
Create a Cubical Pattern in Adobe Illustrator
Geometric Patterns
Article written on Thursday, 08 Nov 2018
- Requirements
- Adobe Illustrator CS6 or later
- Level
- beginner
Geometrical shapes and patterns have always been my thing. I've used them in many of my creations and client projects. They often look rather complicated, but the creation itself can be rather simple. Especially when you have the right tools at hand. The more tricky part lies in the way you apply this into a design…

Just to give you a couple of examples to get the inspiration flowing, here are some business card examples, and a book cover illustration using the pattern you're about to create...

For this tutorial I'll show you how you can create this cubical pattern background using Illustrator's Pattern Maker feature. Let's get started…
1. Select Polygon tool
Select the Polygon Tool which is located under the Rectangle Tool. Click on the canvas…
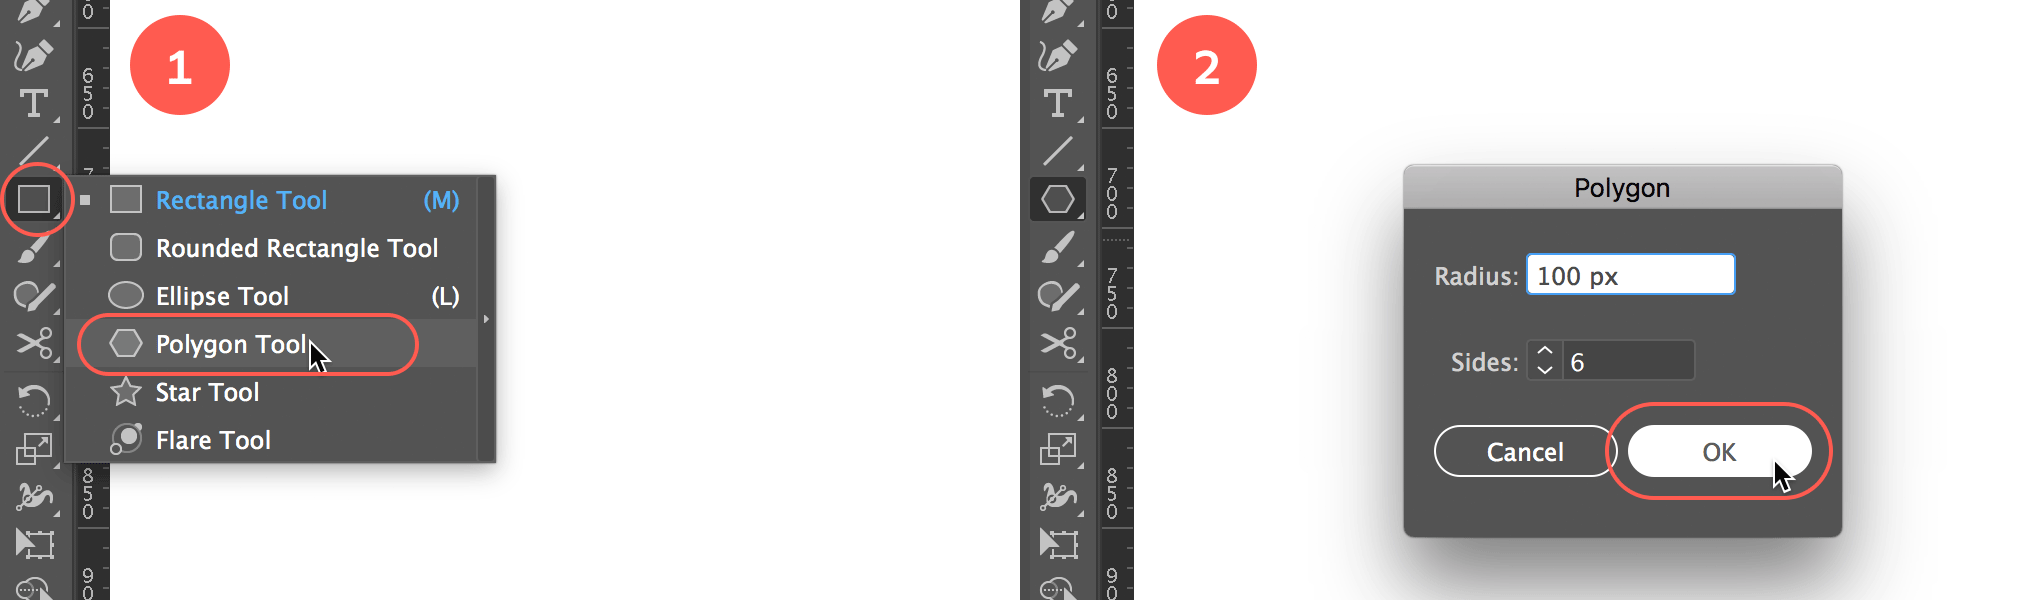
Draw a hexagon
2. Draw a hexagon
Enter 100 px as radius value, and 6 as the amount of sides. Click OK. For pure practical reasons, give the hexagon a color fill and no stroke.
3. Rotate by 30° from the center
To transform this object into a cube, we need to rotate the hexagon by 30° so we have a point at the top in the center. With the hexagon still selected, select the Rotate Tool and Alt/Option click in its exact center point. Enter 30° as the rotation angle value, and click OK.
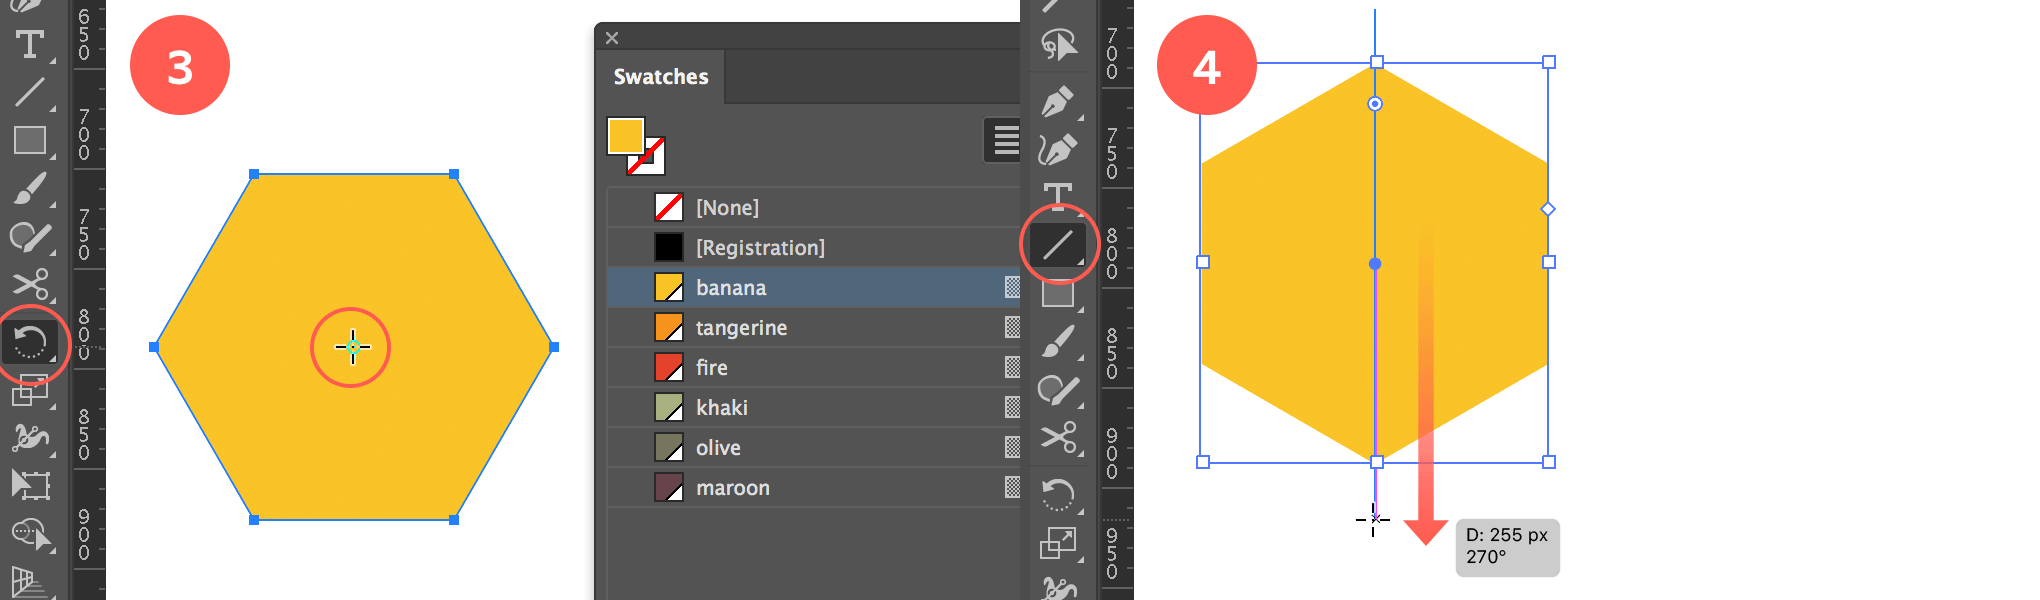
Rotate the hexagon and draw a vertical line
4. Draw a vertical line
Now we'll create dividing lines to split this object up into 6 triangles. We start by drawing a vertical line. Select the Line Tool and draw a vertical line somewhere in the center of the hexagon (by holding down the Shift Key).
5. Align Vertical & Horizontal Center
Now select both objects and click both the Align Vertical Center and Align Horizontal Center option from the Control bar at the top of your workspace. If you don't see this bar go to View > Control.
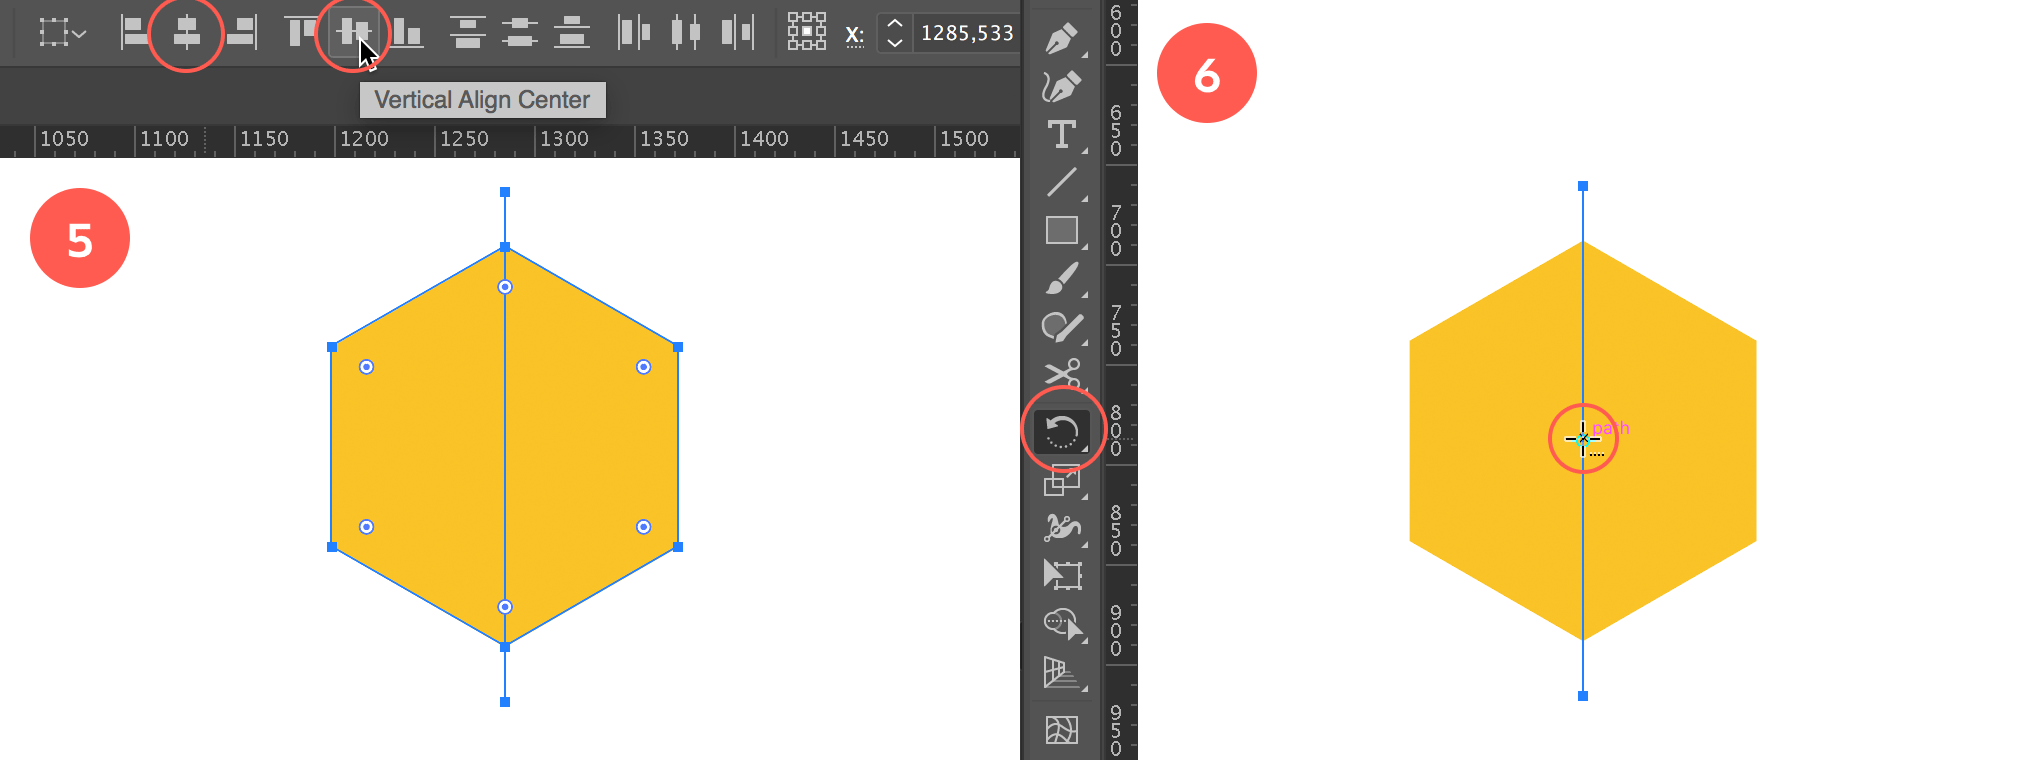
Align the line and hexagon
6. Select the Rotate Tool
Select just the vertical line, choose the Rotate Tool and Alt/Option click in the exact center of the line. To help you find this exact spot, enable Smart Guides: go to View > Smart Guides. If you see a checkmark, then they are enabled. You can use Cmd/Ctrl + U to switch them on and off during your process.
7. Copy Rotate by -60° from the center
In the rotate options window enter -60° as the rotation angle value, and make sure to click the Copy button. Now enter Cmd/Ctrl + D to repeat this action (Object > Transform > Transform Again).
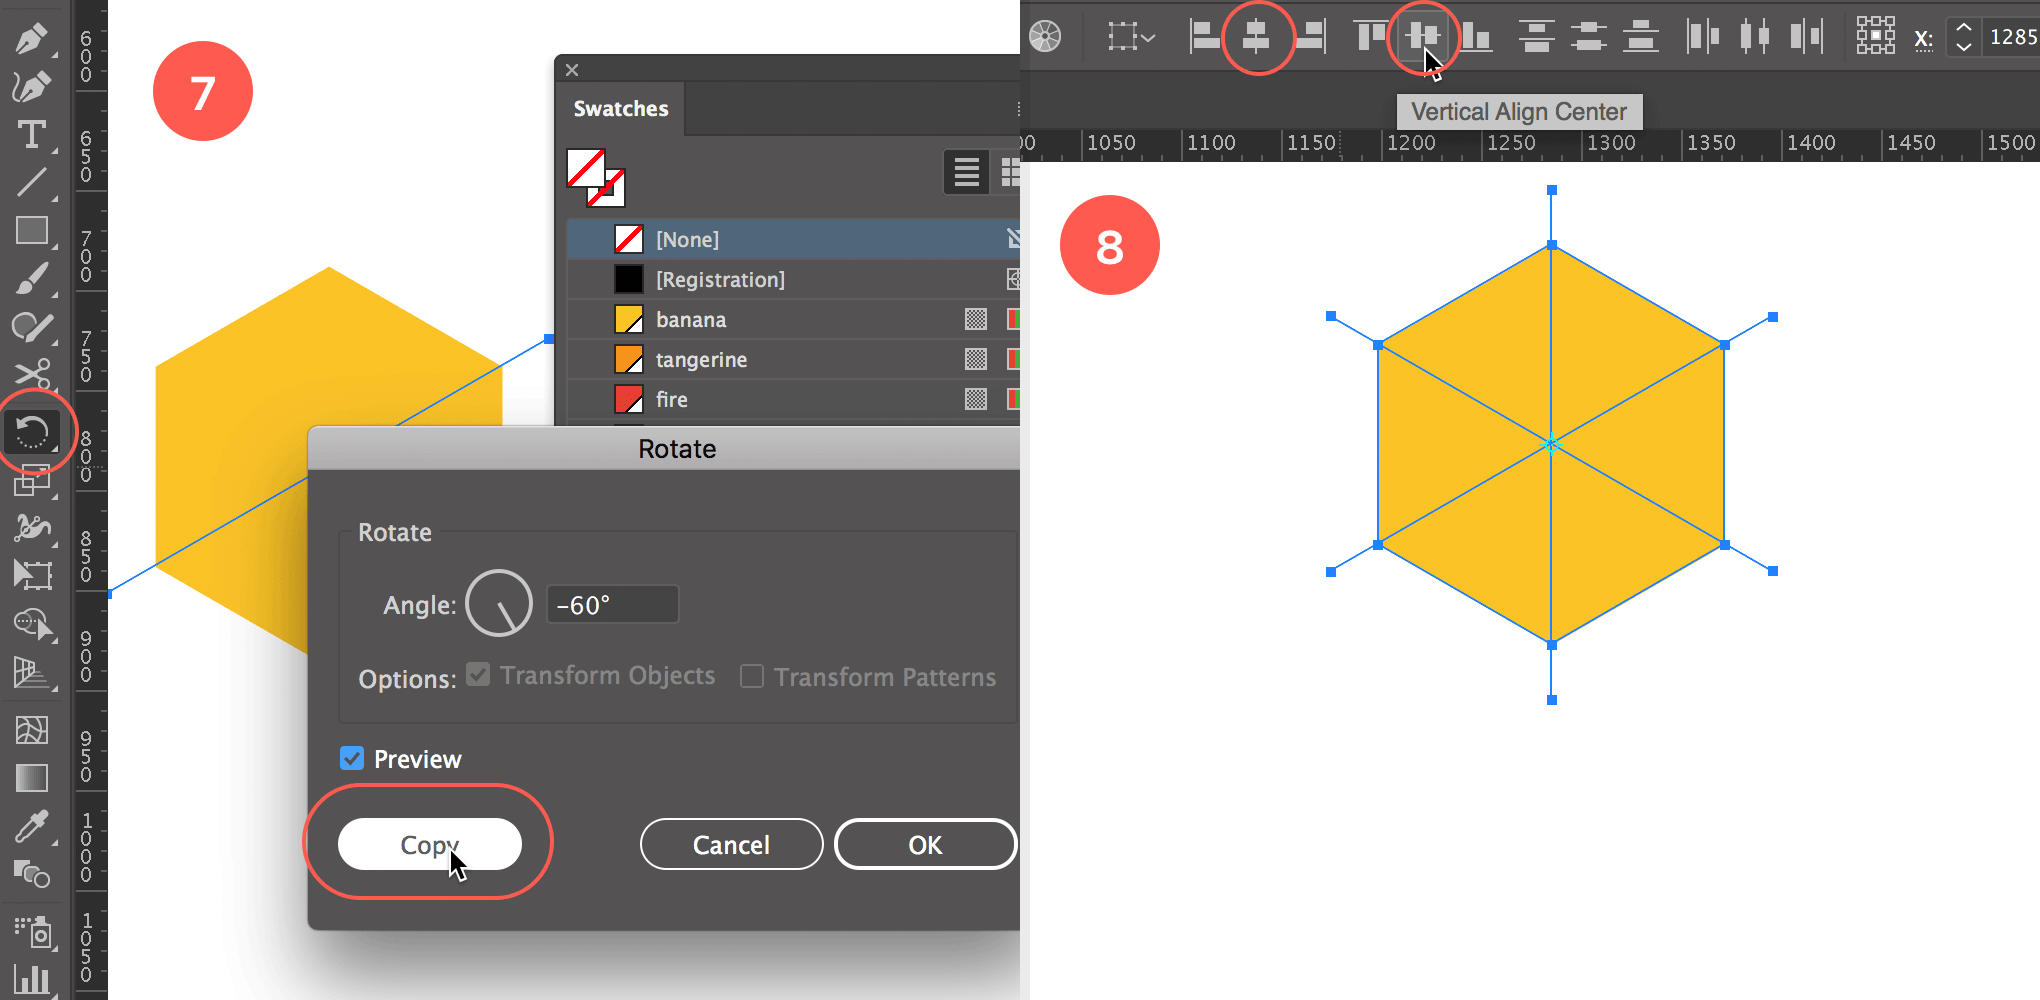
Copy Rotate the line by 60° and center align the lines with the hexagon
8. Align Vertical & Horizontal Center
Just like before, select all objects and click both the Align Vertical Center and Align Horizontal Center option from the Control bar at the top of your screen.
9. Divide into triangular segments
With everything still selected, go to the Pathfinder panel and choose the Divide option. This will divide the hexagon into 6 triangles.
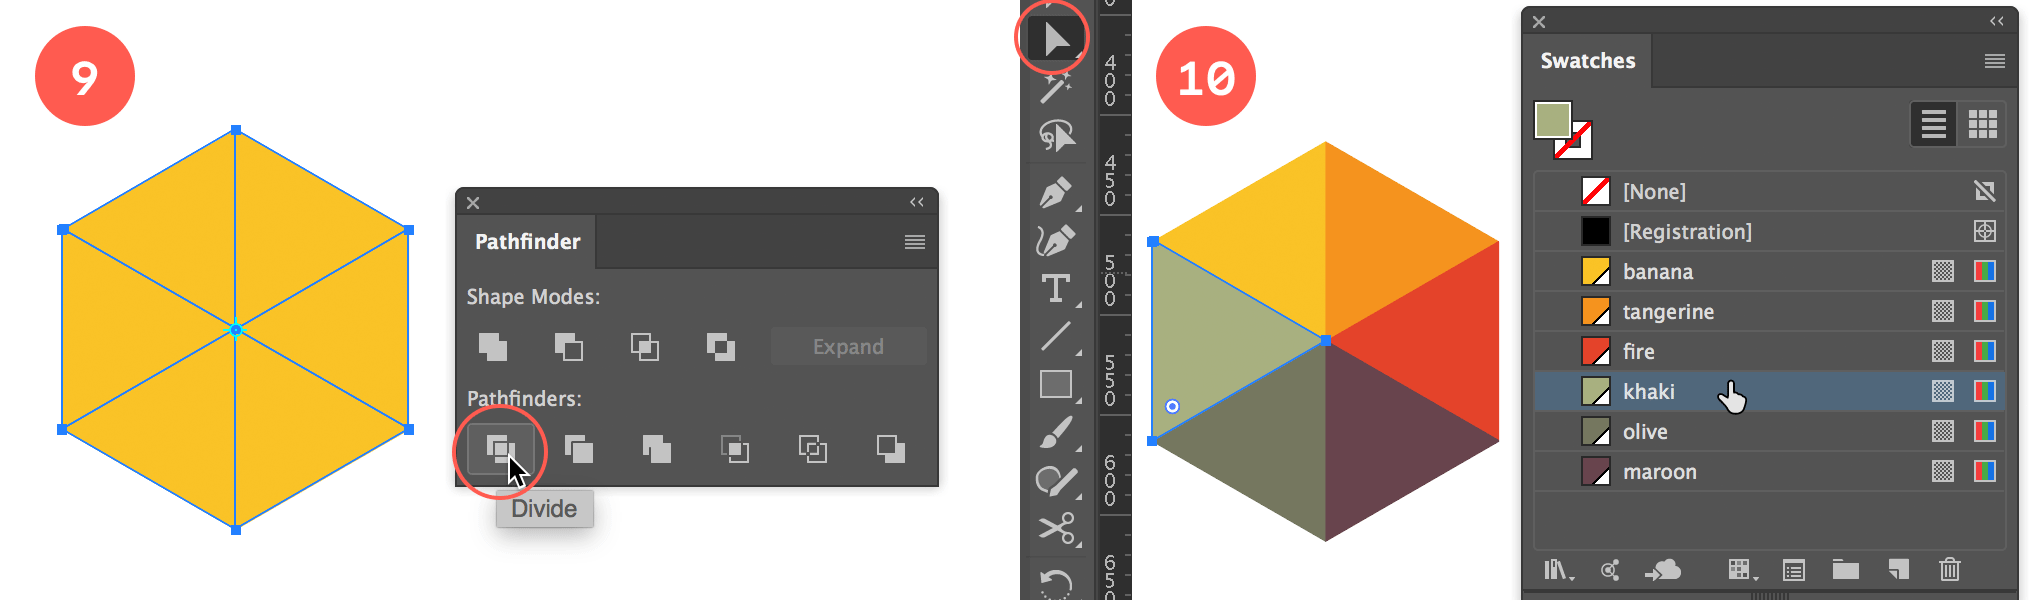
Divide into triangular segments and add color to each of them
10. Apply color
Now select each triangle and give it a color. Use the Direct Selection Tool white arrow) to select. You can choose any color you like. You could choose only one color and play with dark and light to create depth. I've decided to keep it very colorful with the illusion of depth as if it's a cube with transparency at play.
11. Make a pattern
Now comes the fun part! Select the object and go to Object > Pattern > Make.
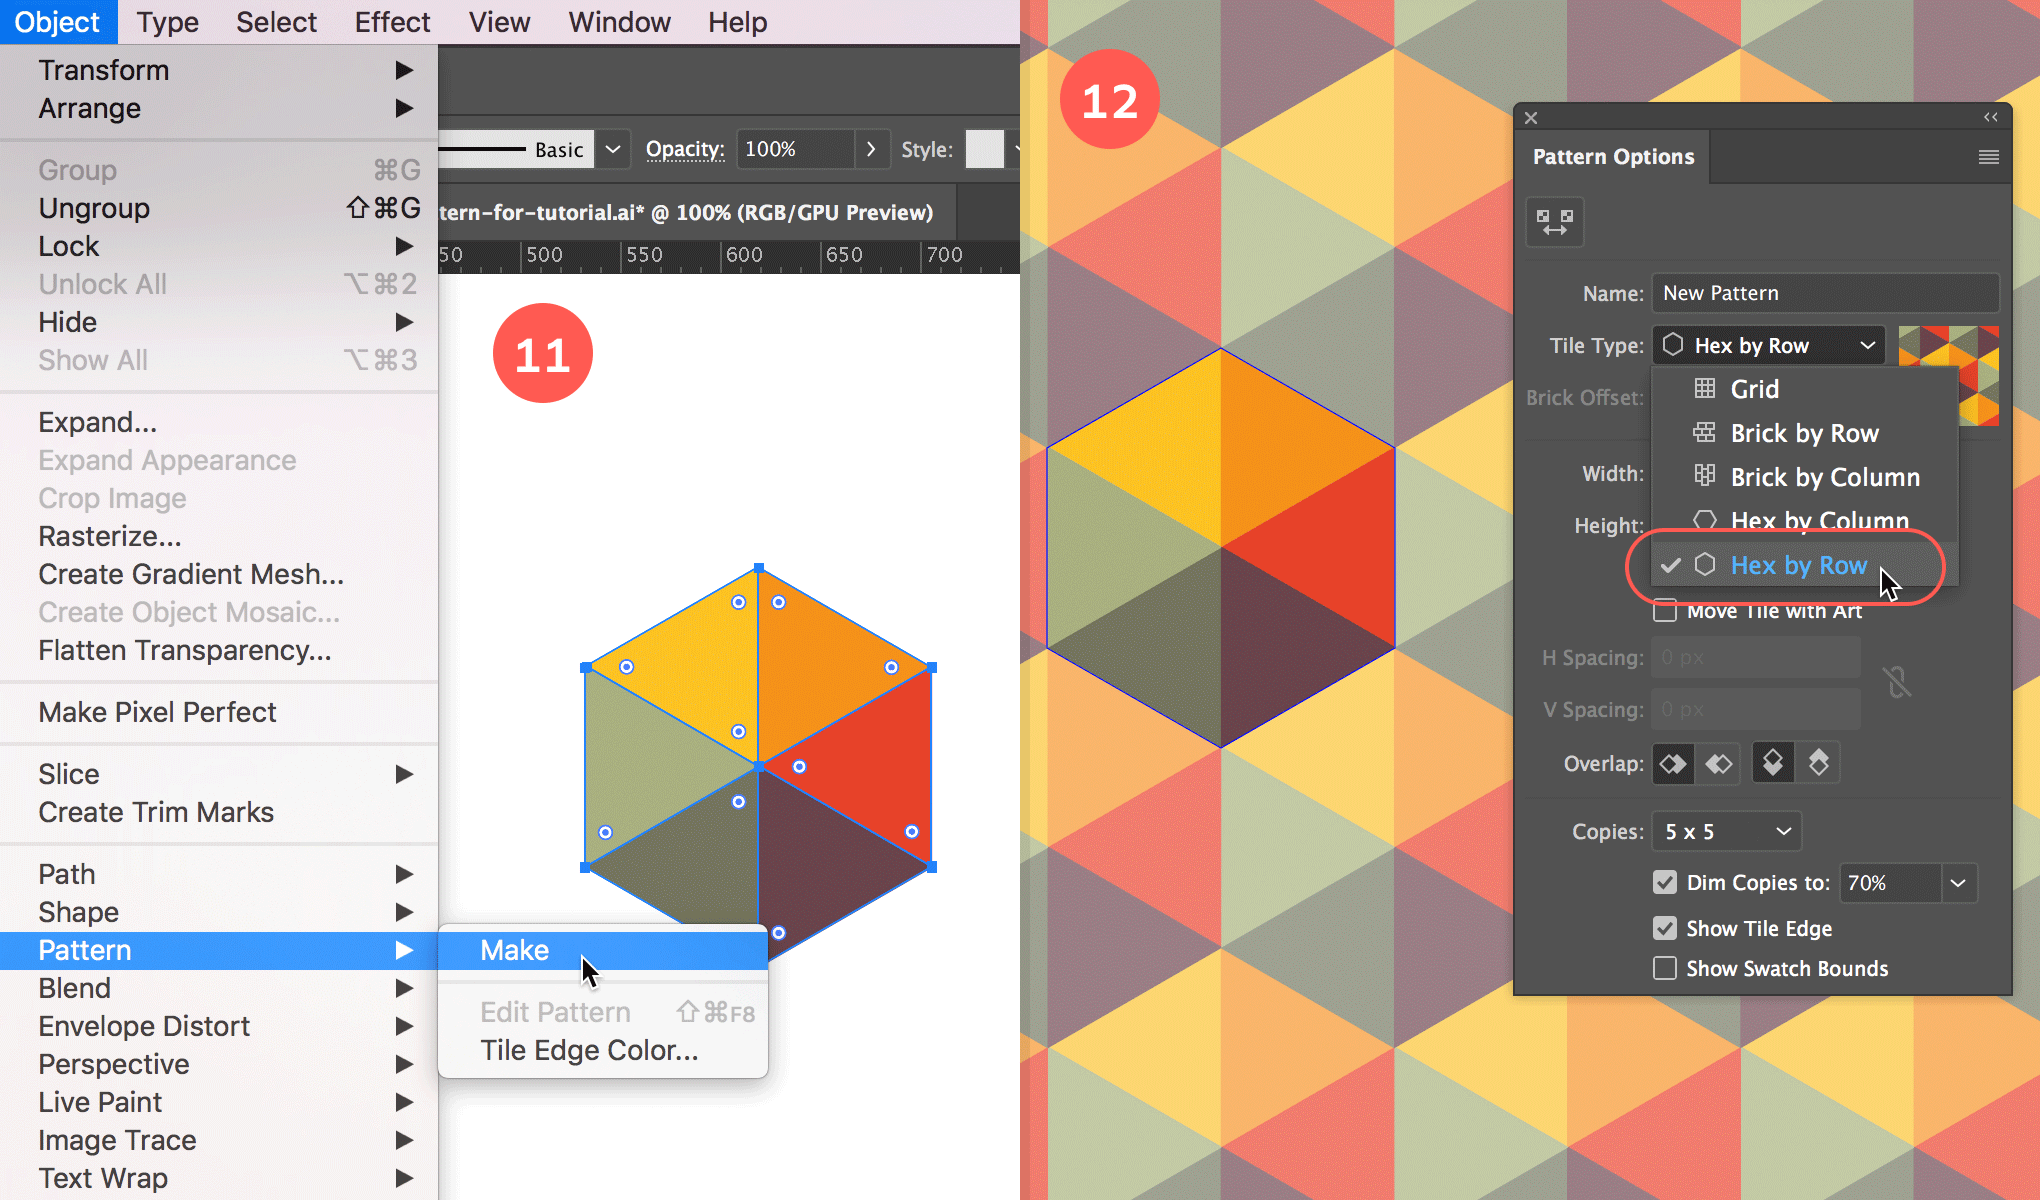
Create the pattern, and choose the Hew by Row option.
12. Select Hex by Row
Select the Hex by Row option from the Tile Type dropdown menu, and enter a name in the Name field. Here you can still tweak the color of the pattern object if you like by using the Direct Selection Tool (white arrow). If you are happy with the result, exit Pattern Mode by clicking the back arrow at the top of your window. That's it! Now you can apply your pattern…
13. Apply the pattern
To apply your pattern, draw a rectangle and select your pattern as a fill from the Swatches panel. Often it happens that the pattern is either too big or too small. To fix this I select my object first and then choose the Scale tool. Then I Alt/Option click to evoke the Scale window. In the Scale window I make sure that the option Transform patterns is checked, and most importantly that the Transform Objects is unchecked. This way I'm only resizing the pattern inside my object, but not the object itself.

Apply the pattern and resize it if needed using the Scale tool
That's it! I hope you liked this exercise and it gives you ideas for some fun and maybe more complex pattern creations. This Pattern Maker feature is powerful and fun to experiment with. Have fun experimenting!
