Create a Full Spectrum Spirograph in Adobe Illustrator
A Step-by-Step Tutorial
Article written on Monday, 18 Nov 2019
- Requirements
- Adobe Illustrator CS6
- Level
- Beginner
- Download
- Illustrator Template File
There is a lot of beauty we can achieve in design using a bit of math and geometry. Think about the creation of spirographs. They look complex and fascinating, and they all involve the sequence of a calculation of certain numbers.
People who have been following my blog for ages, know that I have a soft spot for these kind of creations as I've written this tutorial before on my previous blog. Today, I'm reviving it with a bit of new material...
For this tutorial I'll show you how you can create a full spectrum spirograph in only a few simple steps (the 1st one in the row in the image below). Make sure to download the Illustrator .ase file which includes all the color swatches for this tutorial.

Examples of spirographs explained in this tutorial. We'll be creating the full spectrum one (1st one in the row).
1. Draw a Circle and Duplicate it
First make sure you have View > Snap to Point and View > Smart Guides enabled. Select the Ellipse tool (located under the Rectangle Tool) and draw a perfect circle. The size doesn't really matter. Apply the first yellow swatch color as fill and no border color. Now select the Group Selection tool, hold down the Option/Alt + Shift key and click & drag the circle to the right until the left anchor point reaches the center point of the original circle.

Draw a circle and duplicate it
2. Intersect
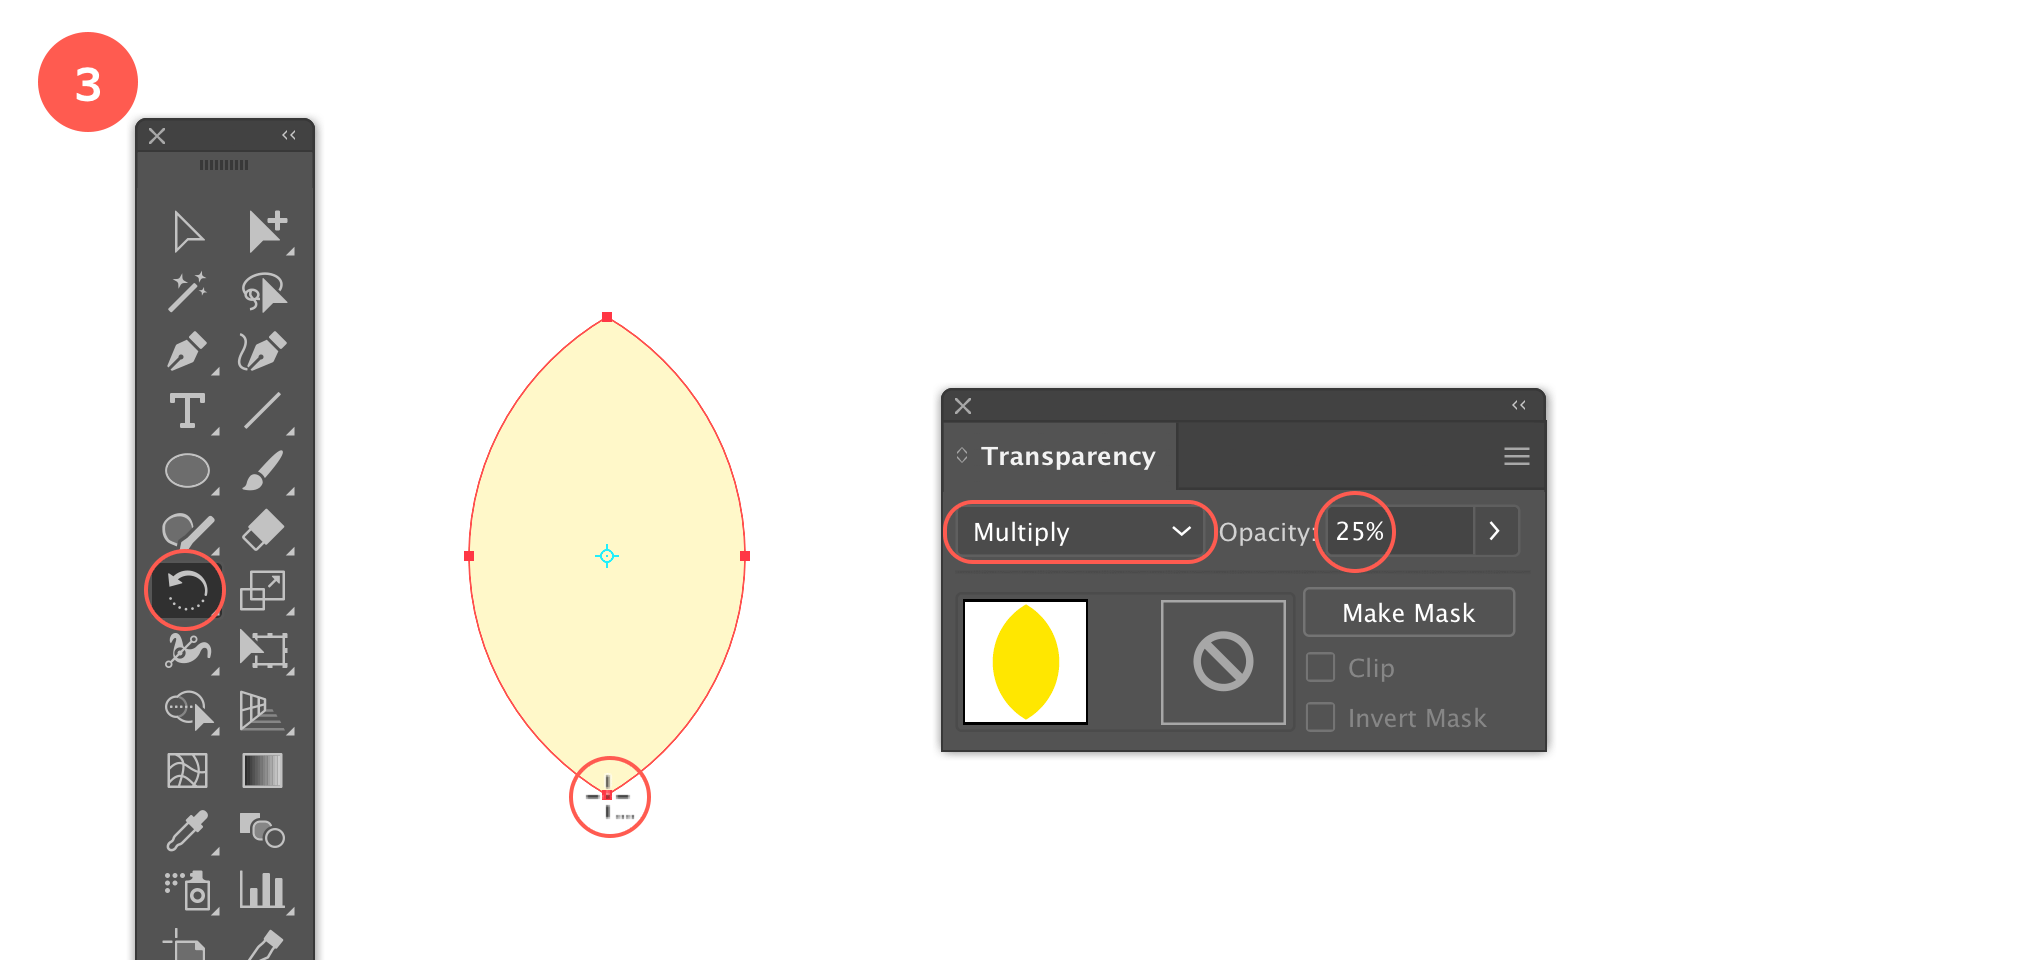
Select both circles and choose Intersect option from the Pathfinder. We end up with this simple leaf shape that we will rotate around in the next step, but first we'll adjust the fill appearance a little bit. Choose Multiply mode and 25% opacity in the Transparent panel. This way we'll achieve this nice overlapping color effect.
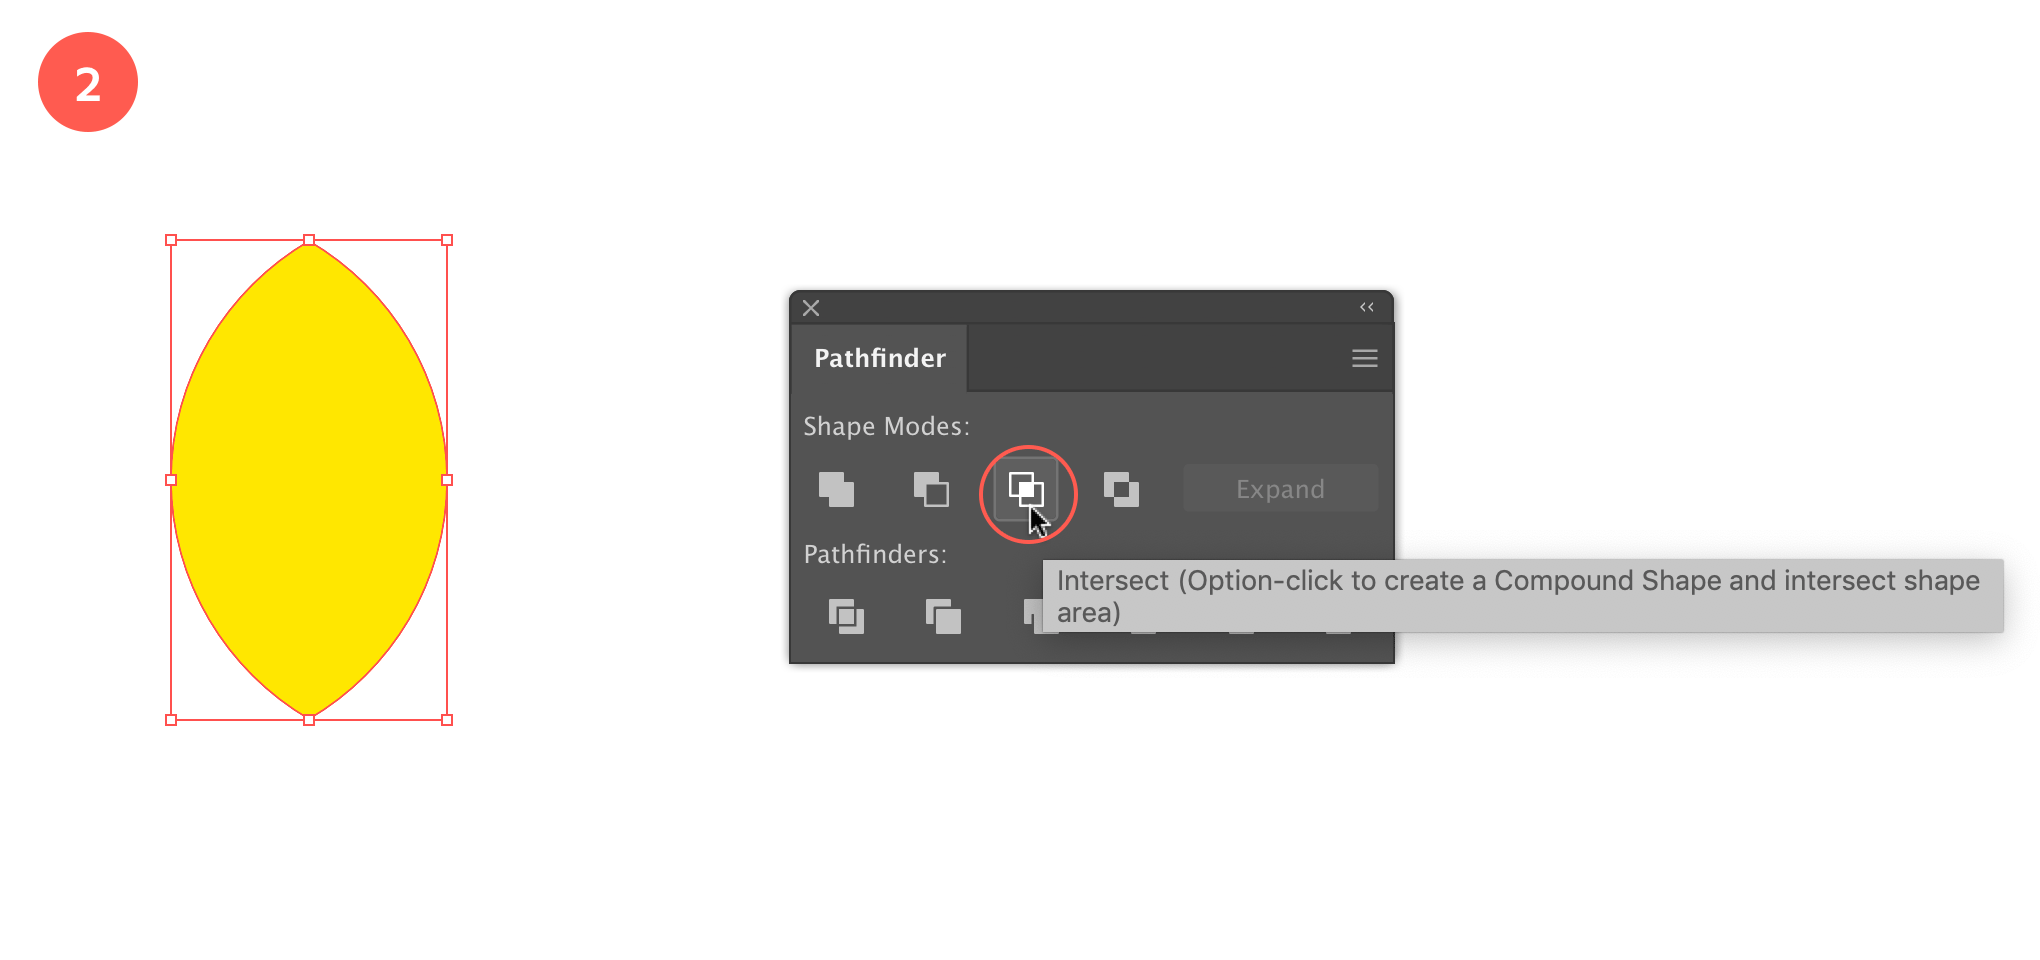
Go to Pathfinder and choose the Intersect option
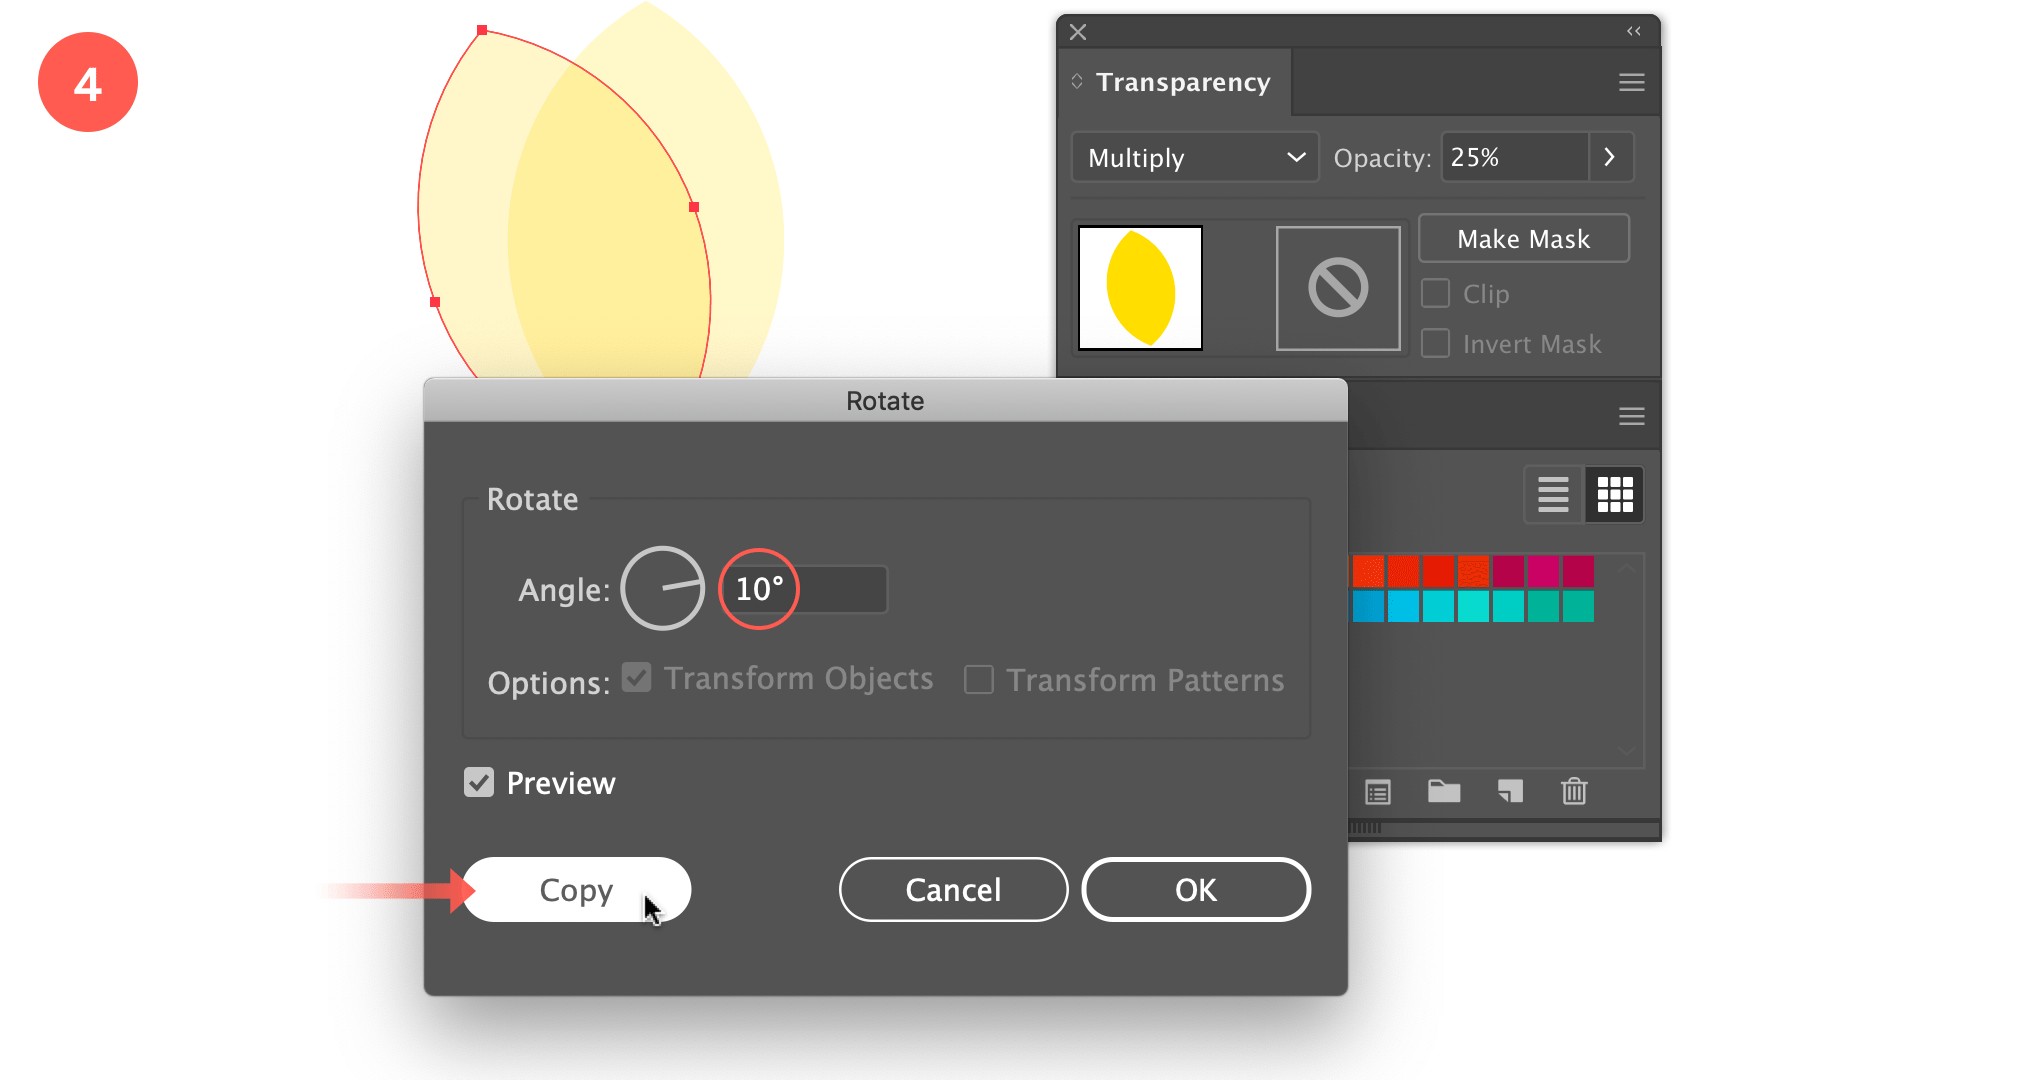
3. Duplicate Rotate at 10%
Now comes the very simple math part. We have 36 colors in total in our swatches panel, which is 1 color per shape. So we'll rotate this leaf shape 36 times, which means we'll rotate it at 10° (360/10).
With the object still selected, choose the Rotate tool and Option/Alt click into the bottom anchor point. In the window that appears enter 10° as Angle value, and click the Copy button. Apply the 2nd yellow swatch to the copied leaf.
Duplicate Rotate at 10%
4. Transform Again & Apply Next Swatch
Now we need to duplicate this rotation another 34 times in a row. Luckily we can do this pretty fast using the Transform Again shortcut. Hit Cmd/Ctrl + D to apply Object > Transform Again. Apply the 3rd color swatch.
Transform Again & Apply Next Swatch
5. Repeat step 4
Hit Cmd/Ctrl + D again, and apply the 4th color…
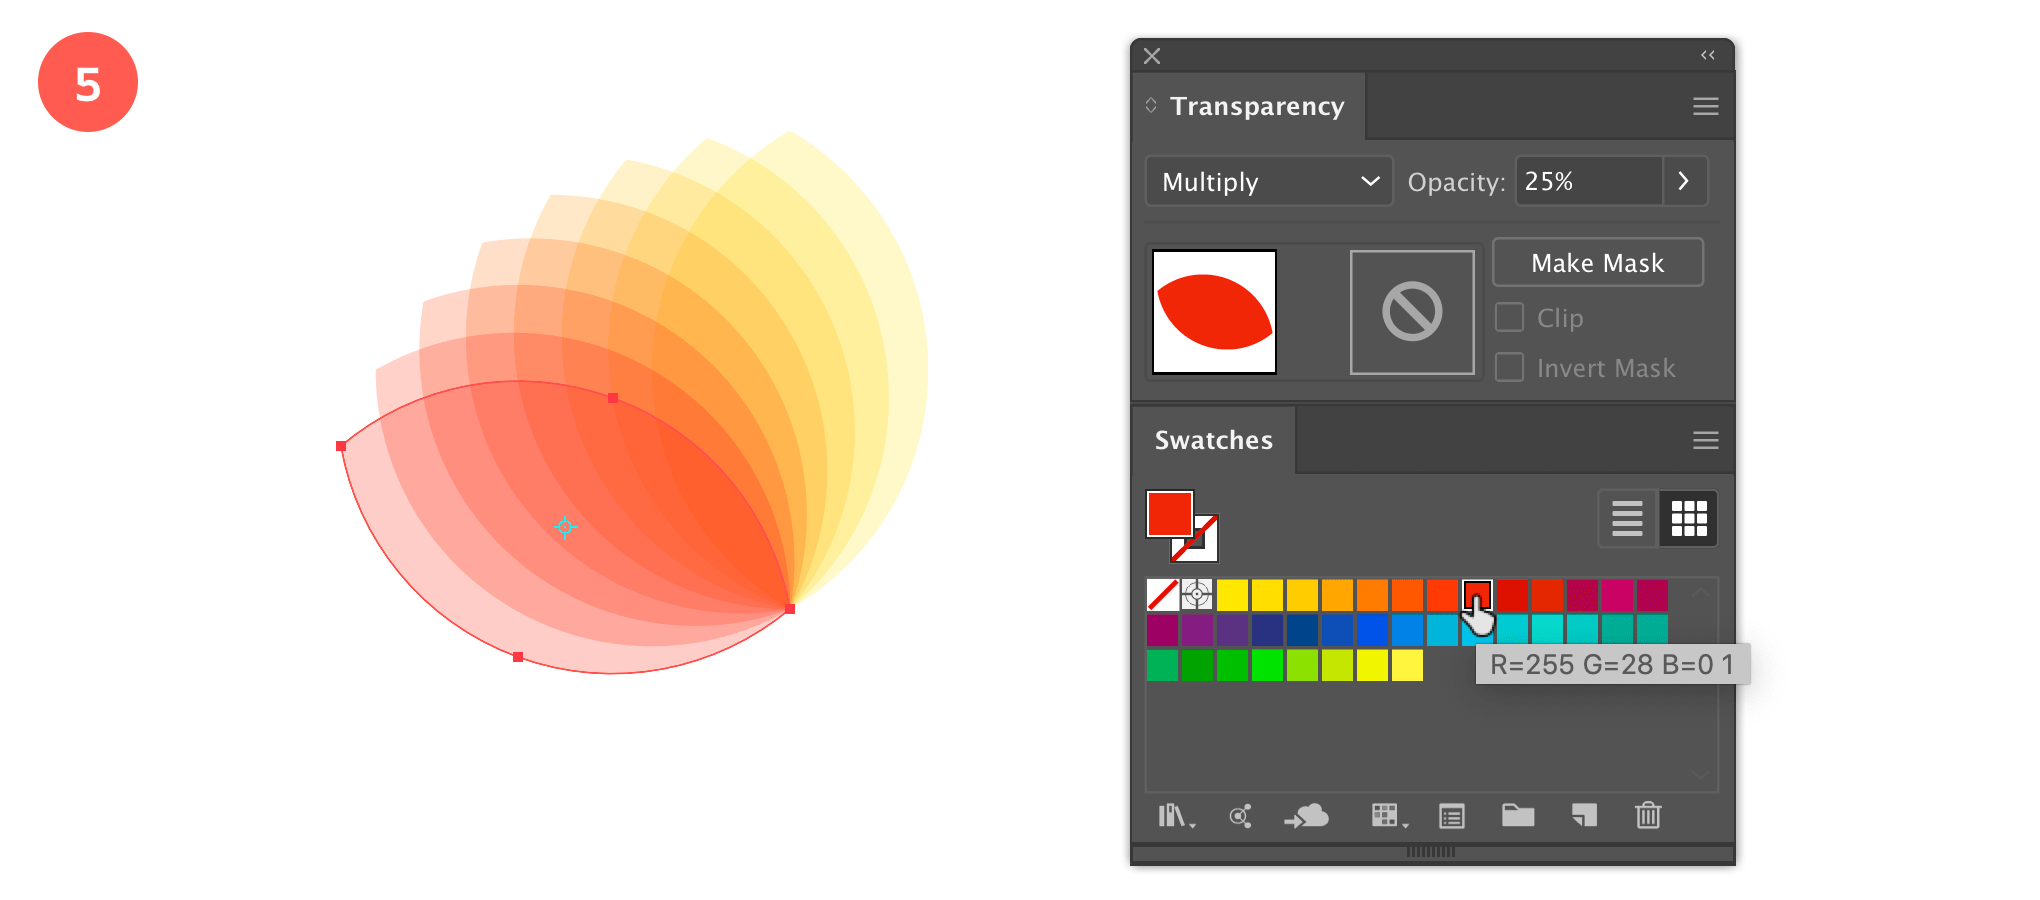
Transform again...
6. Keep Repeating
Keep repeating these steps again, and again...
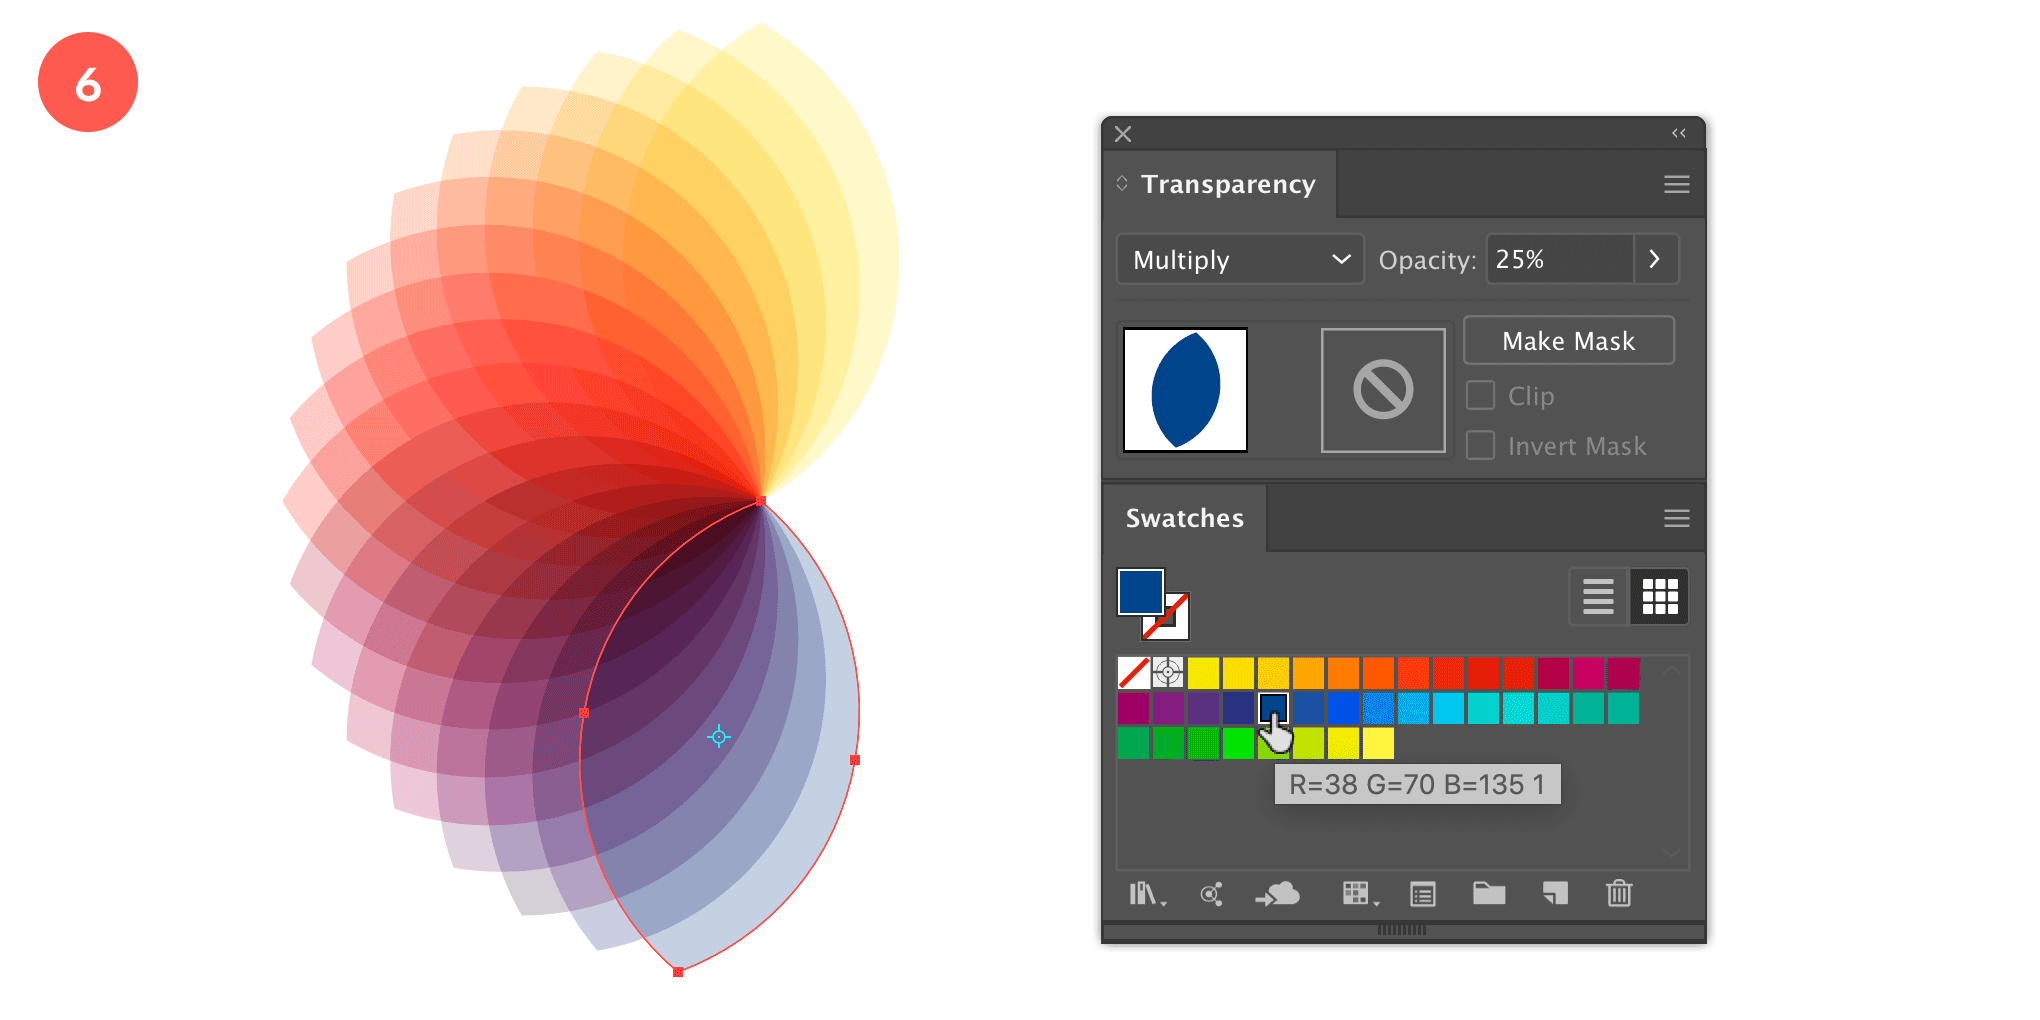
Keep on repeating the steps...
7. Until Full Spectrum
Keep repeating until you end up with a full spectrum spirograph.
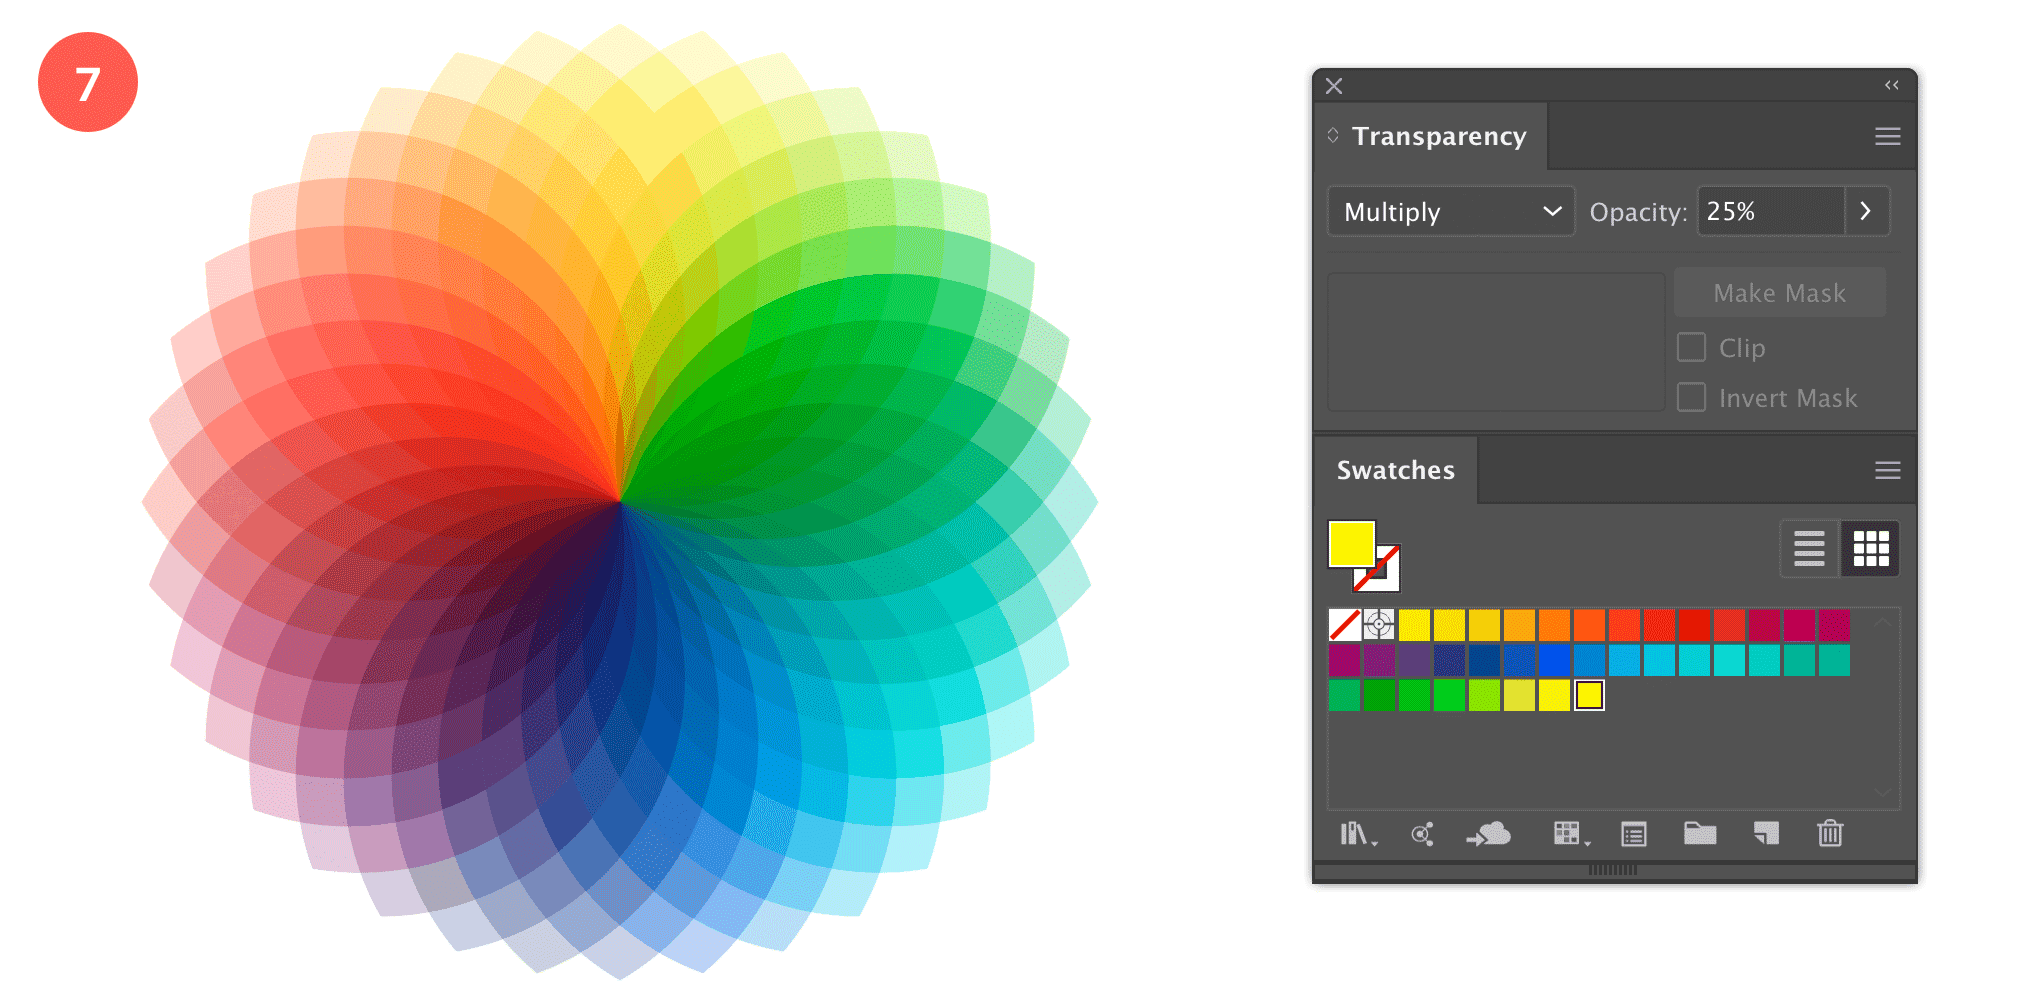
Keep on repeating until you end up with the full spectrum
8. Experiment with other shapes, angles & colors
Now that you understand the basic technique, it's easy to experiment to achieve different effects and results. When you combine Transform Again with Transform Each (Object > Transform > Transform Each...), you can achieve a very interesting repetitive effect. With Transform Each you can rotate, scale and move an object in one single action. Here are a couple of experiments I tried out:
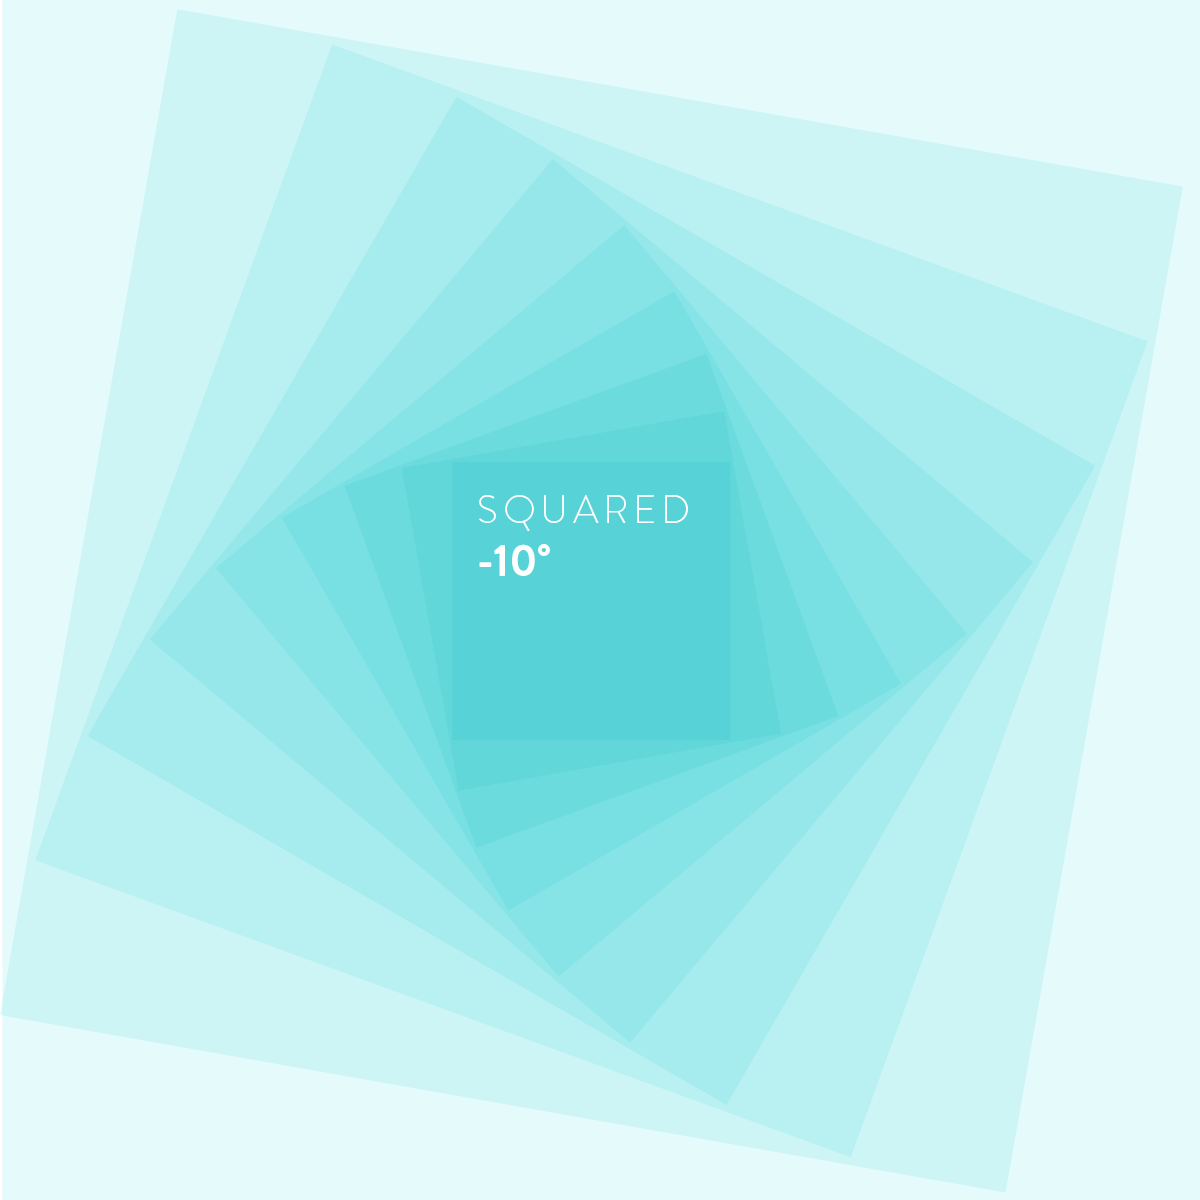
Squared by -10°
Here's a very easy one for starters: draw a big square with a 10% opacity fill color in Multiply mode. Go to Object > Transform > Transform Each... Enter 85% for Horizontal and Vertical Scale, Rotate at -10° and and click Copy. Now hit Cmd/Ctrl + D 8 times in a row.
18°
Here I started from a triangular shape that I repeatedly rotated at 18°. I used Transform Each, entered a rotation value of 18° and hit the Copy button. Next, I hit Cmd/Ctrl + D 5 times in a row to duplicate this rotation effect 5 more times. Lastly I applied a different color for each shape using 100% opacity in Screen mode.

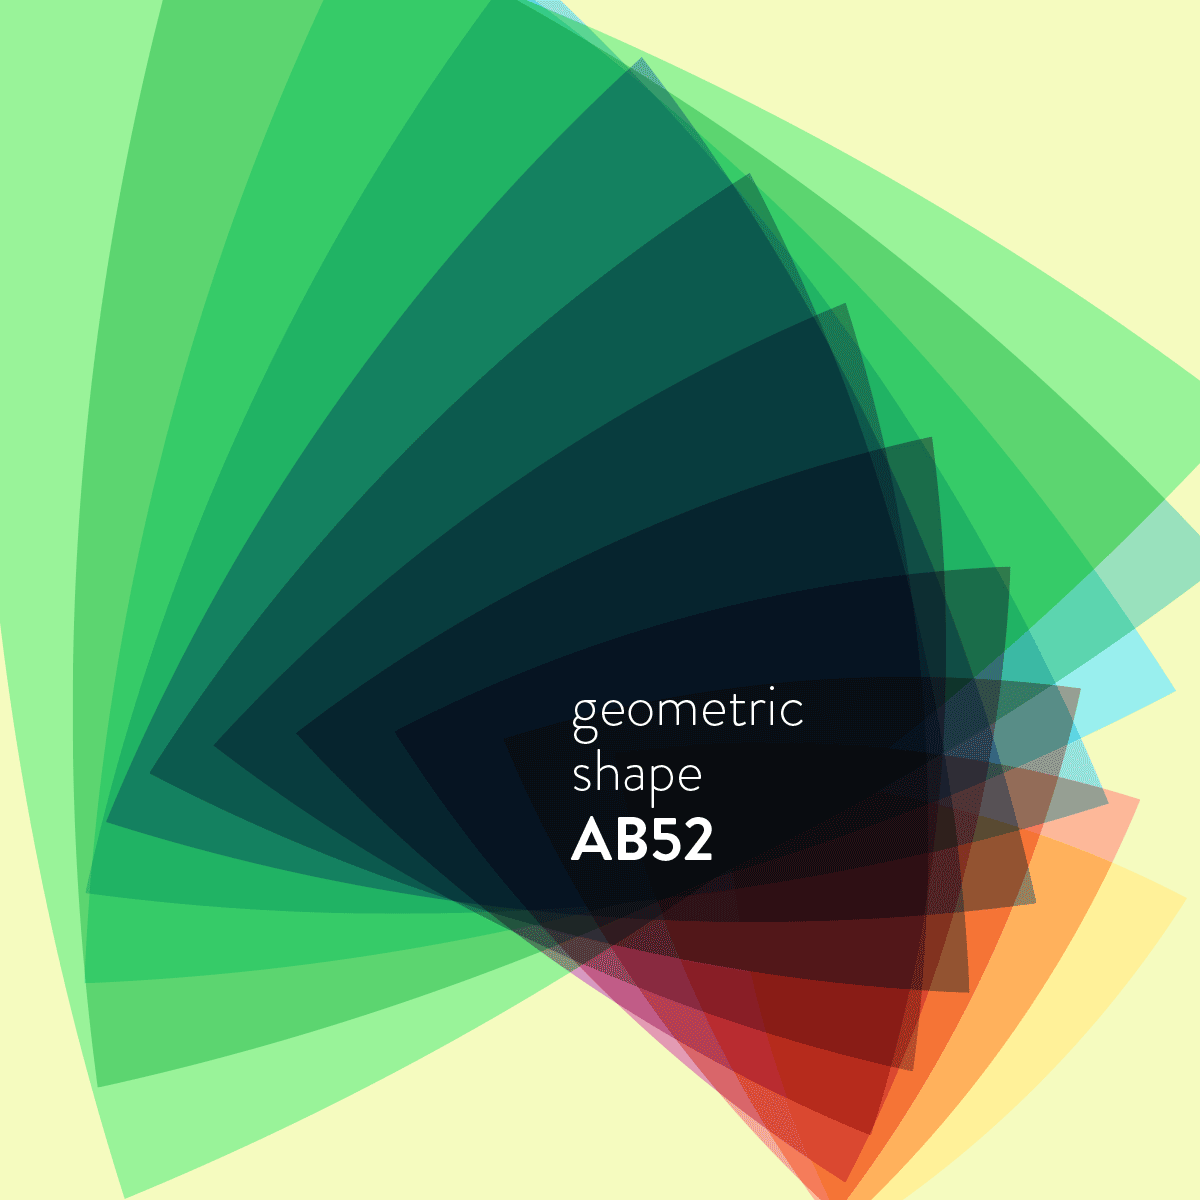
AB52
This is a more complex one that I achieved pure out of experimenting, starting from the same triangular shape that I repeatedly rotated, scaled and moved from position using the Transform Each method. The different colors were also added afterwards at 40% opacity in Multiply mode. Try it out with another shape, and try another reference point instead of the centered one to achieve surprising results.
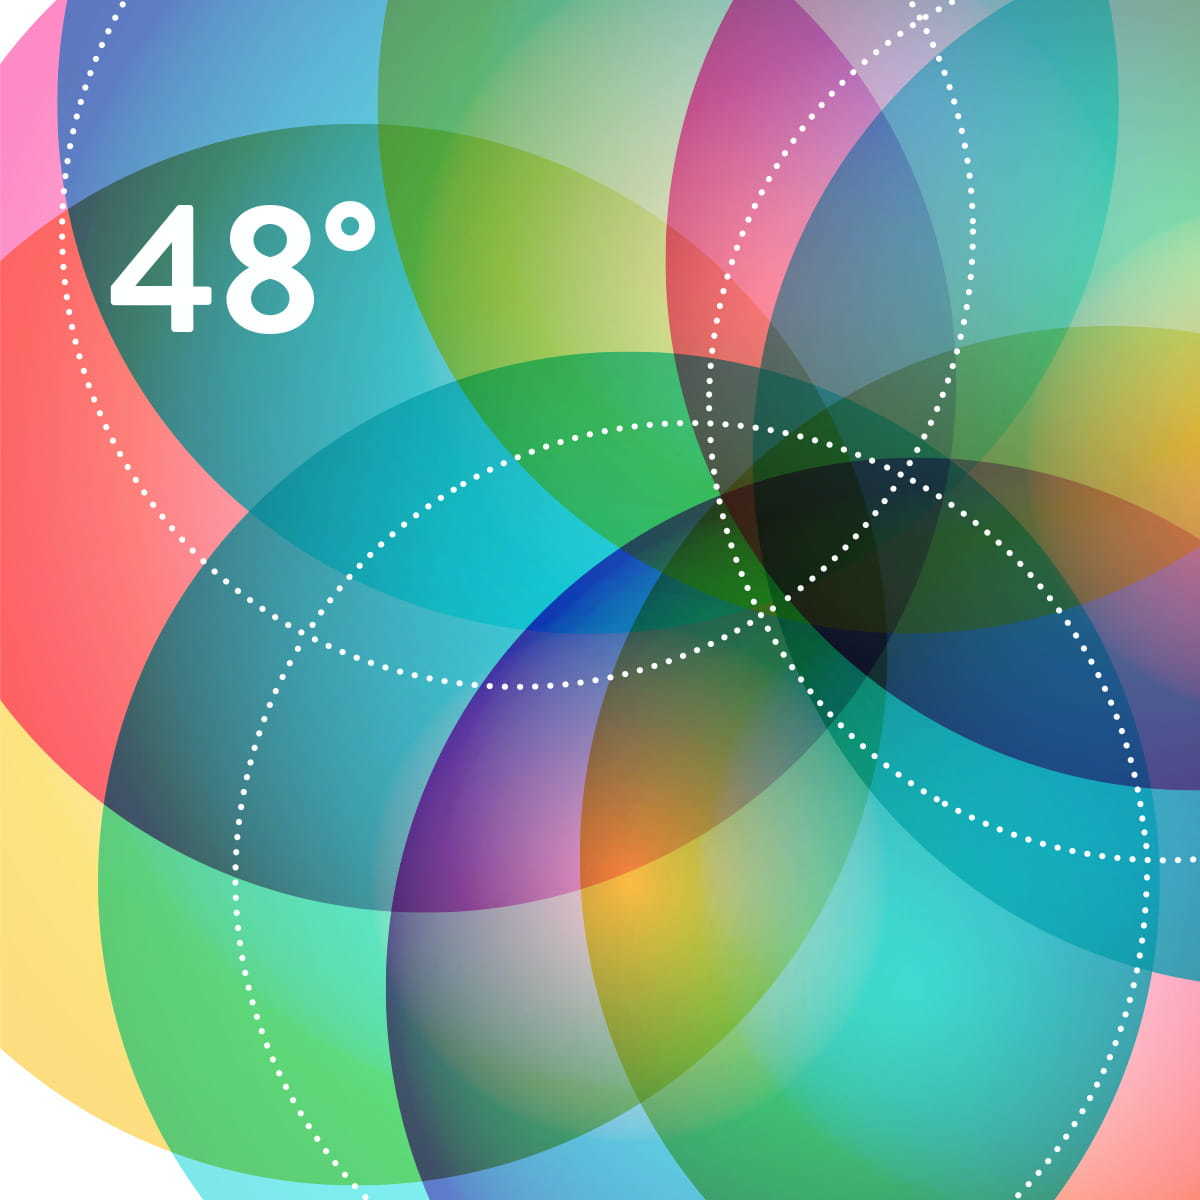
48°
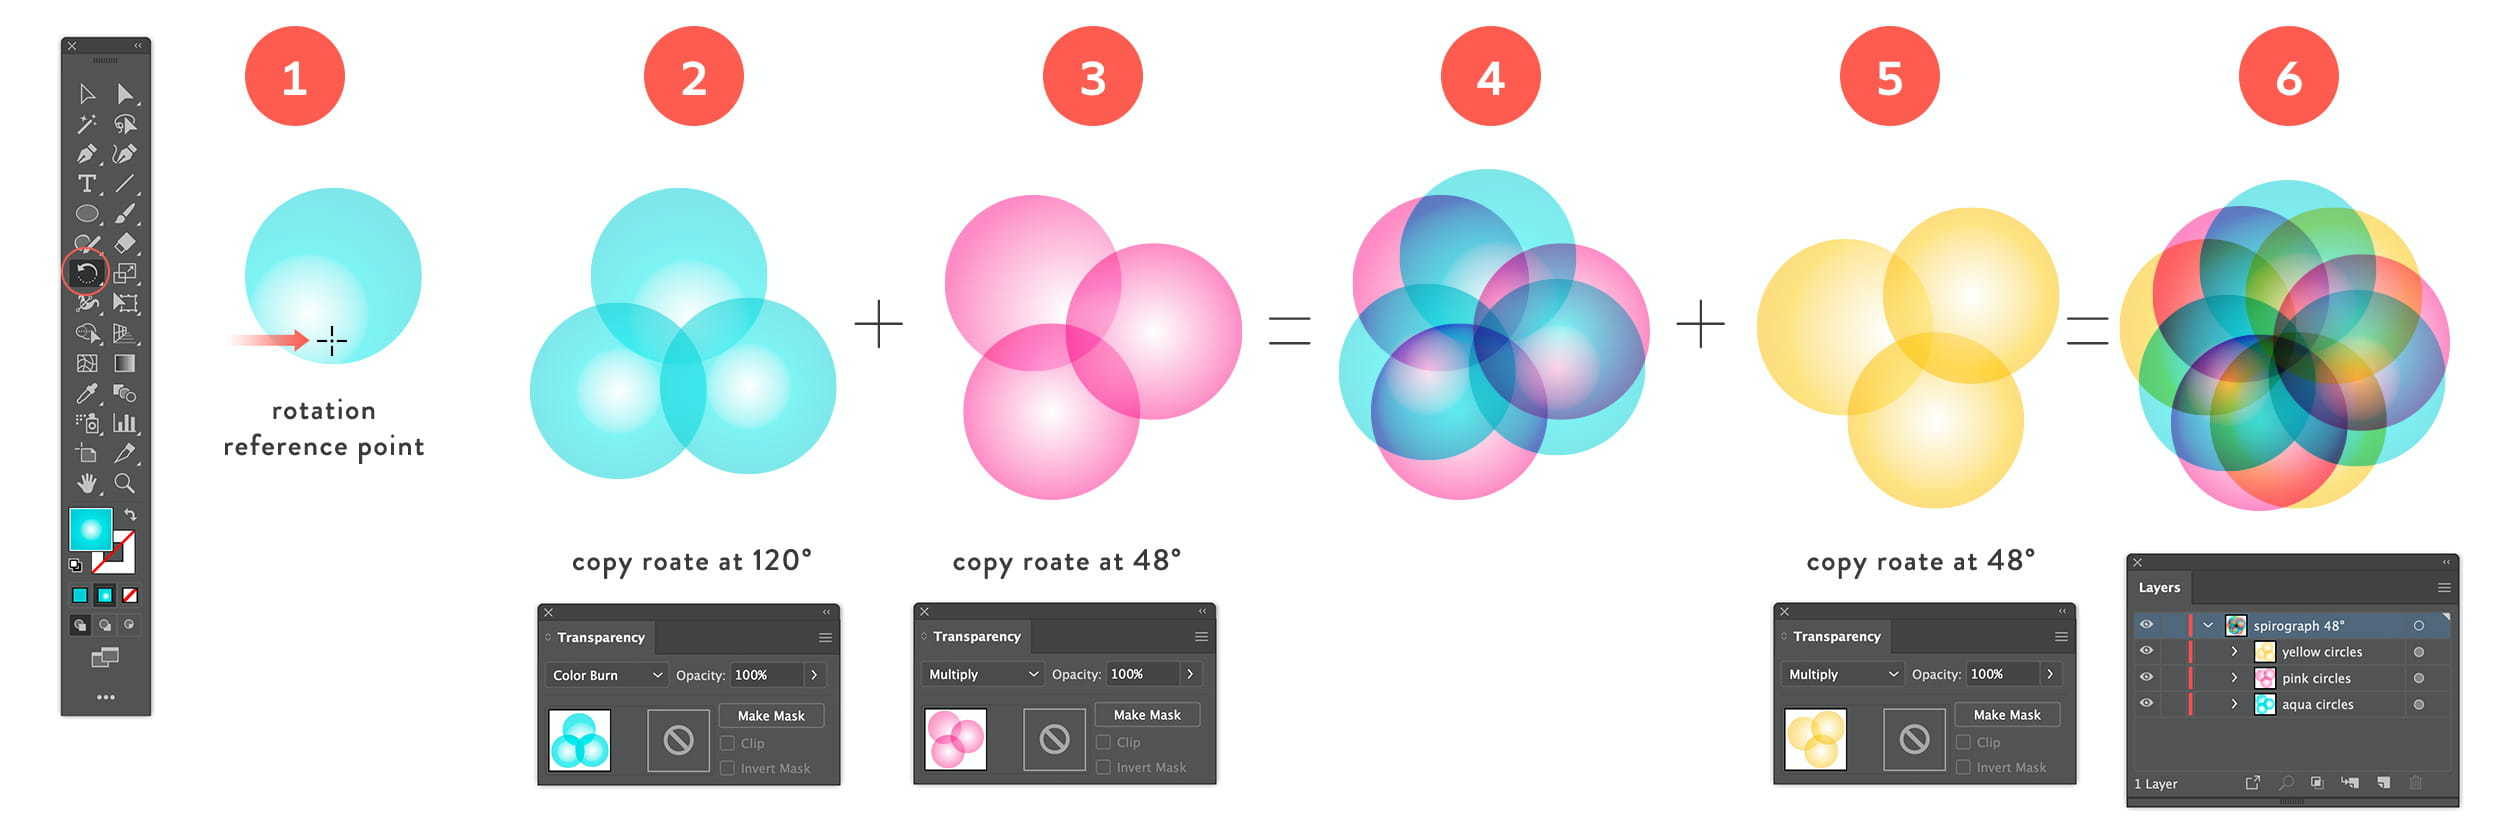
This is maybe the most complex one of all that took me a lot of experimenting to get to this end result. I started from a circle that I first copy rotated at 120° to end up with 3 circles where I used the bottom center area of the circle as rotation reference point. If you look at the white dotted lines you can see the composition of the tree circles. Then I copy rotated these 3 circles together at 48°.
Below you'll find a visual of the different steps to take to complete this spirograph. First create a circle and apply a radial gradient going from white on the inside to aqua blue on the outside and apply 50% opacity. Then copy rotate the circle 2x at 120°. Group the 3 circles, and apply Color Burn as layer mode effect. Next, copy rotate this group at 48°. Apply a pink radial gradient and change the color mode of the group to Multiply. Then copy rotate this group again at 48°, and apply a yellow radial gradient.
These examples are only just a tip of the iceberg of what's possible. The key is experimenting and you might be surprised about the result you achieve. I usually don't have an image in my head of what I want to accomplish as end result, and if I have, it's just vague. The rest I leave to experimenting until I achieve something interesting to build upon, then I tweak by trying another color, another layer mode, transparency value, rotation angle, or reference point etc.
Hope you like this tutorial and you get the hang of experimenting into this area of spirographs. In a 2nd tutorial we keep exploring spirographs, and in a 3rd spirograph tutorial we'll use another yet powerful tool to achieve similar complex results. Go check these out!
