
The Connected Culture Book Design Project
My Design Process
Article written on Wednesday, 04 Oct 2023
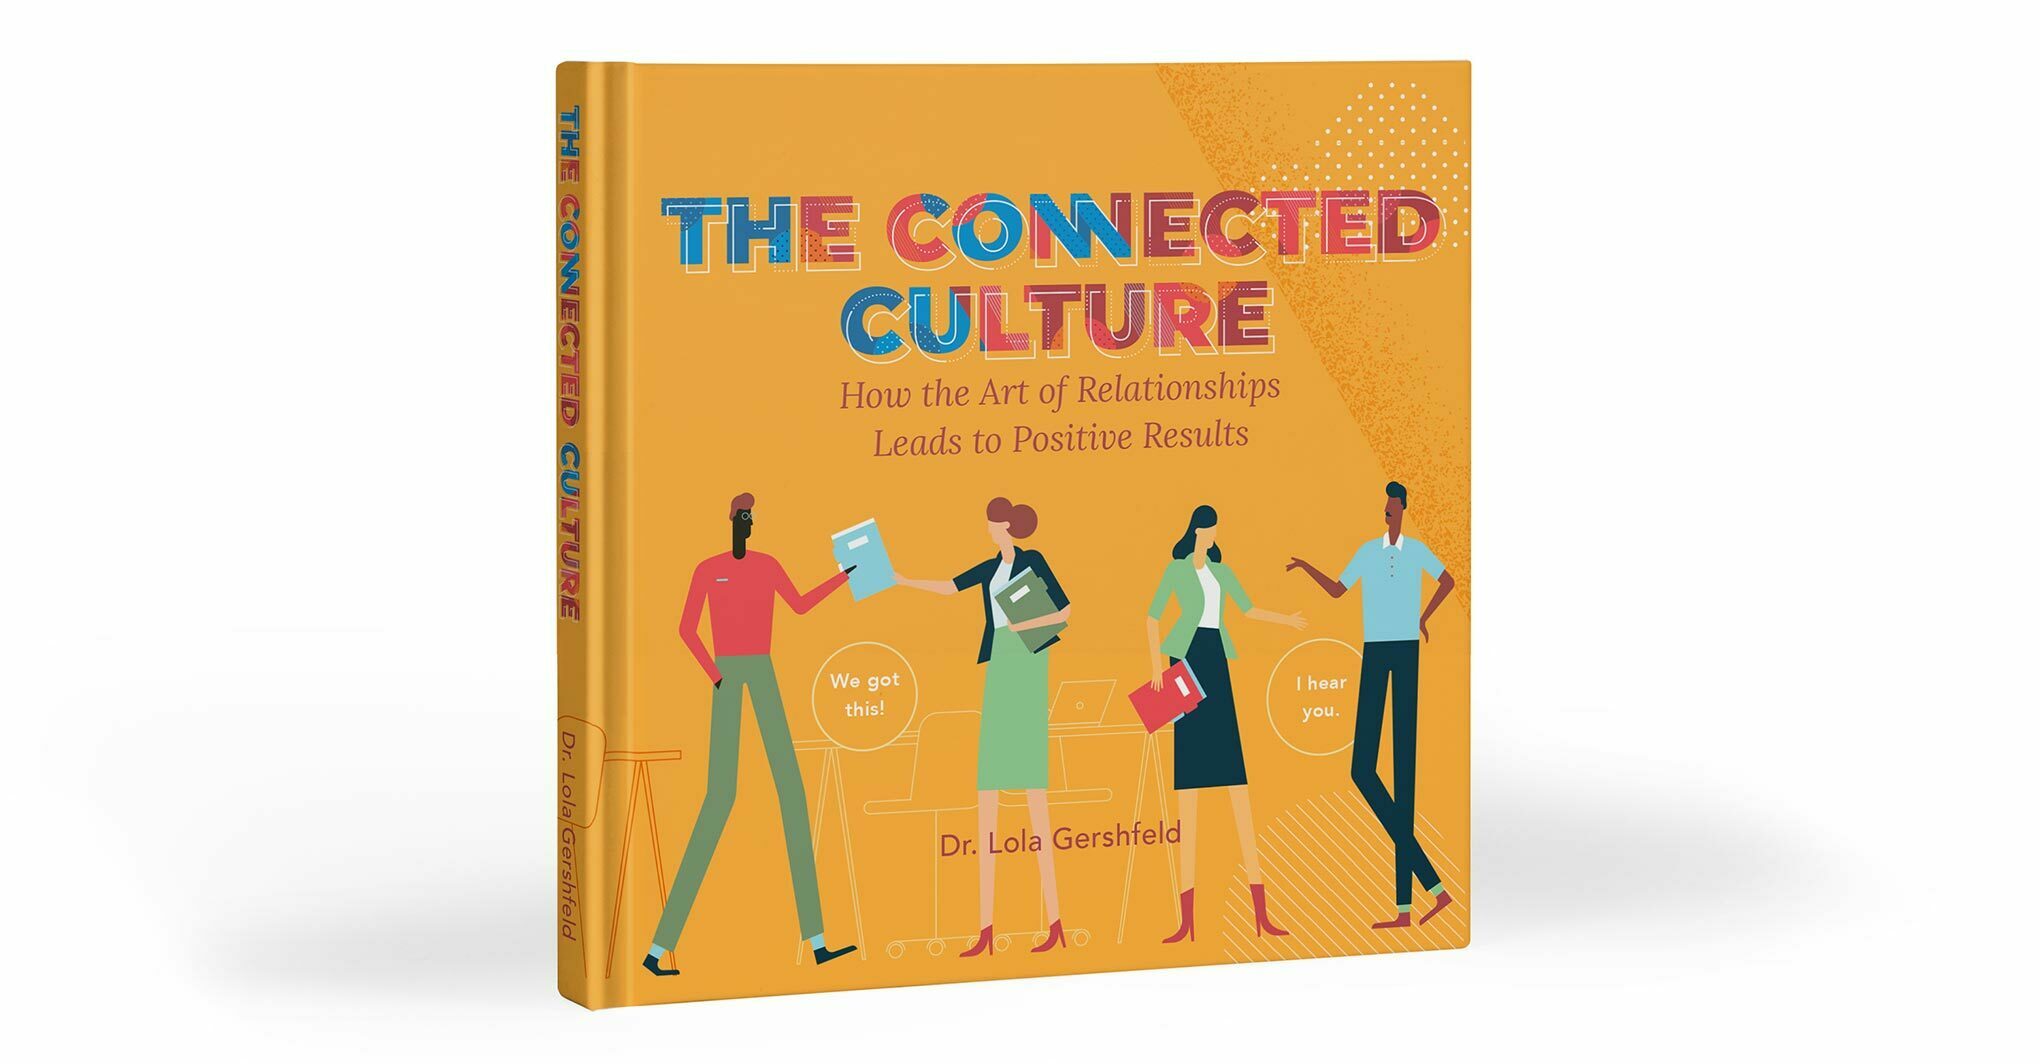
One of the most fun projects I've been working on a couple of months ago was this illustrative book project for one of my best longterm US clients, EmC Leaders. It was initially briefed to me as the creation of a series of 45 Instagram posts/images, where each image would be included as a collection of pages for a book.
Here's a little insight on my design process. I'll be sharing some practical steps in how I've used Adobe Illustrator in combination with InDesign, but also a little how I ended up with these different characters (see sample pages below).
The Characters Illustrations
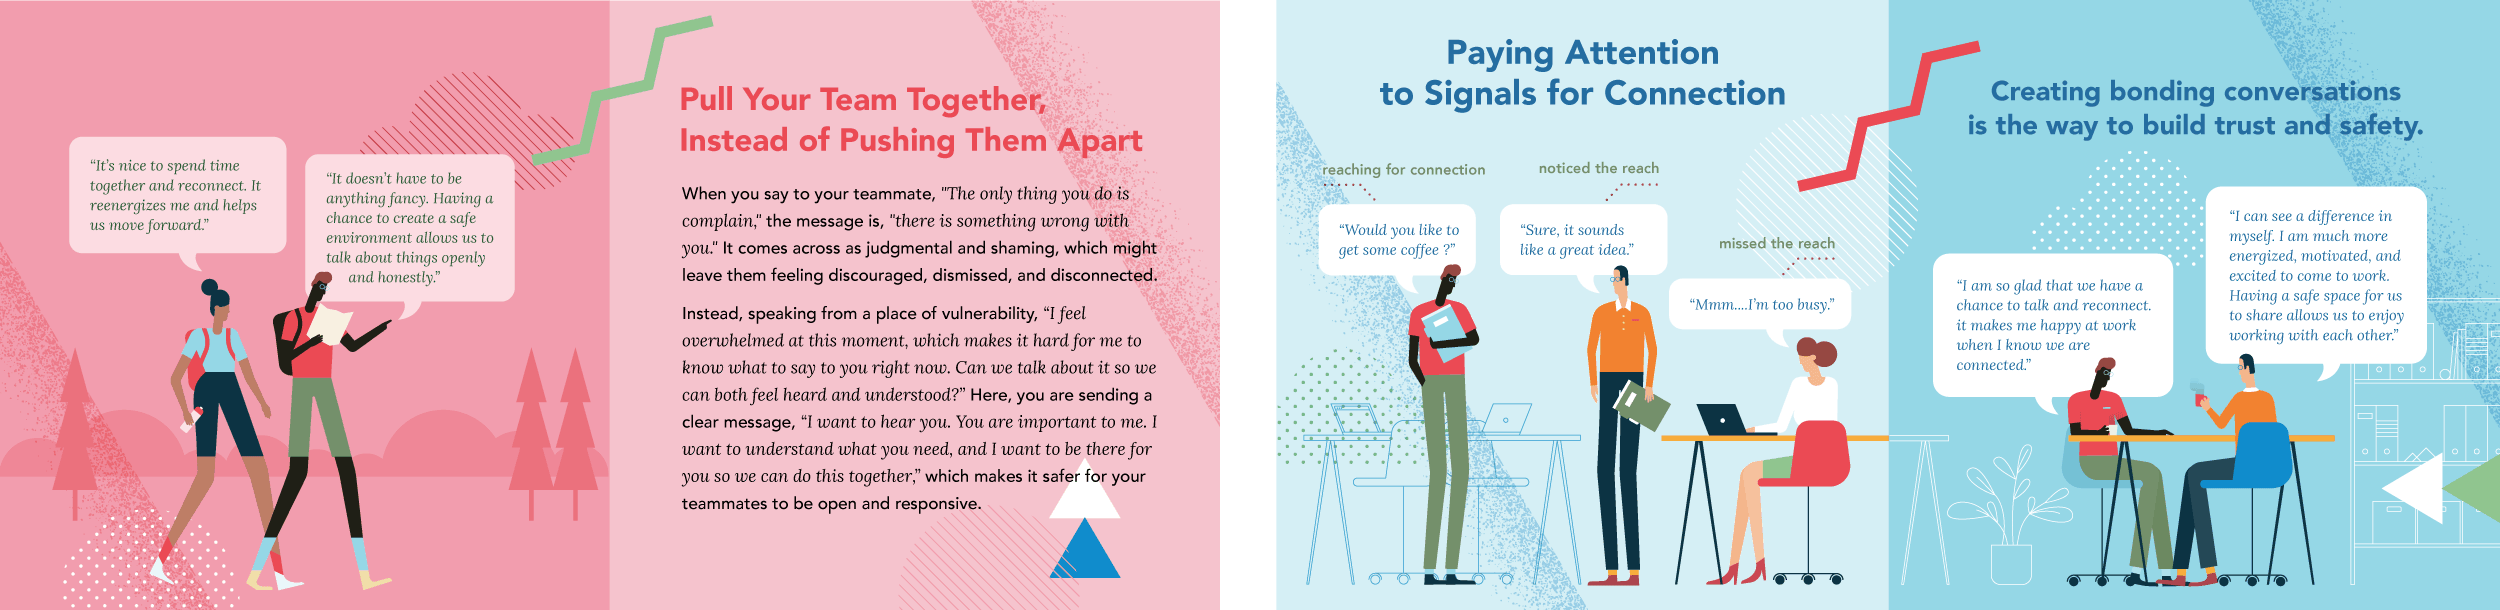
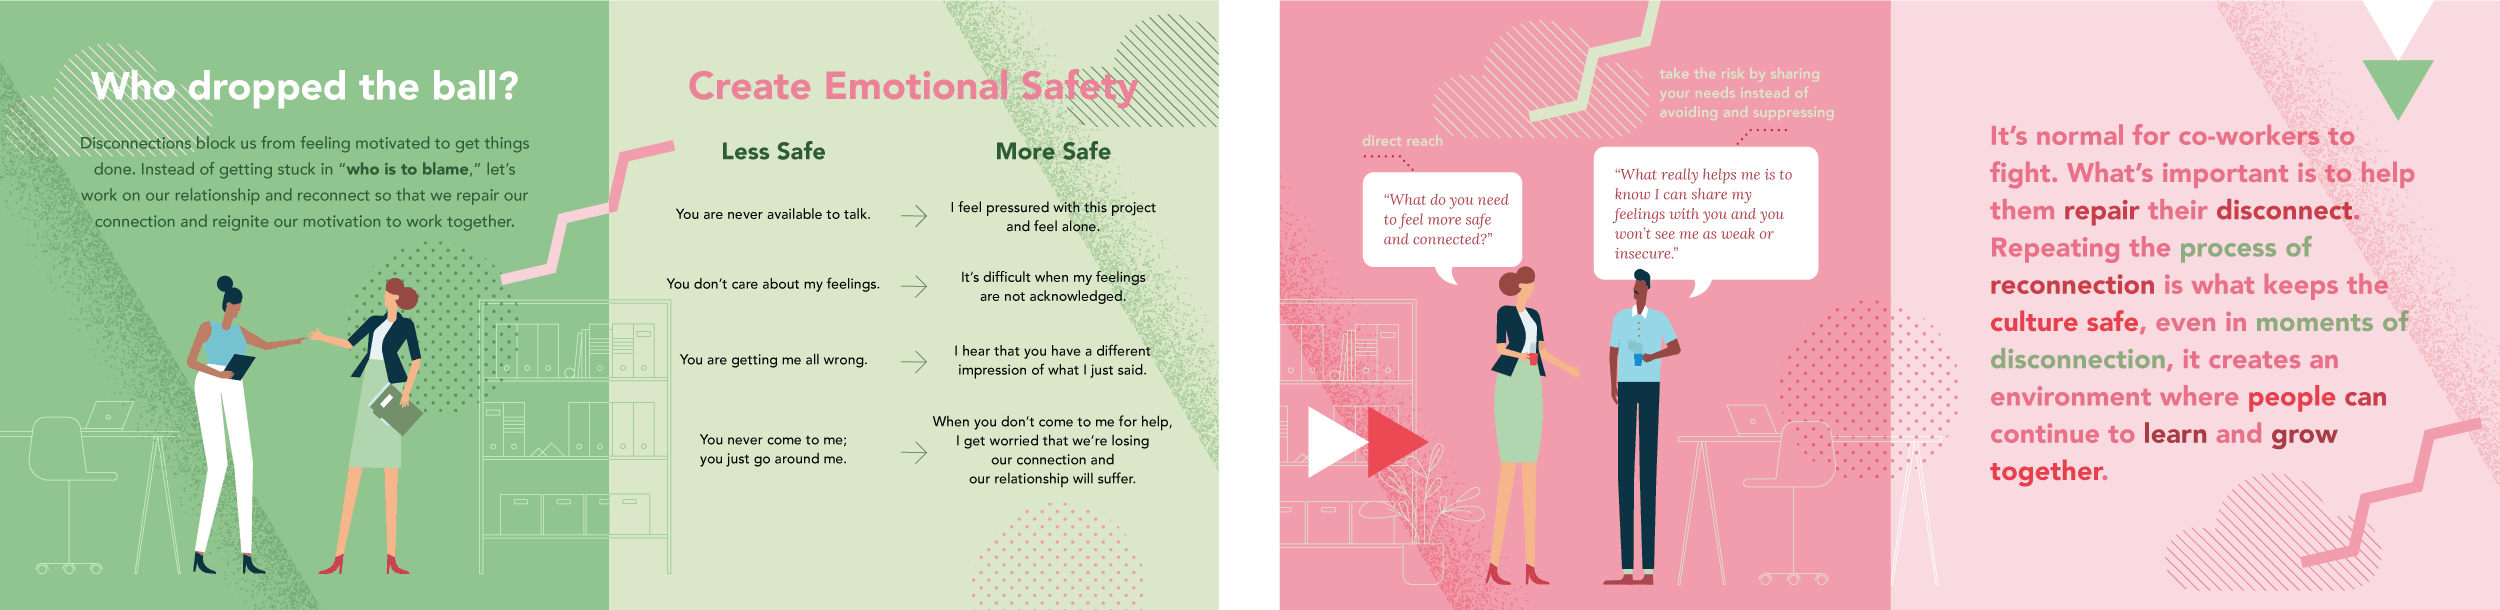
It took me a bit to get to the exact character illustration style my client, Lola Gershfeld approved. Before I showed Lola some actual concepts, I did a bit doodling to explore potential compositions. Each of the images contained also text, and so one of the ideas I had in mind was to create a central container for the text and position the characters around it. Perhaps one or two characters could be depicted holding the container, or depict something collaborative so it is clear that they're an efficient team.

Preliminary sketches to explore some compositions for the EmC Instagram posts (or 'The Connected Culture' EmC book in a later stage of the project).
One of the ideas I tried out was using characters with a blue skin to represent people with any kind of ethnical roots. It was important to show a mix of different kind of people in terms of gender, age, ethnicity, etc.

One of the characters idea I tried out for the EmC book 'The Connected Culture' (the title wasn't final at this time)
While I was simultaneously working on the design for these illustration posts, I was also engaged in designing the EmC mobile app, which involved creating some icons (as depicted below). I felt it also worked very well with the EmC Leaders brand style I created before.
However Lola didn't really like this blue skin and the overal character style, though the simplicity and flat 2D style were approved.
To streamline the process and avoid unnecessary delays, I collaborated with my client to brainstorm ideas. By sharing examples of online illustrations from my own and from my Inspiration Gallery, I gained a clear understanding of my client's preferences.

Lola especially liked the cute characters from Fran Labuschagne (to the left), and the character I created for the cover of Smashing Magazine (in the middle)
Consequently, I adopted a slender character style. I began by crafting a single figure as a starting point and then used this as a reference to create additional figures, ensuring there was ample diversity in terms of clothing, gender, and ethnic backgrounds.
Using Adobe Illustrator in Combination With InDesign
All of the pages of the book were entirely created in Illustrator, ending up with only 3 different Illustrator documents:
- the book's full cover (including front, back and spine)
- the inside illustration pages
- title, copyright, dedication, author and company page
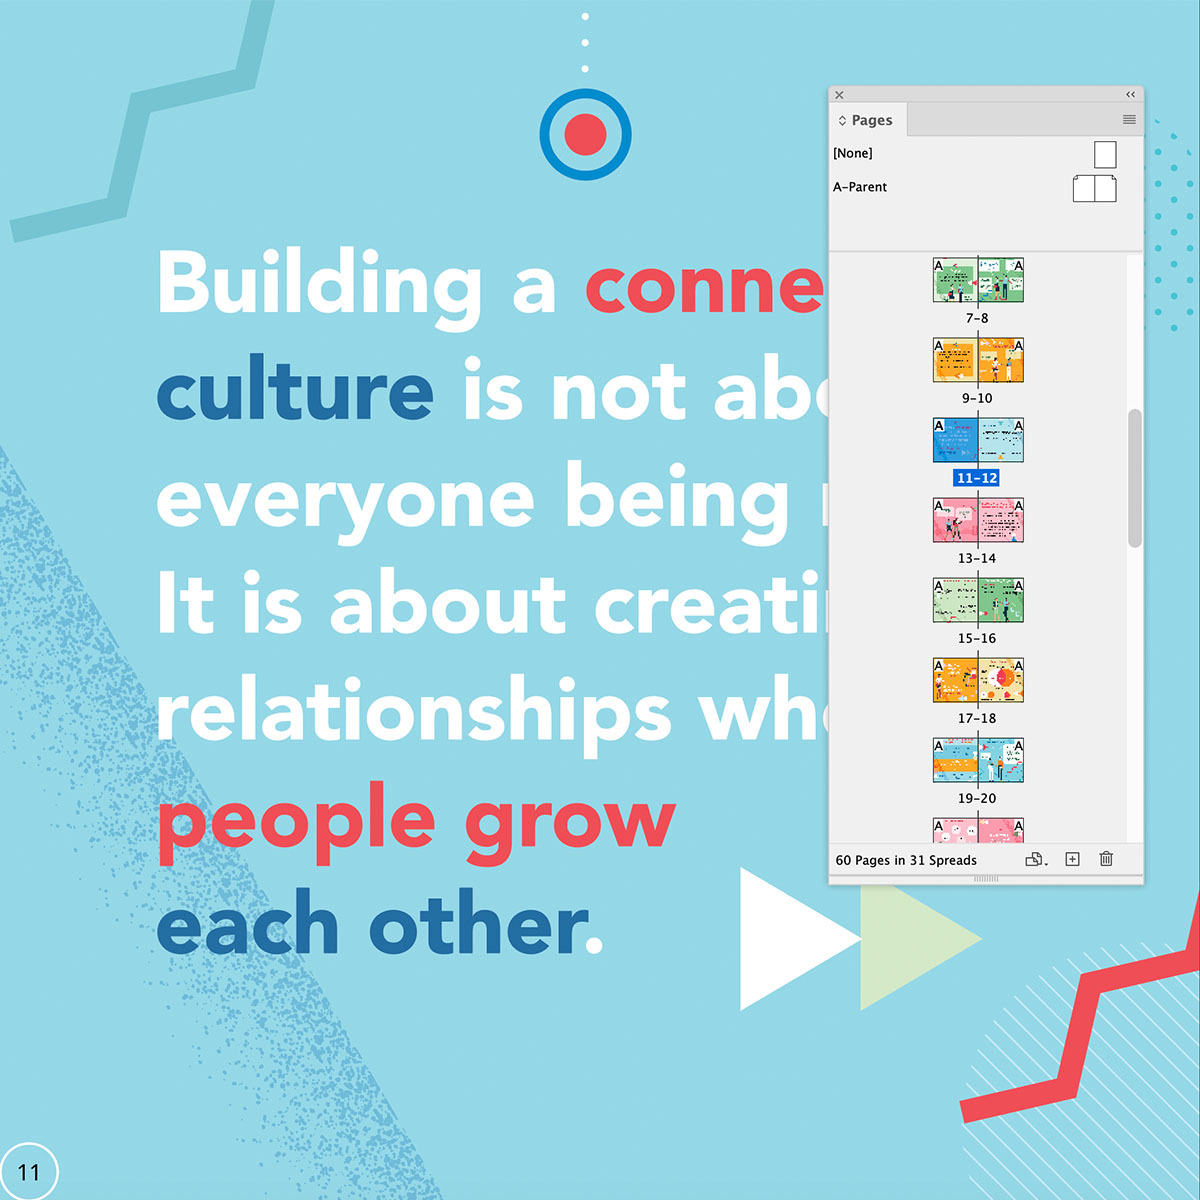
My InDesign document holds the entire book including the front and back cover which is perfect to share with my client as 1 PDF. However, once the documents were handed over for print, I had a separate document for the cover and inside pages. The front, back and spine were saved in a separate Illustrator document since the cover of a book is always a separate print job, and there is also the spine to take into account.
InDesign's biggest advantage is its Master Pages. They serve as my templates. Usually I have a Master Page that holds the pagination, sometimes with the title of book in small print as a header at the top. Then there is a Master Page for each chapter with the chapter title in small print, which is then based on the Master Page that has the pagination and book title header. This means that editing the pagination and book title Master Page will automatically update the chapter Master Page. For this book however, there are no chapters or anything. It's very simple and straight forward.
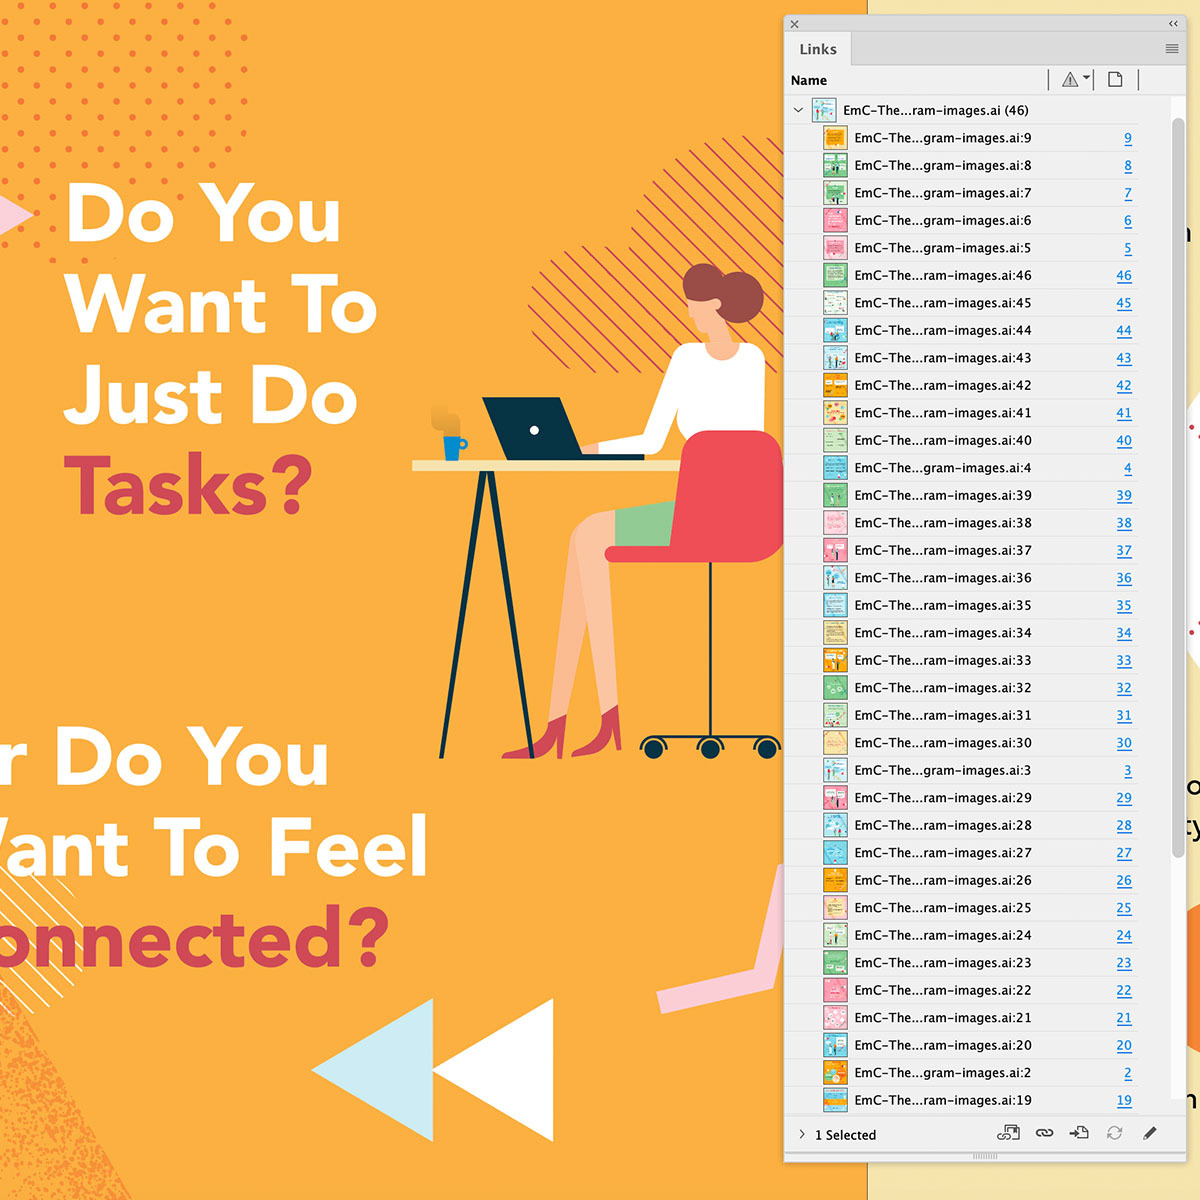
So I've only used 1 Master Page spread (left and right page) that holds the pagination styling. This Master Page is applied to all the illustration pages I created. Now I simply had to import all the separate Illustrator artboarts I created for each image as a separate page into InDesign. The only thing I had to take into account was that they're using a different dimension, and so when placing them in InDesign I need to scale them down to fit the page. To avoid having to redo this resizing after placing the image, I decided to place the images of the 1st left and right page spread. Then, I duplicated this spread for all subsequent pages and replaced each image through the Links panel with the appropriate one. Of course I ensured that the appropriate Master Page was applied to the spread beforehand. Additionally, after updating the illustration pages in Illustrator I only have to click the update icon in the Links panel (or the "update links" button when opening the document) to have my InDesign up-to-date again.
Page Numbering in InDesign
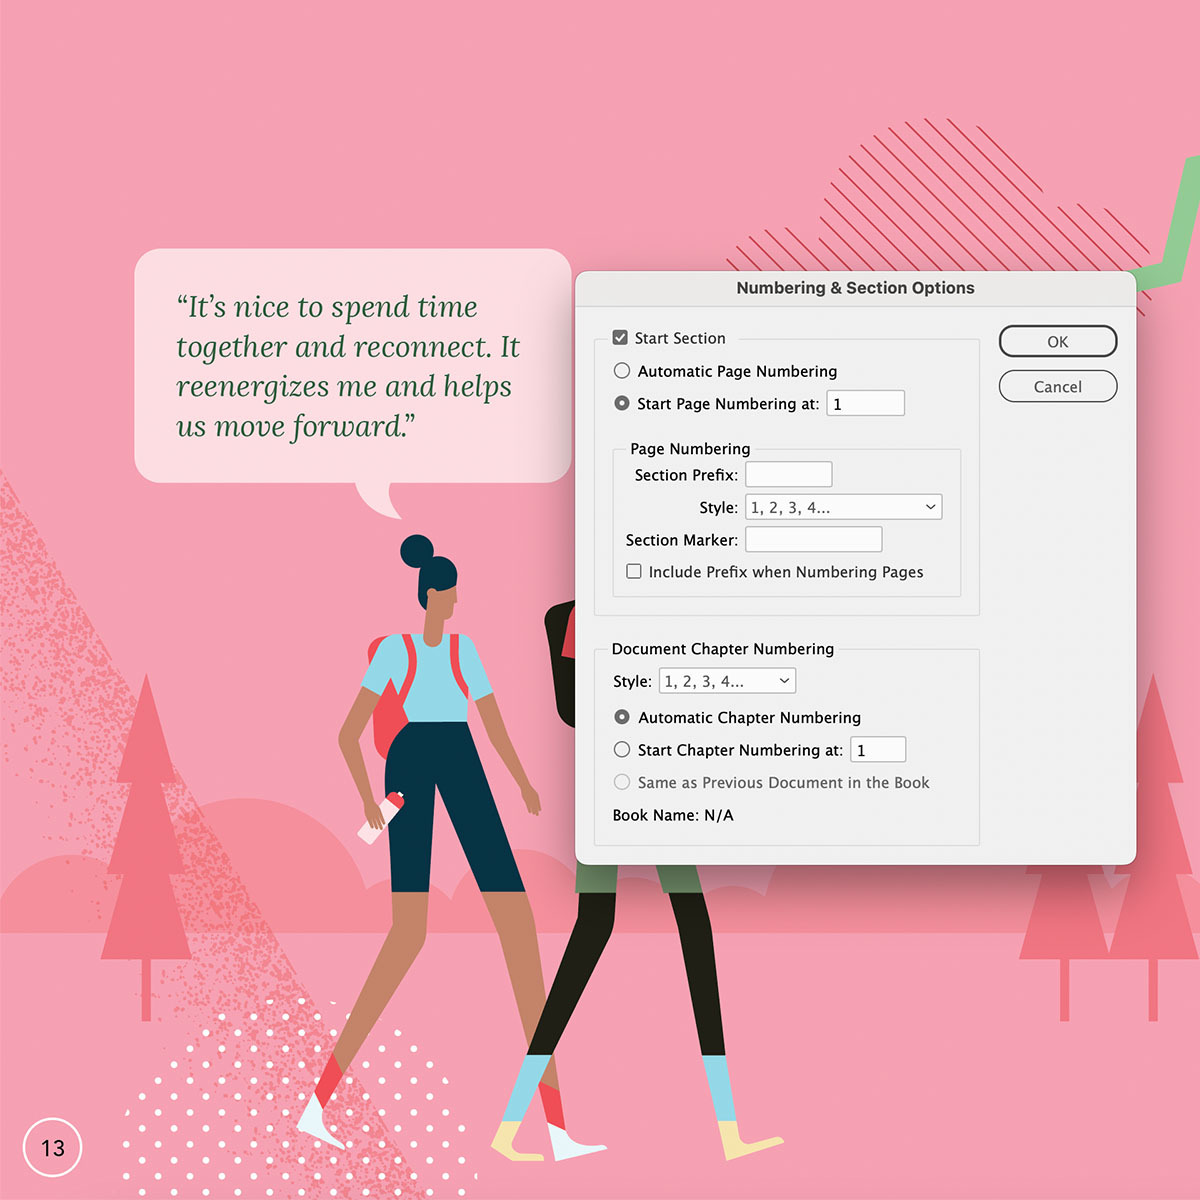
One of my client's last requests was to start the page numbering on page 10 of the book, because this is where the actual content starts. Your see, the preceding 9 pages contain light black & white content such as the credits, copyright info etc. and also the inside cover in full color. To accomplish this, you must begin by selecting the pages 10-11 spread in the Pages panel. Next, in the panel's fly-out options menu you have to make sure that 'Allow Selected Spread to Shuffle' is unchecked.
You see, page 10 which needs to be page 1 now is an even number. So making this page nr. 1 would shuffle the pages as by default uneven page numbers are always right-side pages. In my specific scenario, it's crucial to maintain page 10 on the left side. With the spread still selected you choose Numbering & Section Options... from the panel's fly-out menu. Here you enter 1 in the Start Page Numbering at field and now page 10 should have page number 1 assigned.
Resizing the Document Size in InDesign
Another development arose during this InDesign process. As I was preparing my files for the printer, my client mentioned that the size of the inside pages of the book should be 6x6 inch and the cover 6.25x6.25 inch. I used 6.25x6.25 inch for all pages. Somehow this got lost into our communication.
My initial reaction led me to believe that I was in for at least an hour of work. I anticipated having to fix each page individually, except for the page numbering, which had already been addressed in a master spread. Keeping all the pages' content created in Illustrator made applying edits very straightforward. Updating the InDesign file was as easy as pressing the 'Update Modified Links' button when opening the file, or the update link icon button at the bottom of the Links panel next to the image that needs updating. All the pages are represented as 1 linked image in the Link panel, with the number of placed images between brackets. Updating is only 1 click.
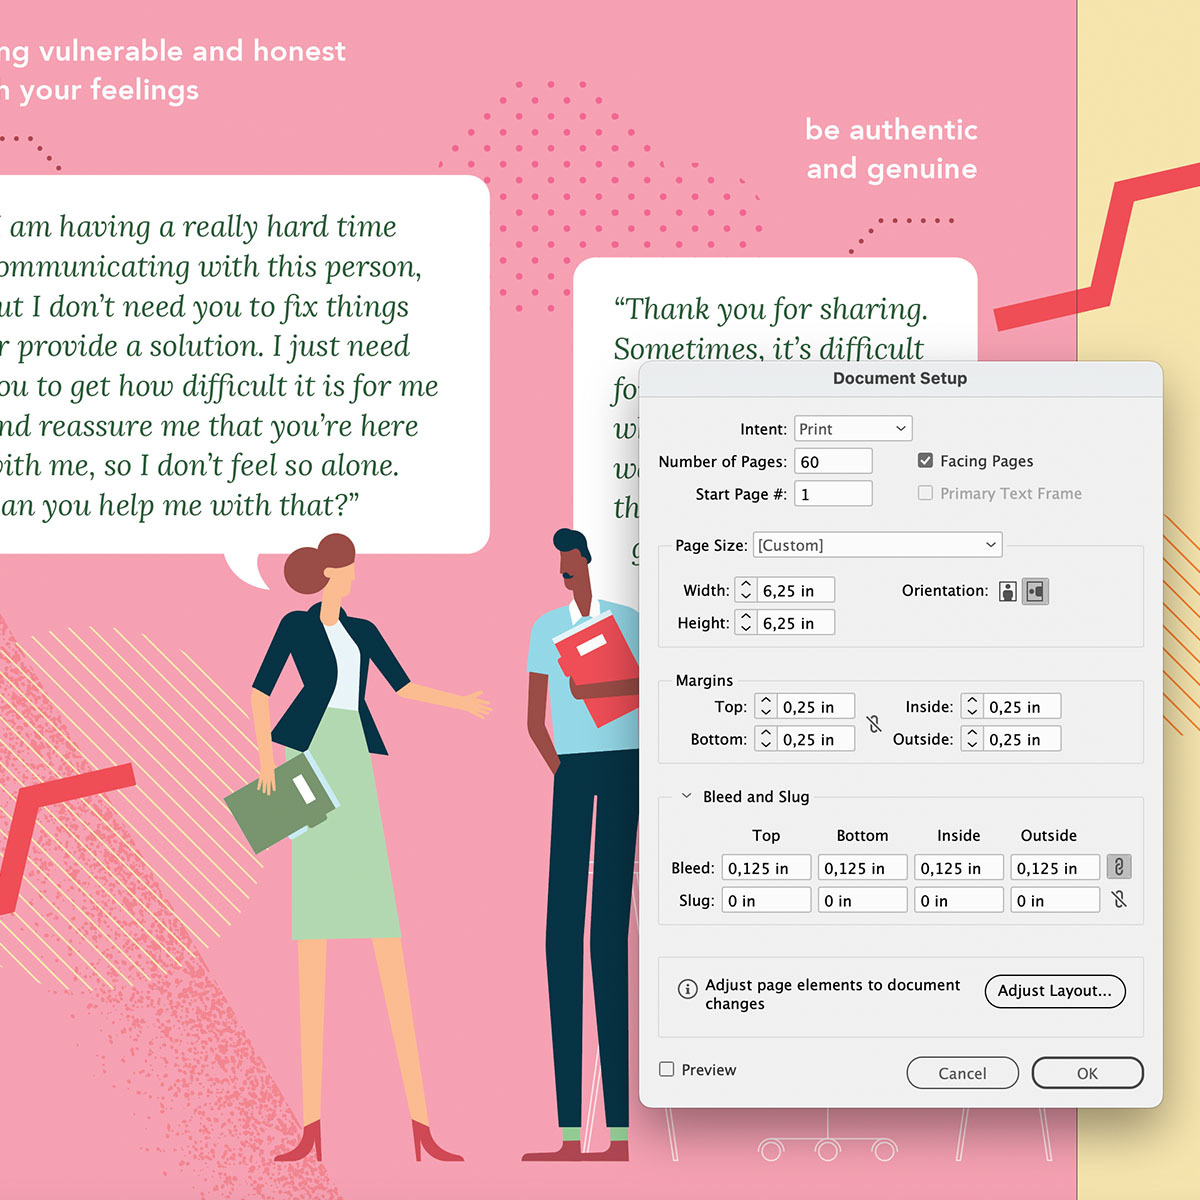
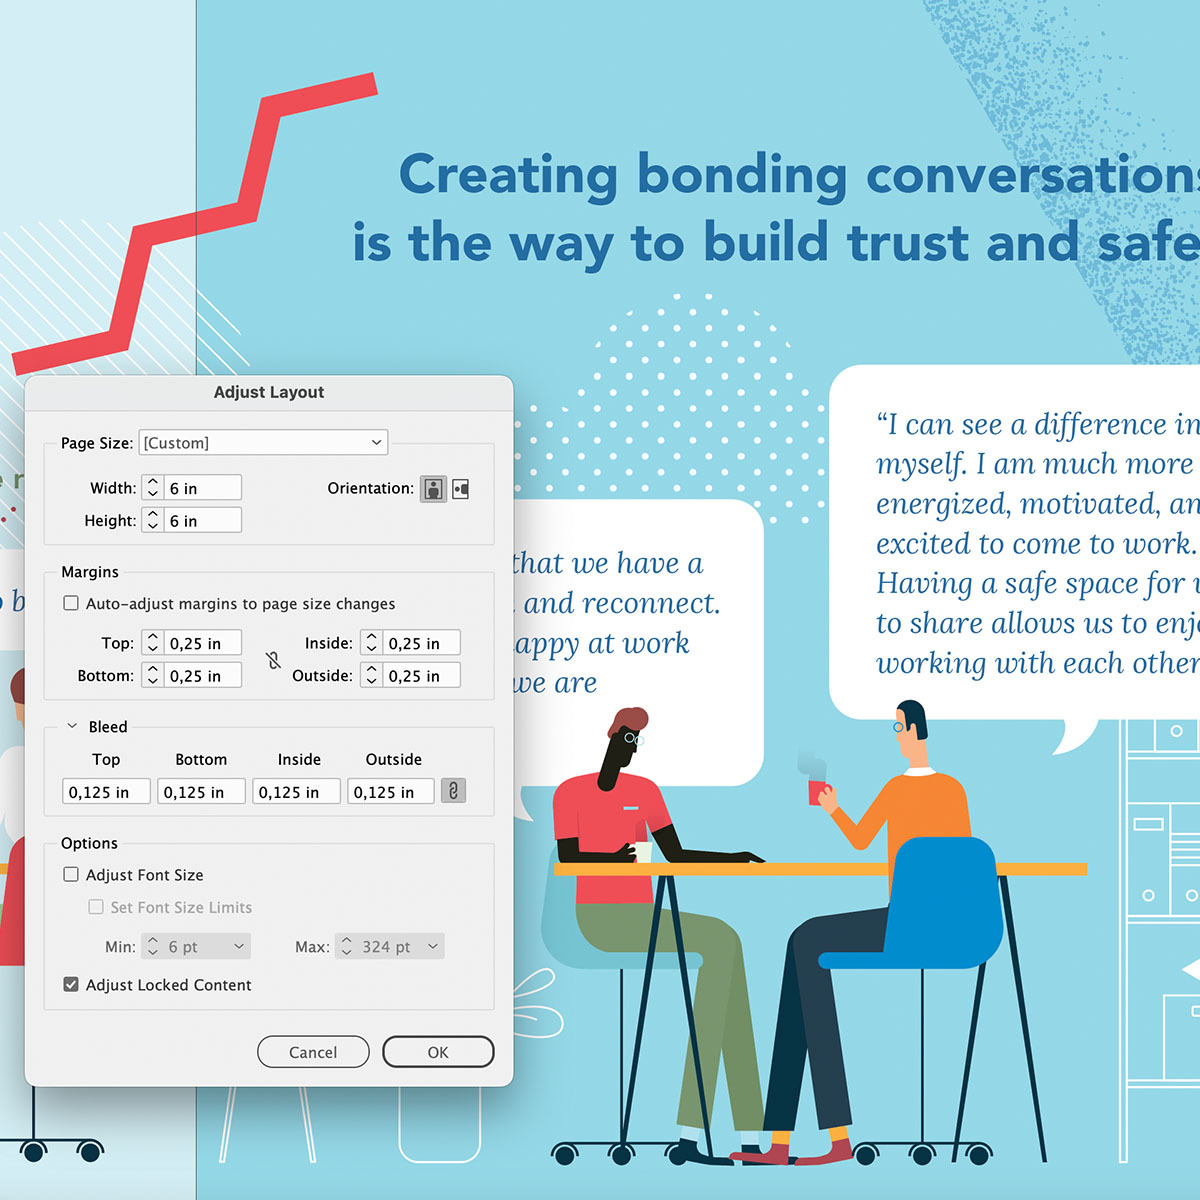
Interestingly, this approach also proved highly beneficial when adjusting the page size. While I was about to get my files prepared for the printer, my client was mentioning that the size of the inside pages of the book should be 6x6 inch and the cover 6.25x6.25 inch.
First thing I did was going to File > Document Setup where I changed the width and height settings from 6.25 to 6 inch. Then I noticed the Adjust Layout button further below. Reading the description to the left gave me hope. So I clicked the button and entered the new values there as well and hit OK. It seems this was all it takes! Big relief 😃 You can also find the Adjust Layout option directly under the File menu (File > Adjust Layout...).
The Final Printed Result
Designing for any digital media is always cool and fun. However, there's a unique thrill that comes with seeing your design materialize in physical form, especially a book. Needless to say I was very excited when I received the printed book in my mailbox. The book has a hard cover and the title shines with a glossy varnish finish. Below is a video of me wading through the pages of this little book.
In case you're interested in this book and its content, find out more here.
