Creating Tropical Leaves Art Brushes in Adobe Illustrator
Quick & Easy Tutorial
Article written on Monday, 10 May 2021
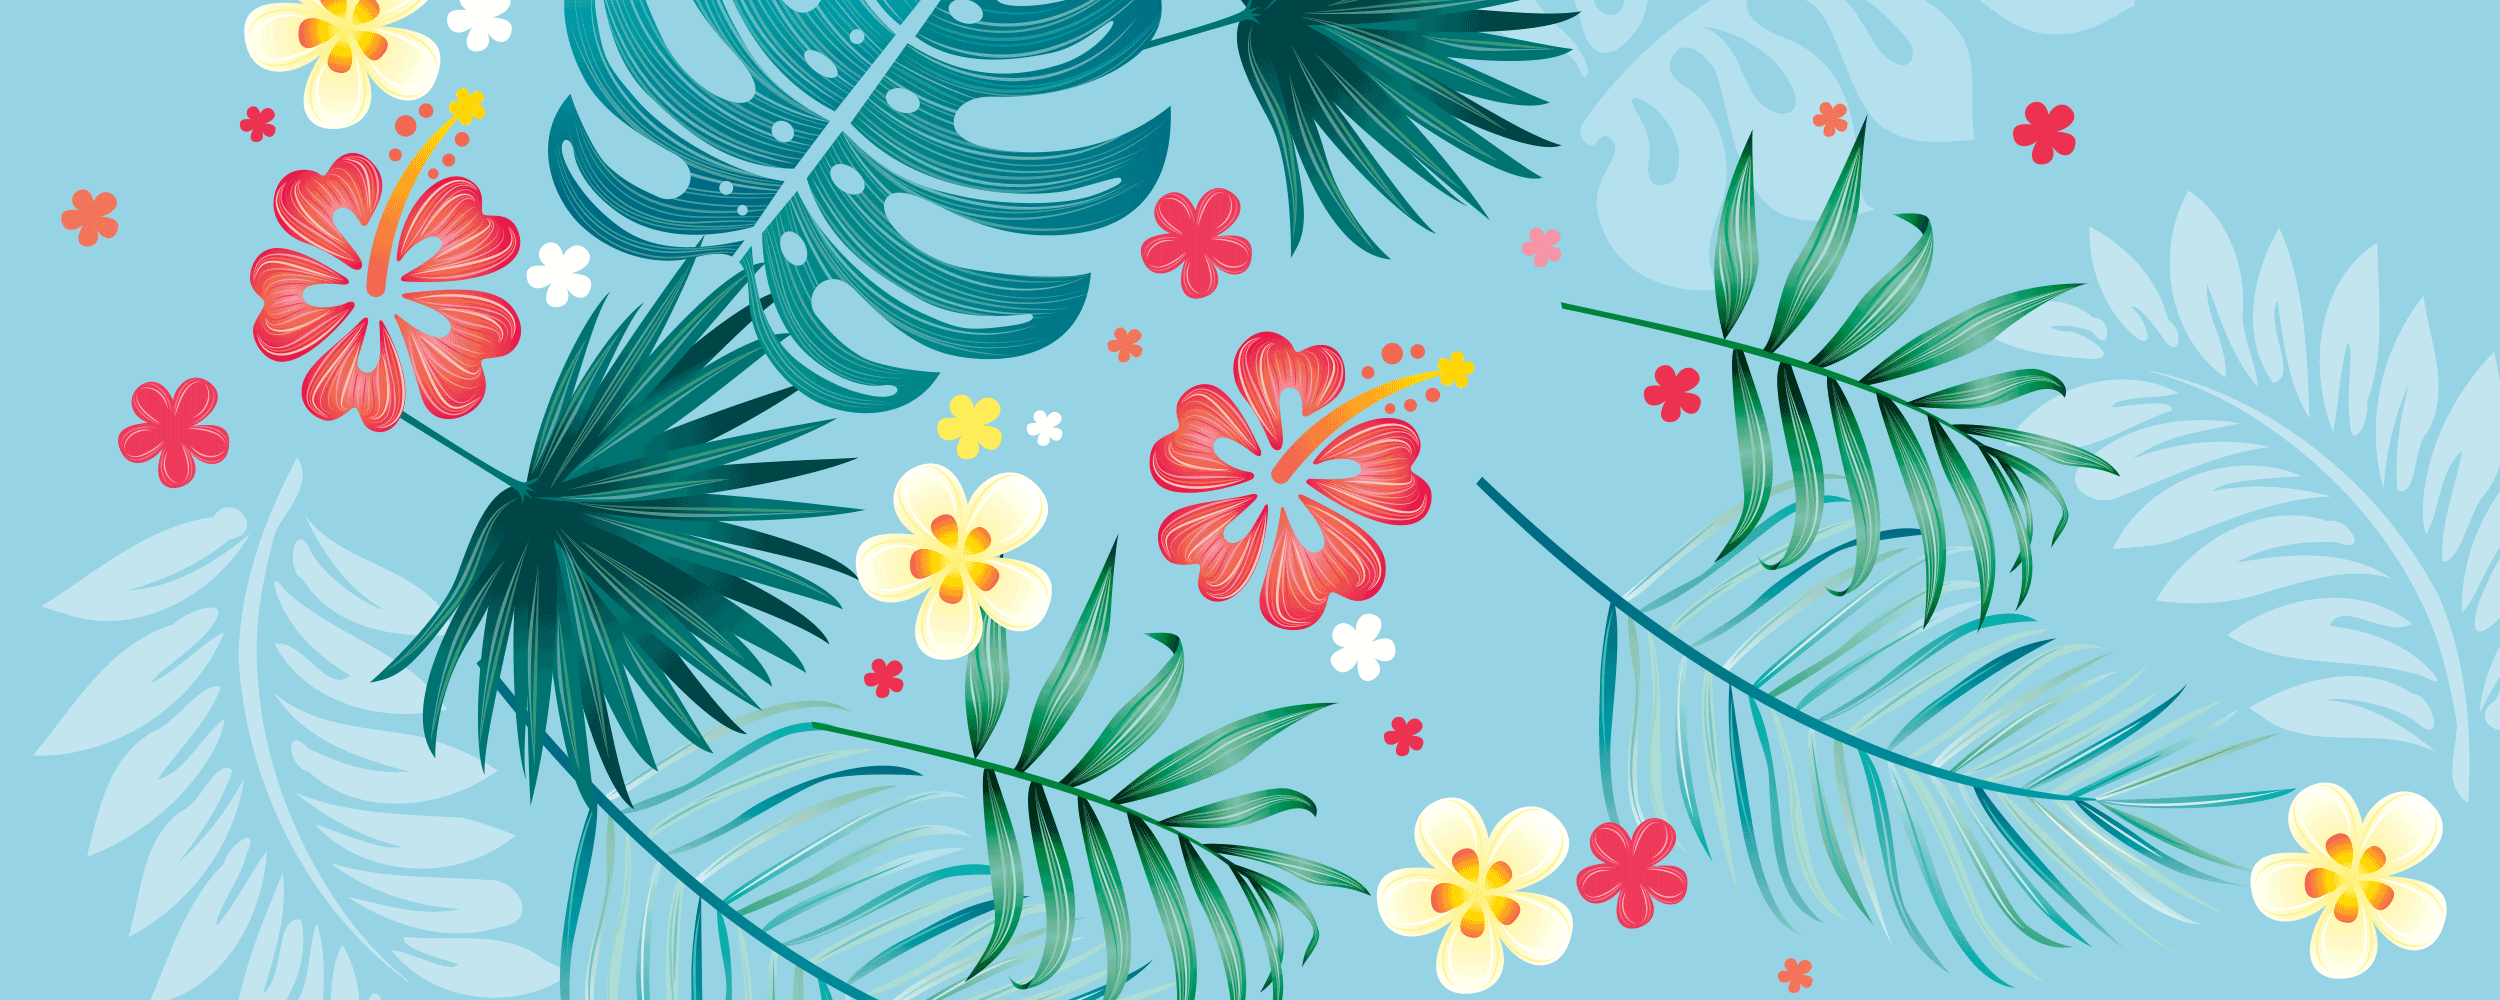
A while ago I designed a series of Samba Sol flip-flops. For one of the collections I designed a Hawaii version where I used tropical leaves. For some of the leaves I decided to create a couple of Art Brushes so I could add these nice details to give them this clean polished look.
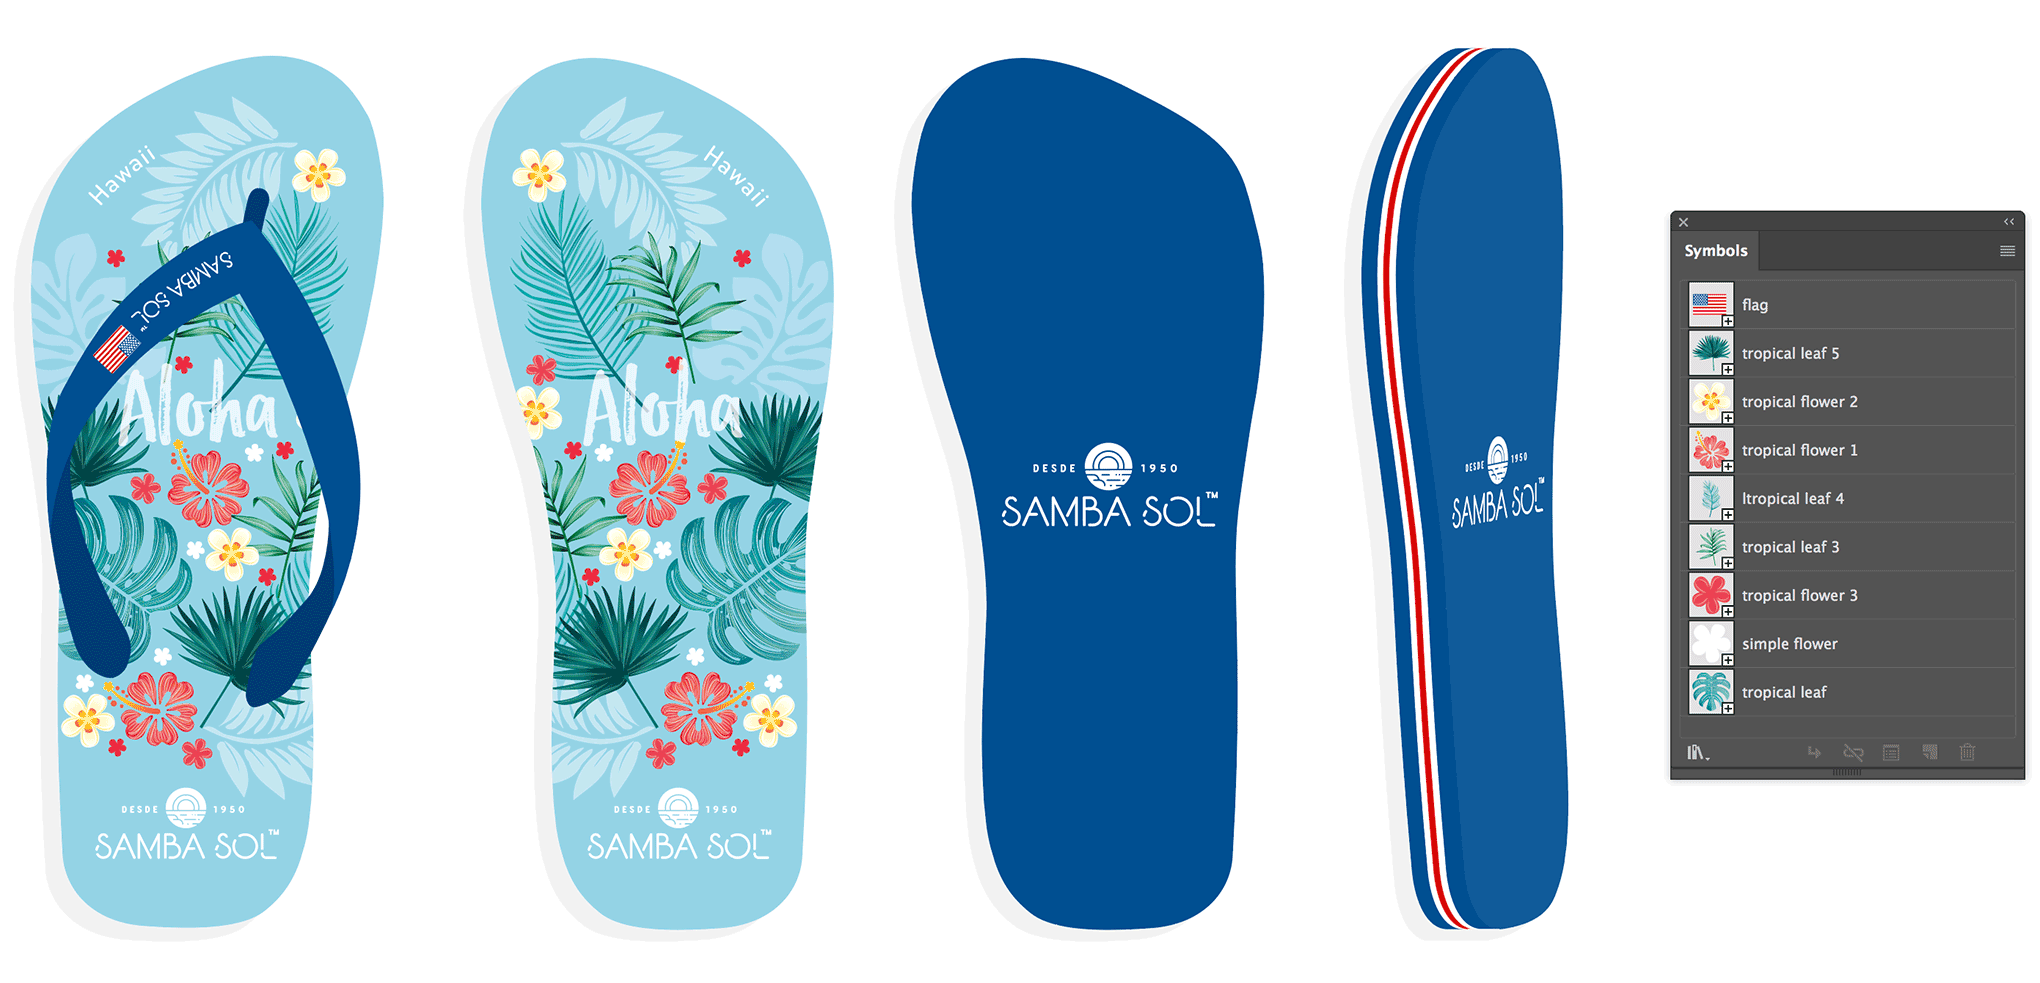
One of the many flip-flops designs created for Samba Sol. This is the Hawaii version.
Creating Art Brushes in Adobe Illustrator can a bit of work, but once created you save so much time and the end result is also rewarding. In my example I was able to add detail to each leaf in no time. Here are the steps I took to create such brush…
1. Draw a Straight Line
I started by drawing a straight horizontal line. Select the Line tool and hold down the Shift key once you start dragging.
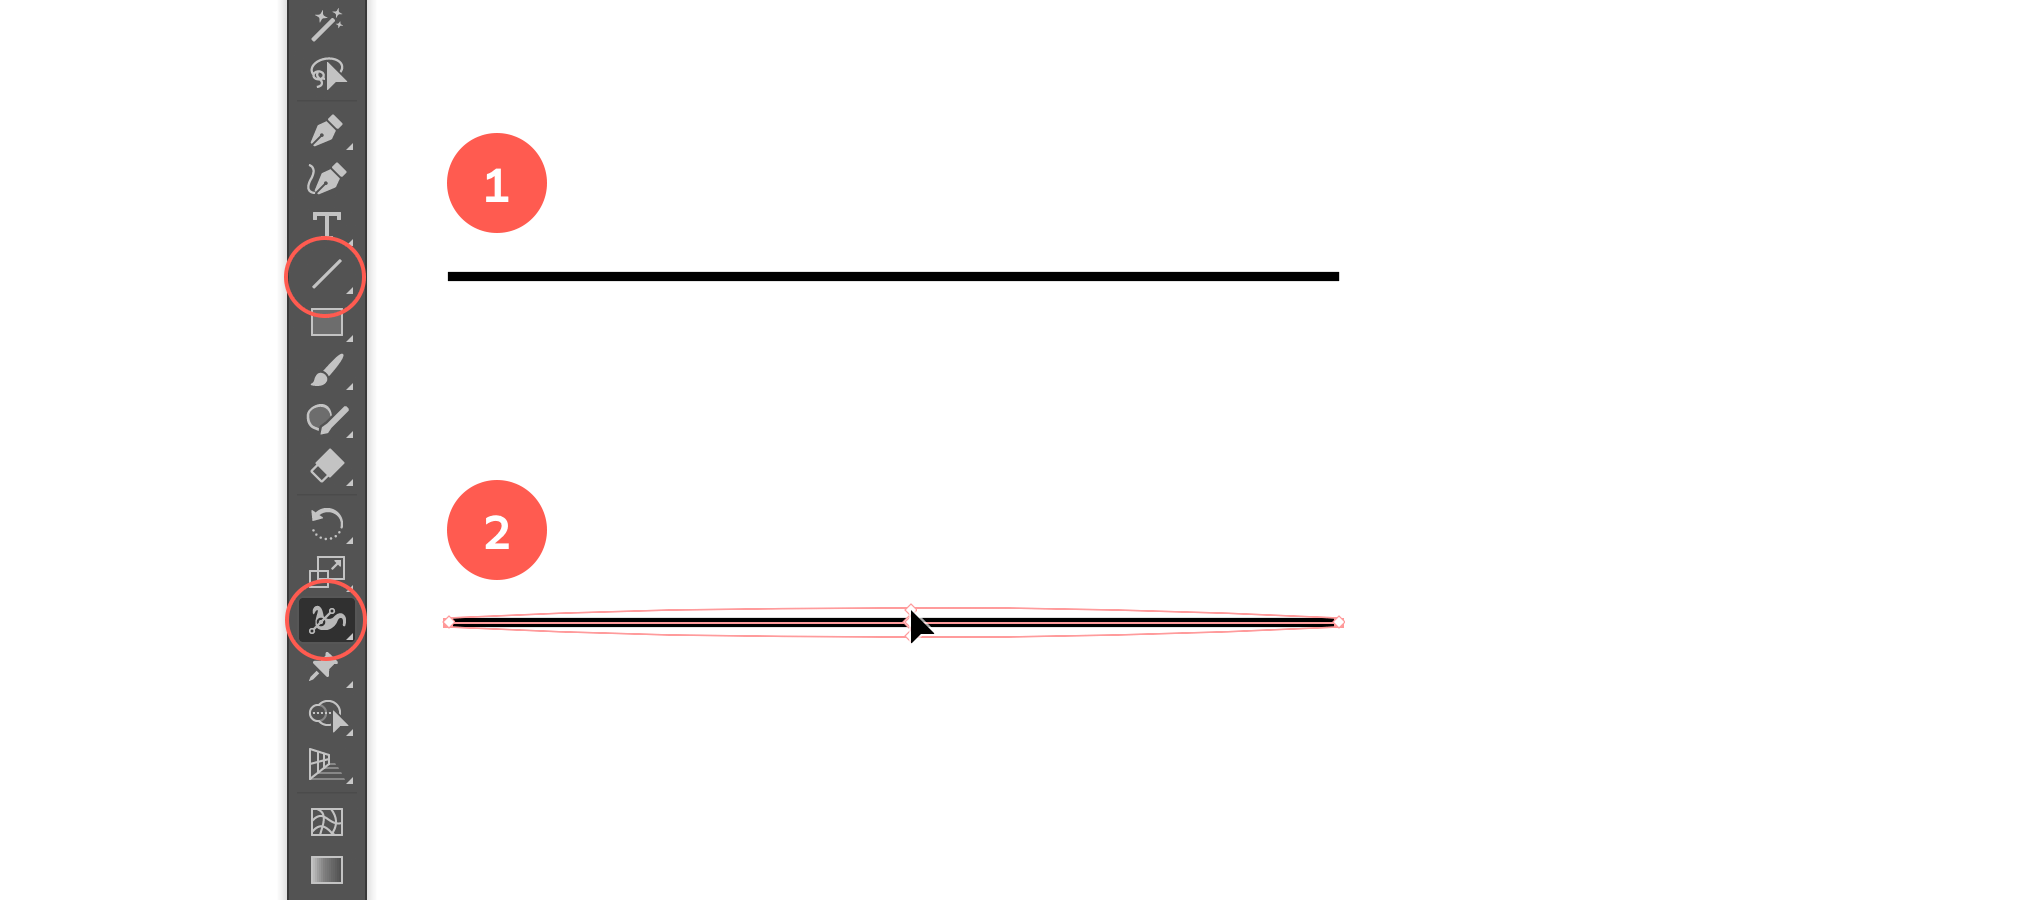
Draw a straight line and adjust the width in the middle.
2. Make Middle Part Thicker
Then I used the Width Tool to make the middle part thicker and the end points thinner.
3. Turn Line into Art Brush
Next, I turned this line into an Art Brush by going to the Brush panel and clicking the New Brush icon at the bottom. Select Art Brush as brush type and choose Tints as Colorization method. This means that when you draw a stroke and apply the brush, you can give it any color.
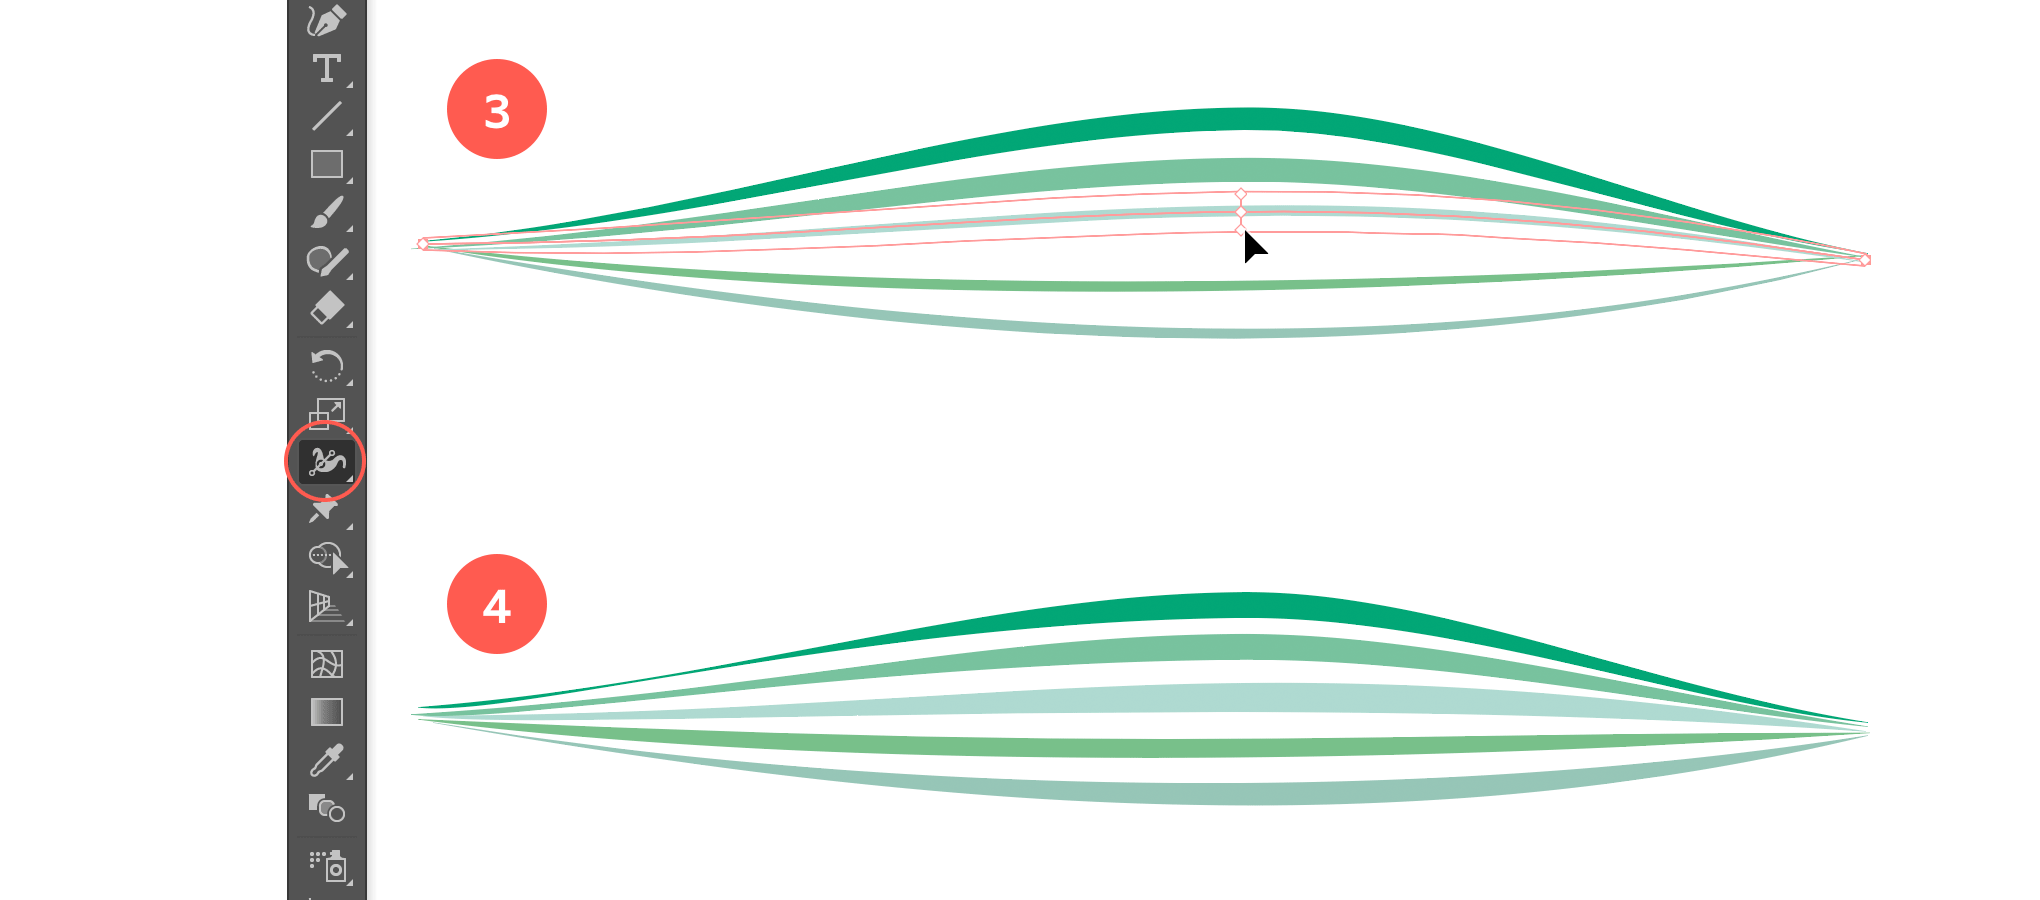
Add additional lines applying the new Art Brush, and apply color to each line.
4. Apply Brush and add Color
Then I drew these other curved lines, applied the brush stroke I just created, and gave each line a different color. I also used the Width Tool again to make only the the middle part of each line thicker. Finally I turned this group of lines into a new Art Brush, making sure the Stretch To Fit Stroke Length option was selected. Here I left the Colorization method setting to None since this brush has its own specific colors.
Apply the new Art Brush
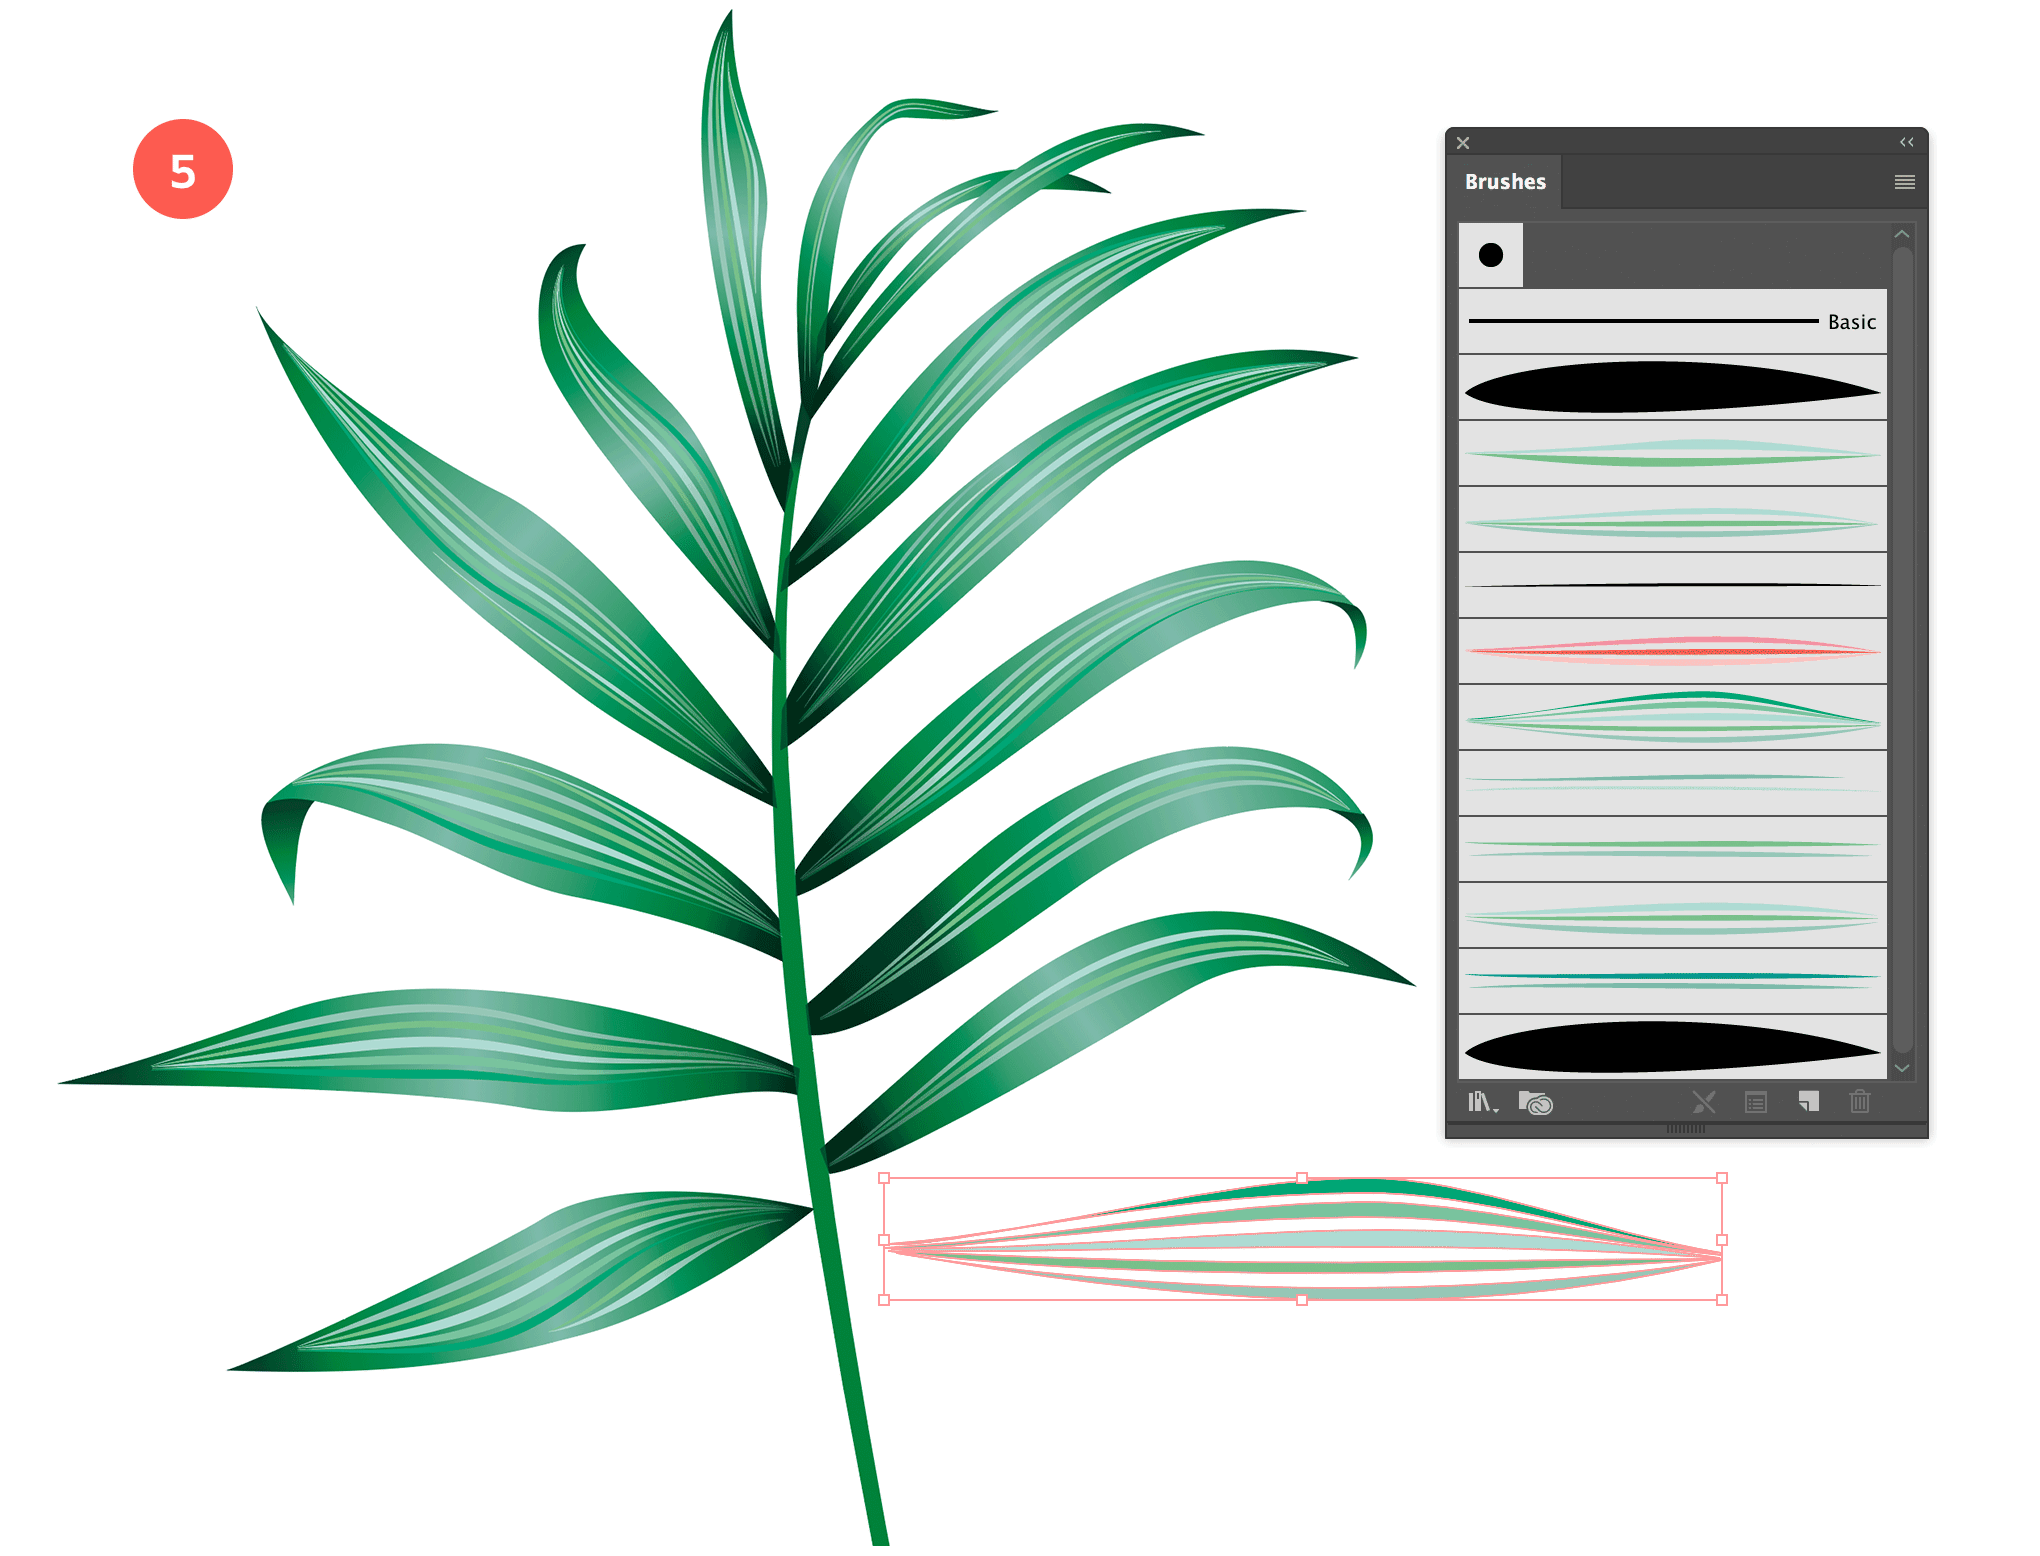
5. Apply Art Brush
Once I had created a couple of different brushes, it was a matter of drawing only 1 single stroke per leaf fragment, and applying the brush that fits the leaf. The always good to create more variations so the end result looks more random and natural. Once I finished a leaf I turned it into Symbol so I could easily reuse it throughout my illustration. I did the same for the flowers, and any other element in my design that I knew I would need more than once.
Hope this quick tutorial has sparked your inspiration to start creating your own set.
