Create a Christmas Ball in Adobe Illustrator
A Step-by-Step Tutorial
Article written on Friday, 20 Dec 2019
- Requirements
- Adobe Illustrator CS6
- Level
- Beginner
- Download
- Illustrator Tutorial File
It's that time of the year again, and so I thought it's the perfect opportunity to share a very quick & easy tutorial on how to create a simple Christmas ball in Adobe Illustrator. It's something I created for a newsletter for a client that went out the door last week. Here's how you create this big red one...
This is a very simple tutorial on how you can create a nice looking Christmas ball like the ones created in the header. We're going to create the big red one. I have prepared an empty Illustrator document for you with the Color Swatches already in place ready for you to apply.
1. Draw a Vertical Line
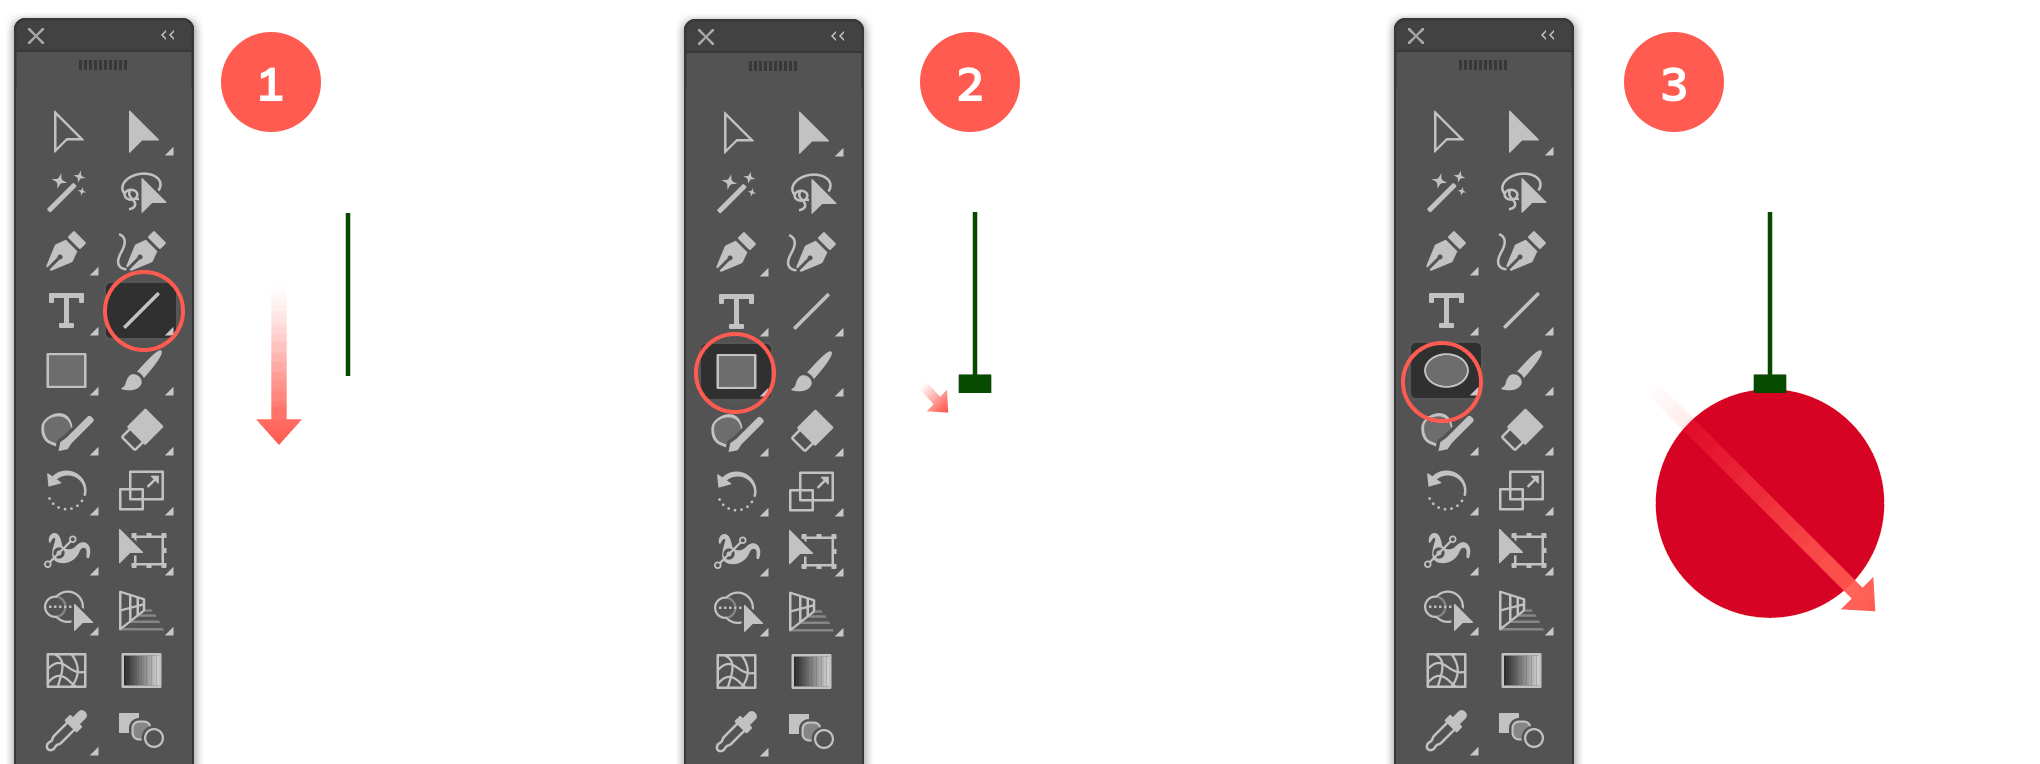
Start by drawing a vertical line of about 150 px. Select the Line tool and drag vertically. Apply the darkest green color (located in your Swatches panel) and give it a Stroke width of 1 point.

Step 1,2 and 3 of this tutorial. Drawing the 3 basic shapes: line, rectangle and circle.
2. Draw a Small Horizontal Rectangle
Now select the Rectangle tool and draw a small horizontal rectangle at the bottom of the line. Give it the darkest green fill (same color as the vertical line), and no stroke.
3. Draw a Big Red Circle
Select the Ellipse tool and draw a big circle right below the small rectangle, but make sure to overlap the small rectangle at the top. Move the circle upwards a bit if needed. Next, select the circle and copy its shape for later usage. Give the circle the red fill (and make sure it has no stroke applied).
4. Horizontal Align Center the 3 Objects
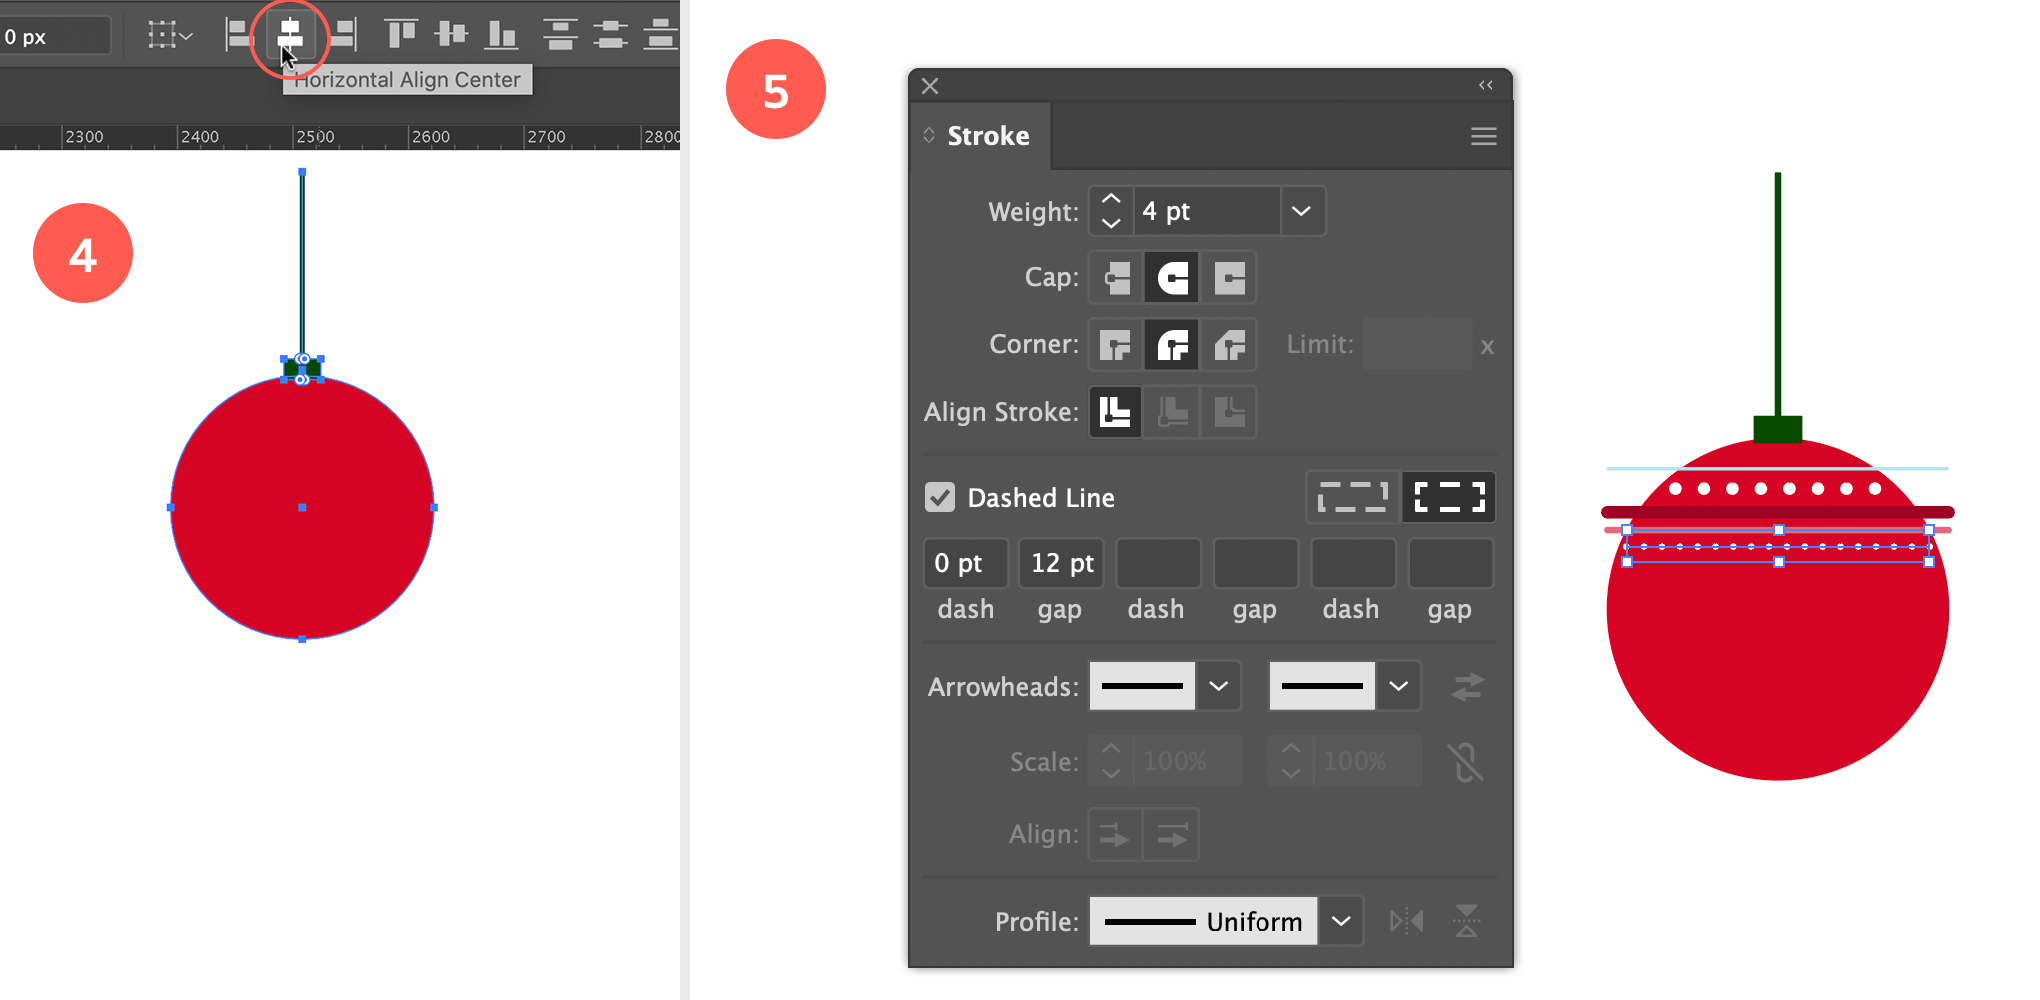
Select all 3 objects, and align them horizontal center via the Align panel > Horizontal Align Center. Then lock the objects by going to Object > Lock > Lock Selection, or hit Cmd/Ctrl + 2.

Step 4 and 5 of the process: align the 3 objects horizontally center, and start drawing decorative lines and shapes on top fo the circle.
5. Draw Decorative Lines on the Ball
Next, start drawing horizontal lines in different colors and thickness on top of the red circle. Give e ach of them a different color that goes well with the color of the ball and switch between full, dashed or dotted lines. For rounded dots choose the rounded Stroke Cap and Corner, and it's best to always enter 0 px for the dash.
6. Apply a Zigzag Effect
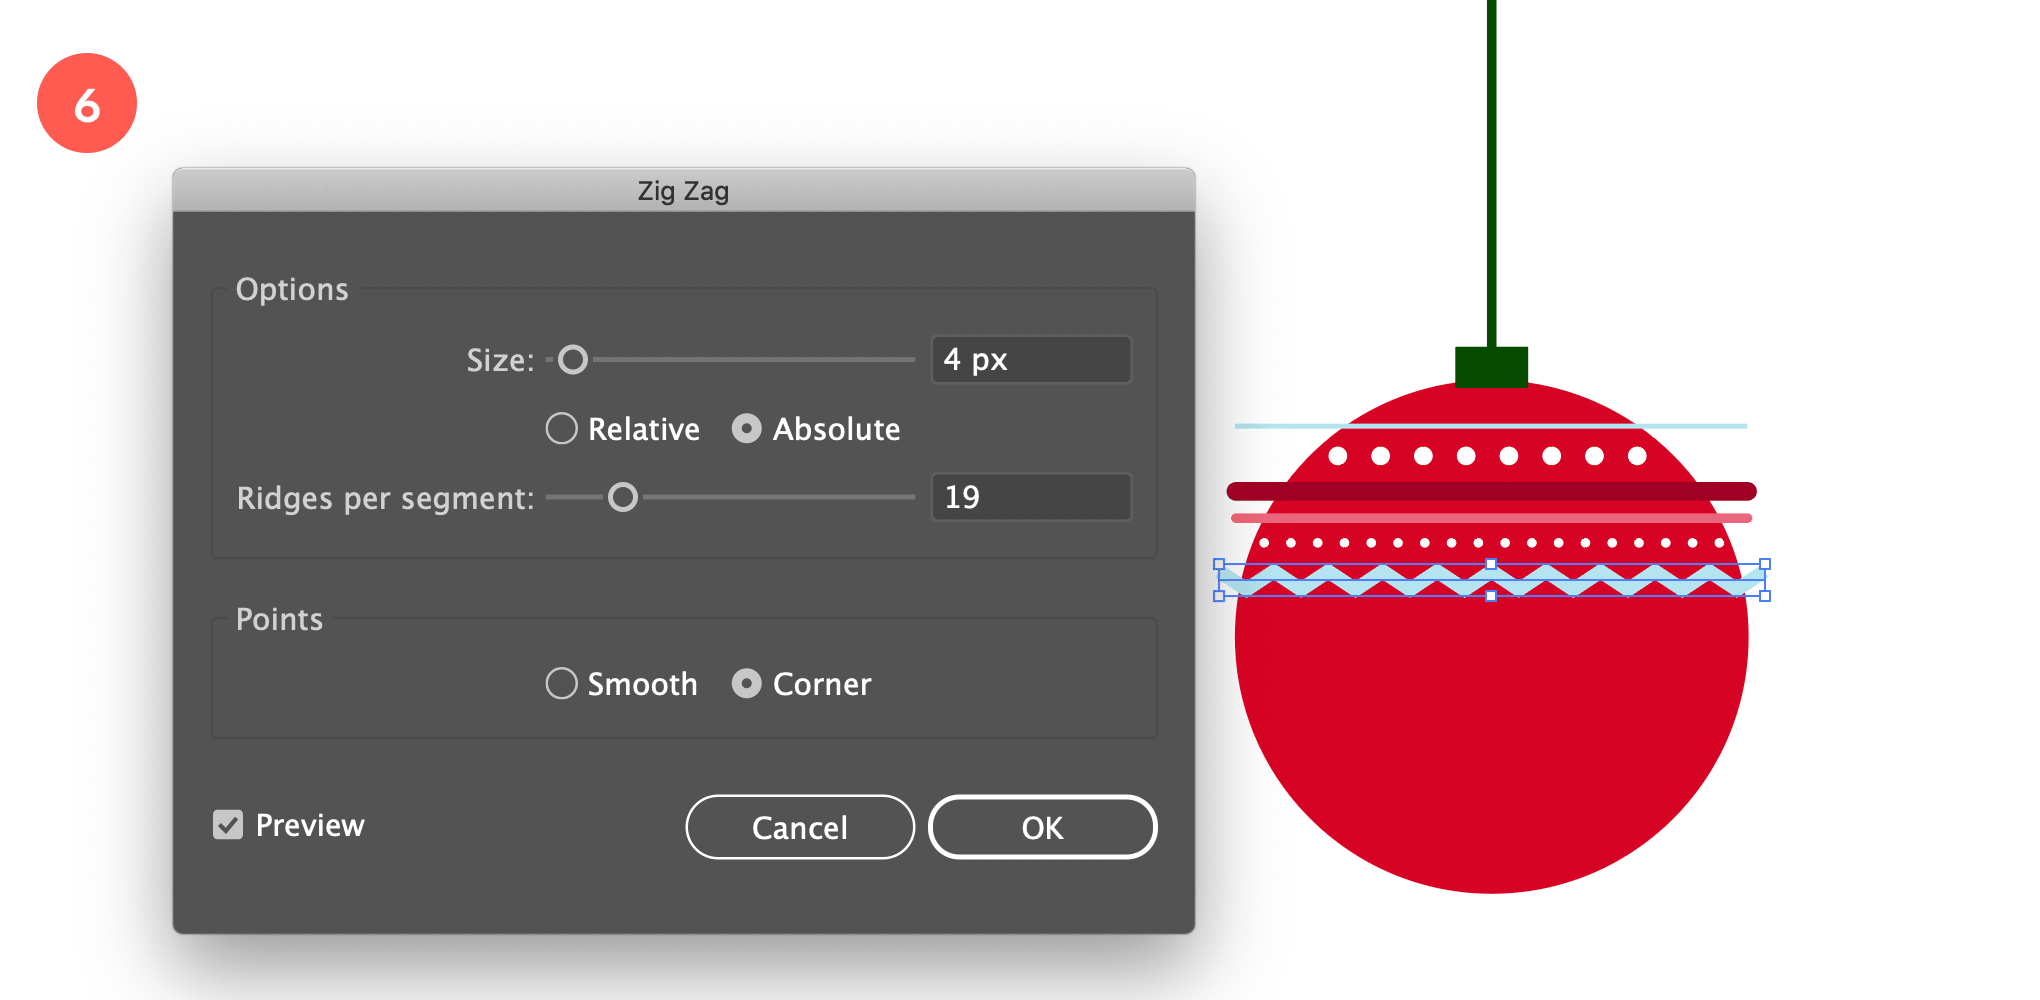
Try applying a zigzag effect by going to Effect > Distort & Transform > Zig Zag. You can also choose the Smooth option here so you end up with a curvy wave effect. You can always double click the fx icon in the Appearance panel in case you need to edit the effect afterwards. Keep in mind that the lines cover the ball nicely. The full lines and shapes should go wider than the width of the ball.

Step 6 of the process: apply a zigzag effect on some of the lines
7. Horizontal Align Center All Lines & Shapes
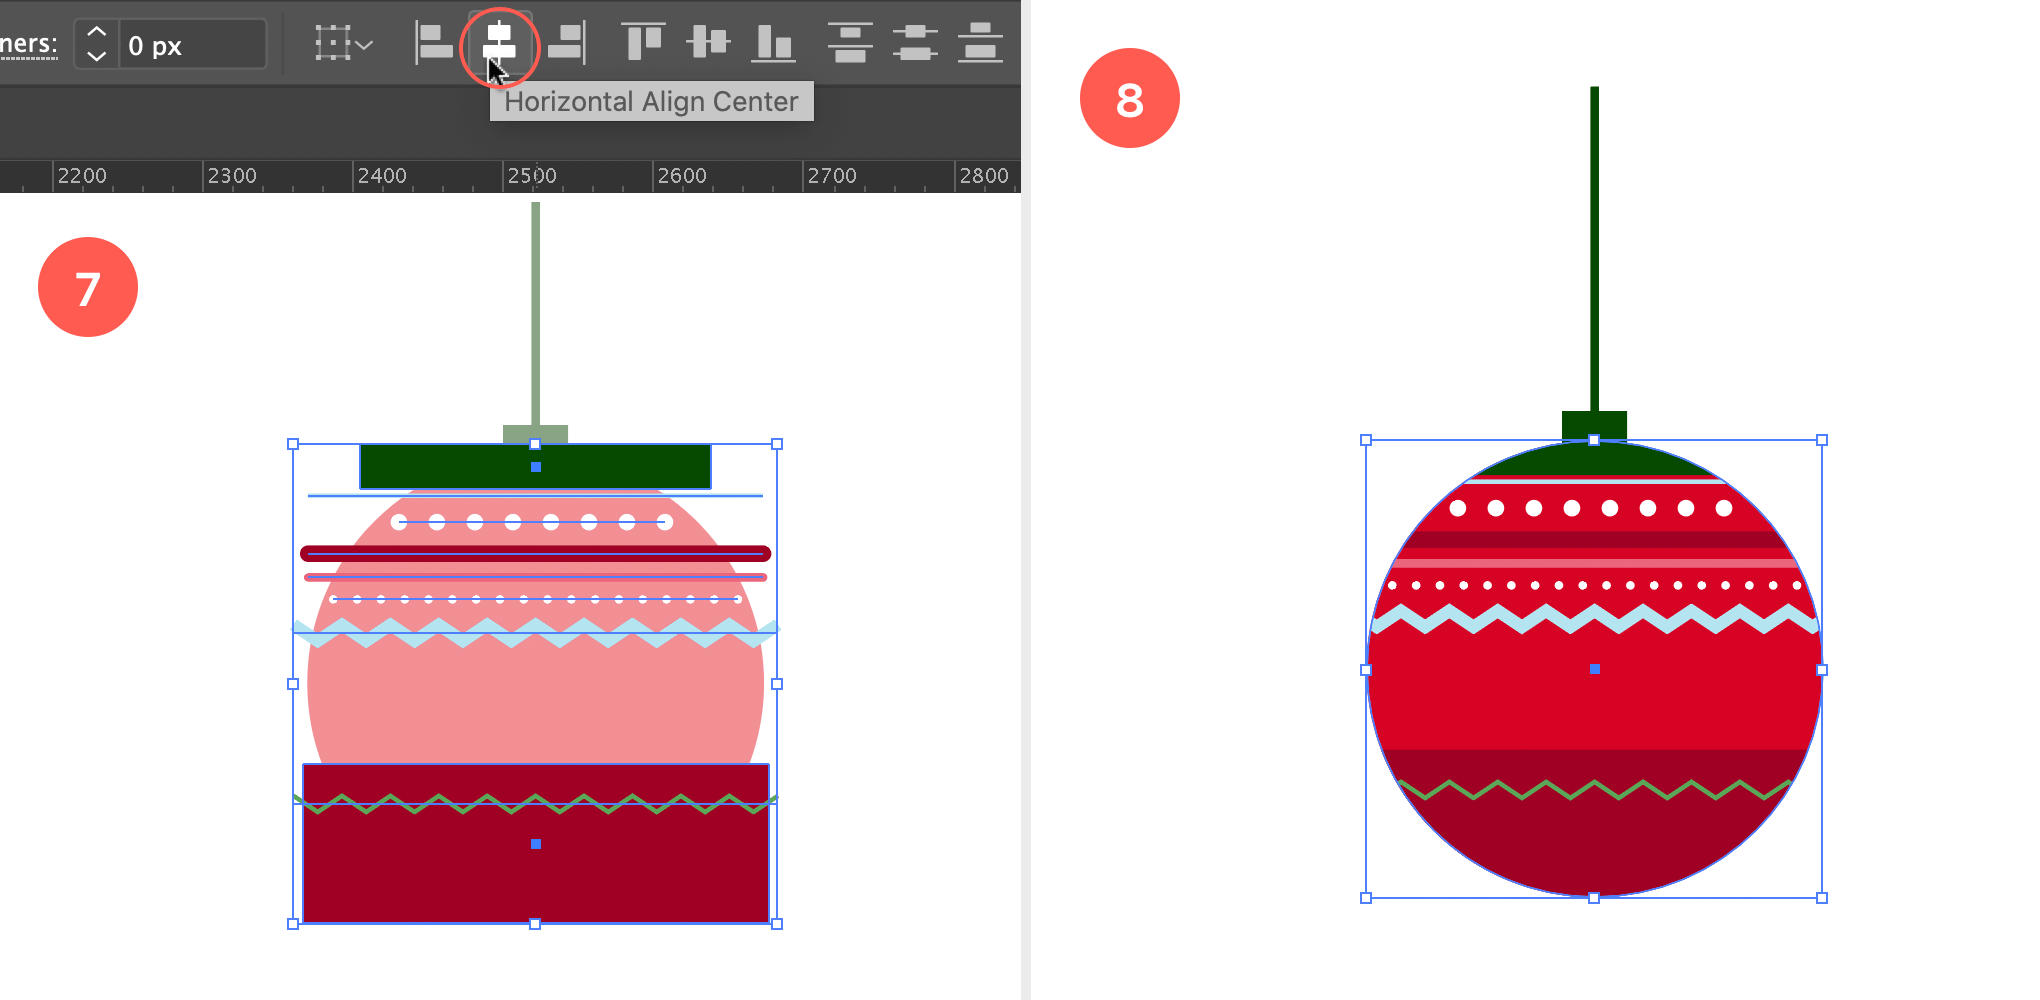
In the next step, when all the lines and shapes on top of the ball are completed, select them all and align them horizontal center just like you did before. Then group them together by going to Object > Group (or simply hit Cmd/Ctrl + g). Now, double click this group to go into Isolation Mode...

Steps 7 and 8 of the process: horizontal align center all the decorative objects, group them and apply a circle mask
8. Apply a Circle Mask
Paste the circle shape that was still into your copy memory into the exact same position (if not, you need to unlock the red circle first and copy it again ), by pasting it in front: simply hit Cmd/Ctrl + f. It should be pasted in the exact same place as the ball. Select both the group of lines and the circle you've just pasted and go to Object > Clipping Mask > Make (or hit Cmd/Ctrl + 7). Exit Isolation Mode by hitting the Esc key or click the left arrow at the top. That's it!
Now that you have your 1st Christmas ball ready, create a couple of more variations with different colors and decorative effects. I've used lines in different ways, but you might as well add stars or other shapes. Even snowflakes if you want. Just remember that you can group it all together when you're done and mask it out with the shape of the ball.


