
Colorful Pattern Masking in Illustrator
Another Step-by-Step Tutorial
Article written on Wednesday, 23 Jan 2019
- Requirement
- Adobe Illustrator CS6
- Level
- Beginner
- Download
- Ai document with colors
Ever wondered how you can mask a colorful pattern into letter shapes, while keeping the text editable? Sounds more difficult than it is. The hard part is actually finding the right pattern and colors.
This will take some experimentation, and maybe you might need to do a bit of browsing around to spark an idea. Just in case you need a little push, I can offer you plenty of inspiration in my Inspiration Stream.
1. Create a Circle
Start by selecting the Ellipse tool, click and drag diagonally while holding down the Shift key to draw a perfect circle. Give the circle a fill and no border. Just pick a bright color to your liking.
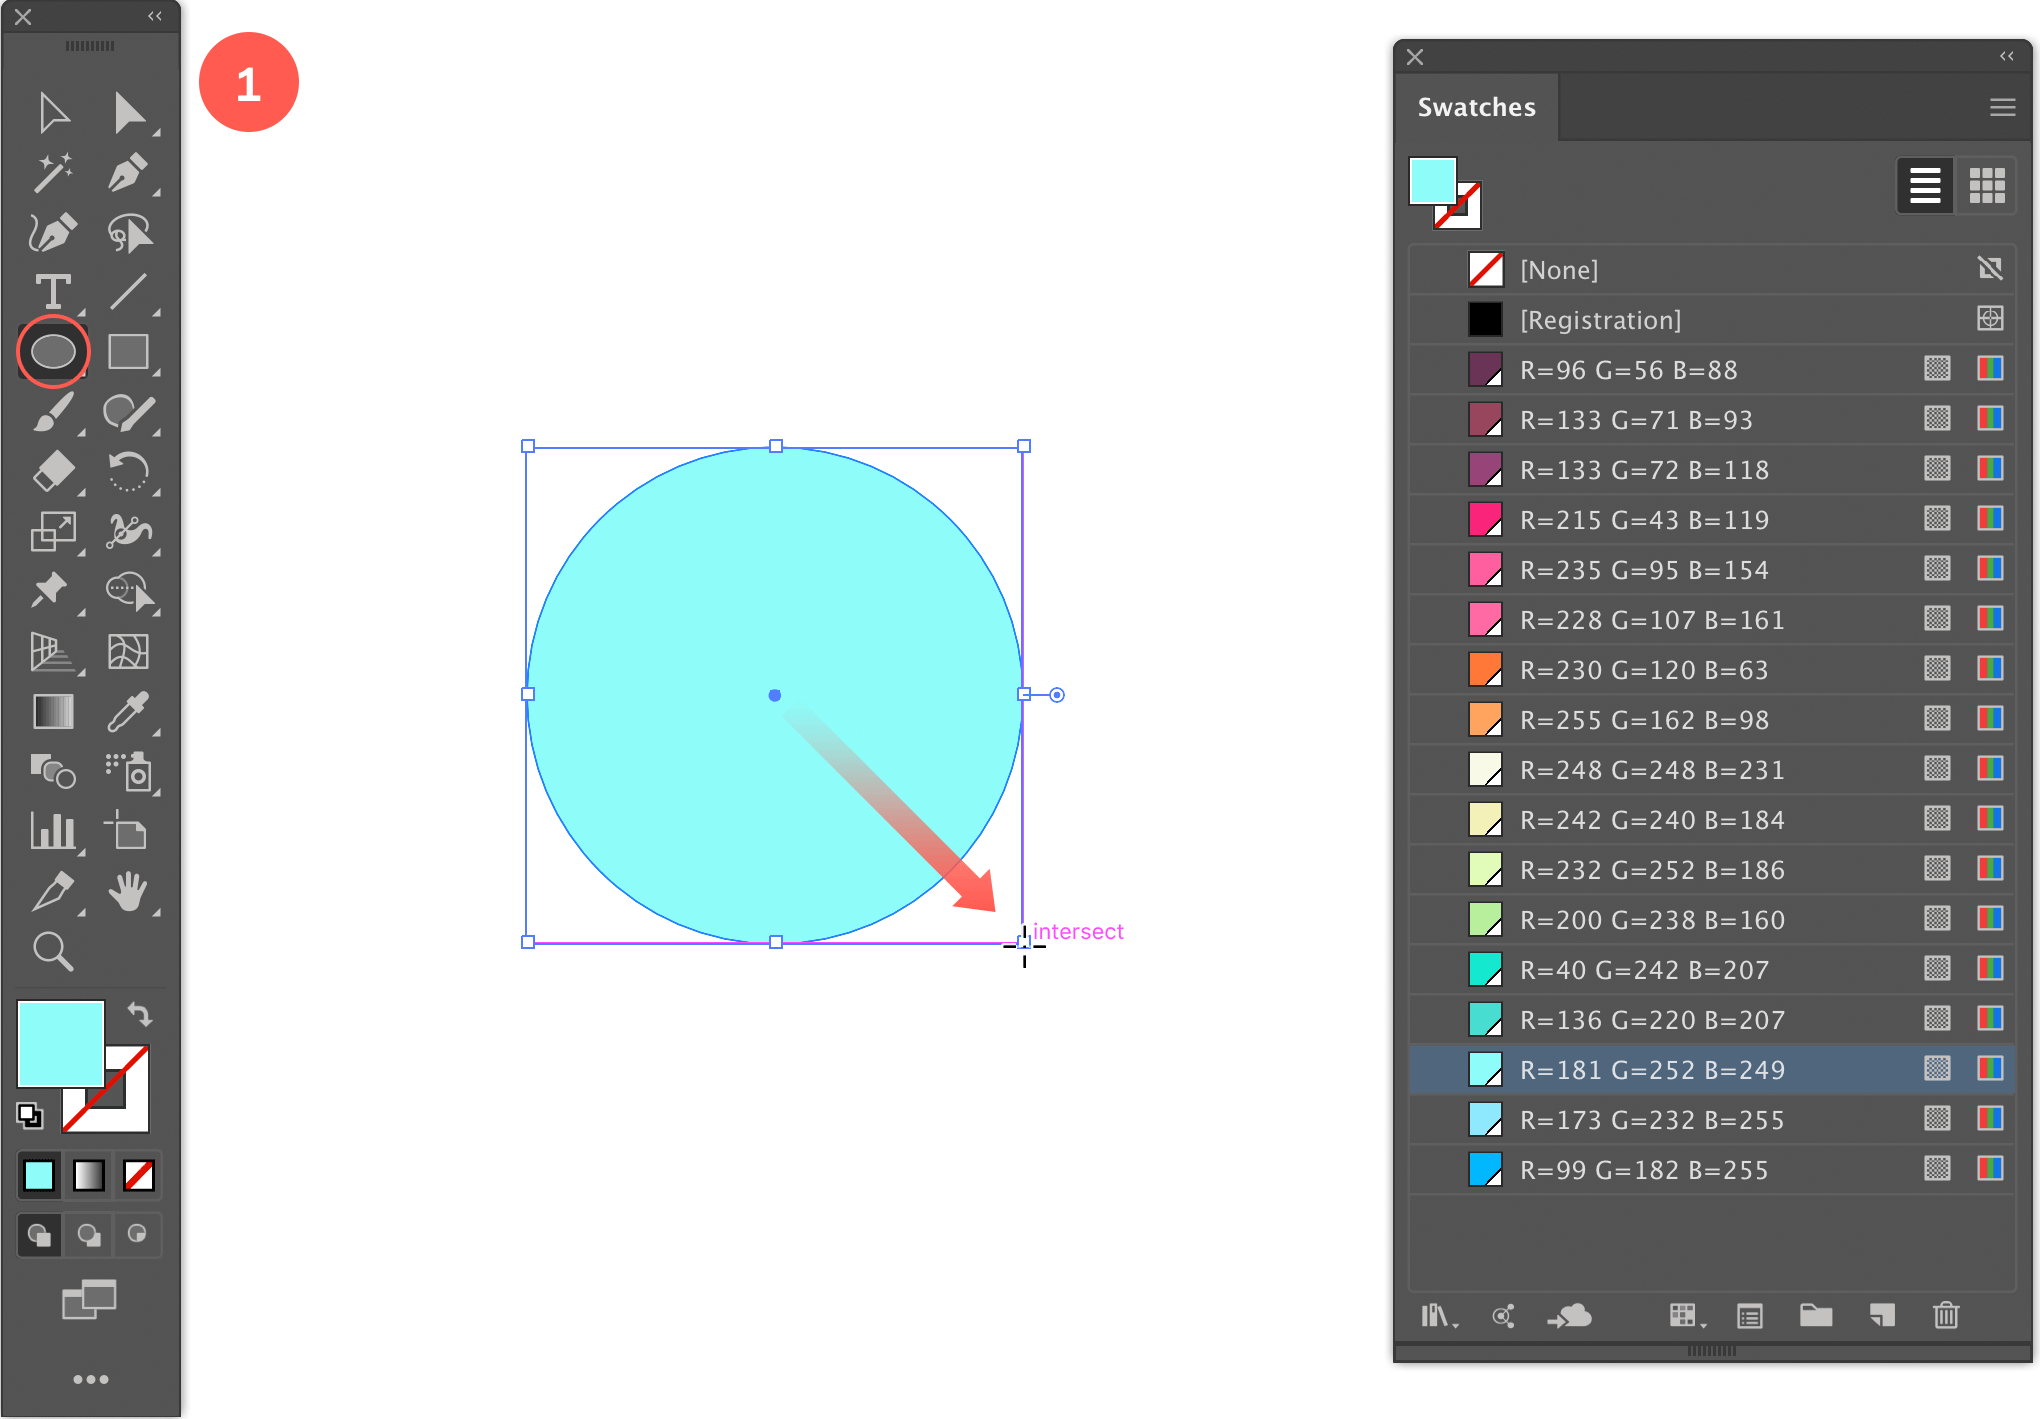
Drawing a circle
2. Duplicate the Circle & Recolor
Select the Selection tool (black arrow), select the circle, start dragging, and while you drag, hold down both the Shift and Alt/Option key to duplicate the circle perfectly horizontal. Move the duplicated circle somewhere to the position as shown in the example below. Make sure there is a nice overlapping area. Give the new circle a nice color that contrasts well with the first one.

Duplicate the circle. Apply another color. Duplicate the two circles
3. Duplicate Both Circles
Now select both circles and do the same again. Start dragging while holding down both the Shift and Alt/Option key to duplicate both circles perfectly horizontal. Make sure to move them to the position as shown in the image above. Make sure you have more or less the same overlapping area. Again, give the two new circles a suitable color. You could choose to go for a bright contrasting palette, but you could go for pastels and more subtle hues as well. We'll experiment more with the colors of these circles in a later phase.
4. Duplicate Again
Repeat the previous step by duplicating the last two new circles like you did before and give them a suitable color. You can repeat this to cover the length of your text. The longer the text, the more circles you need. You can of course also scale the group of circles.

Duplicate more circles and Horizontal Distribute Center them all.
5. Horizontal Distribute Center
To make sure the circles are horizontal evenly spaced, select all circles using the Selection tool, and go to the Align, Control or Properties panel, and choose the Horizontal Distribute Center option.
6. Experiment with Layer Modes and Colors
Try to achieve an interesting color effect in the overlapping areas by selecting the circles 1 by 1 and choose a certain Layer mode via the Transparency panel. In the above example I've chosen for Soft Light for the green circle which gives me this interesting pinkish color. Could be you don't end up with the color you want exactly, but it helps creating a surprising effect. If somehow you don't get a really satisfying result, no worries, you'll have more freedom and control in the next step...
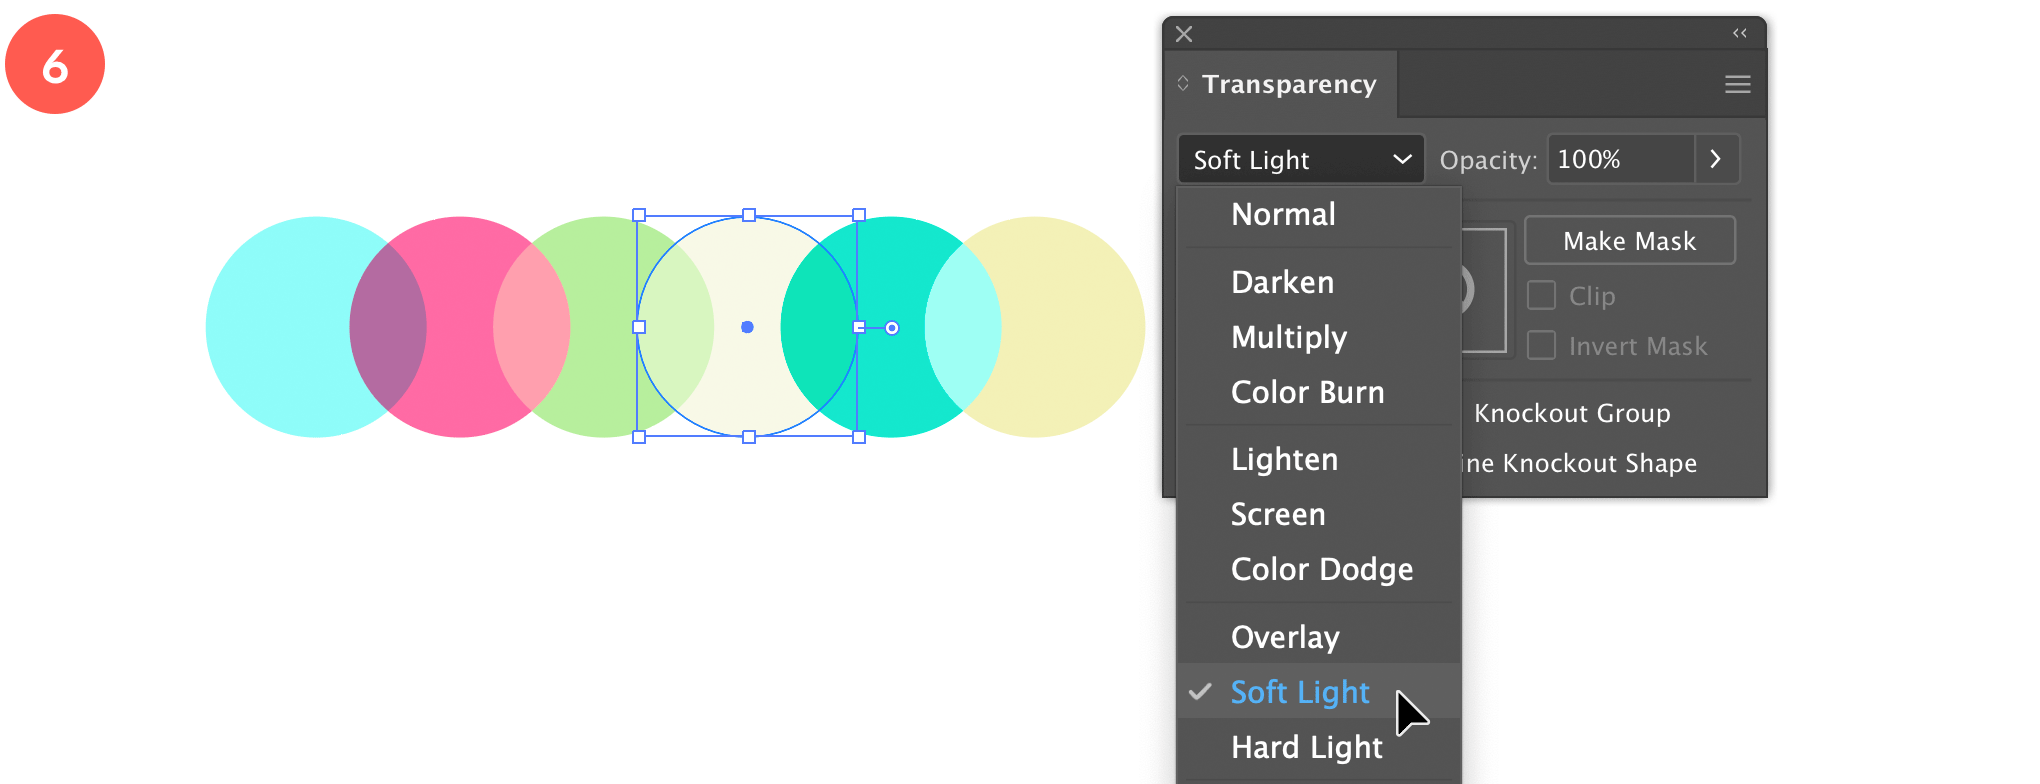
Experiment with transparency modes
7. Divide into Separate Objects
You could of course just skip the step of experimenting with different layer modes, and decide to have complete control over the hues and colors, but I think experimenting is vital. Not sure about you, but when I'm creating things I don't have an exact view in my mind of the end result. There is a basic idea and from there I experiment, and in a lot of cases (most of the time really) new ideas are born in the middle of my process. That's why I believe experimenting is so important, it creates new ideas for you. So after you've tried a couple of things in the previous step, select all circles (using the Selection tool) and select the Divide option from the Pathfinder panel. Now you have each shape as a separate object ready to select and alter its color.
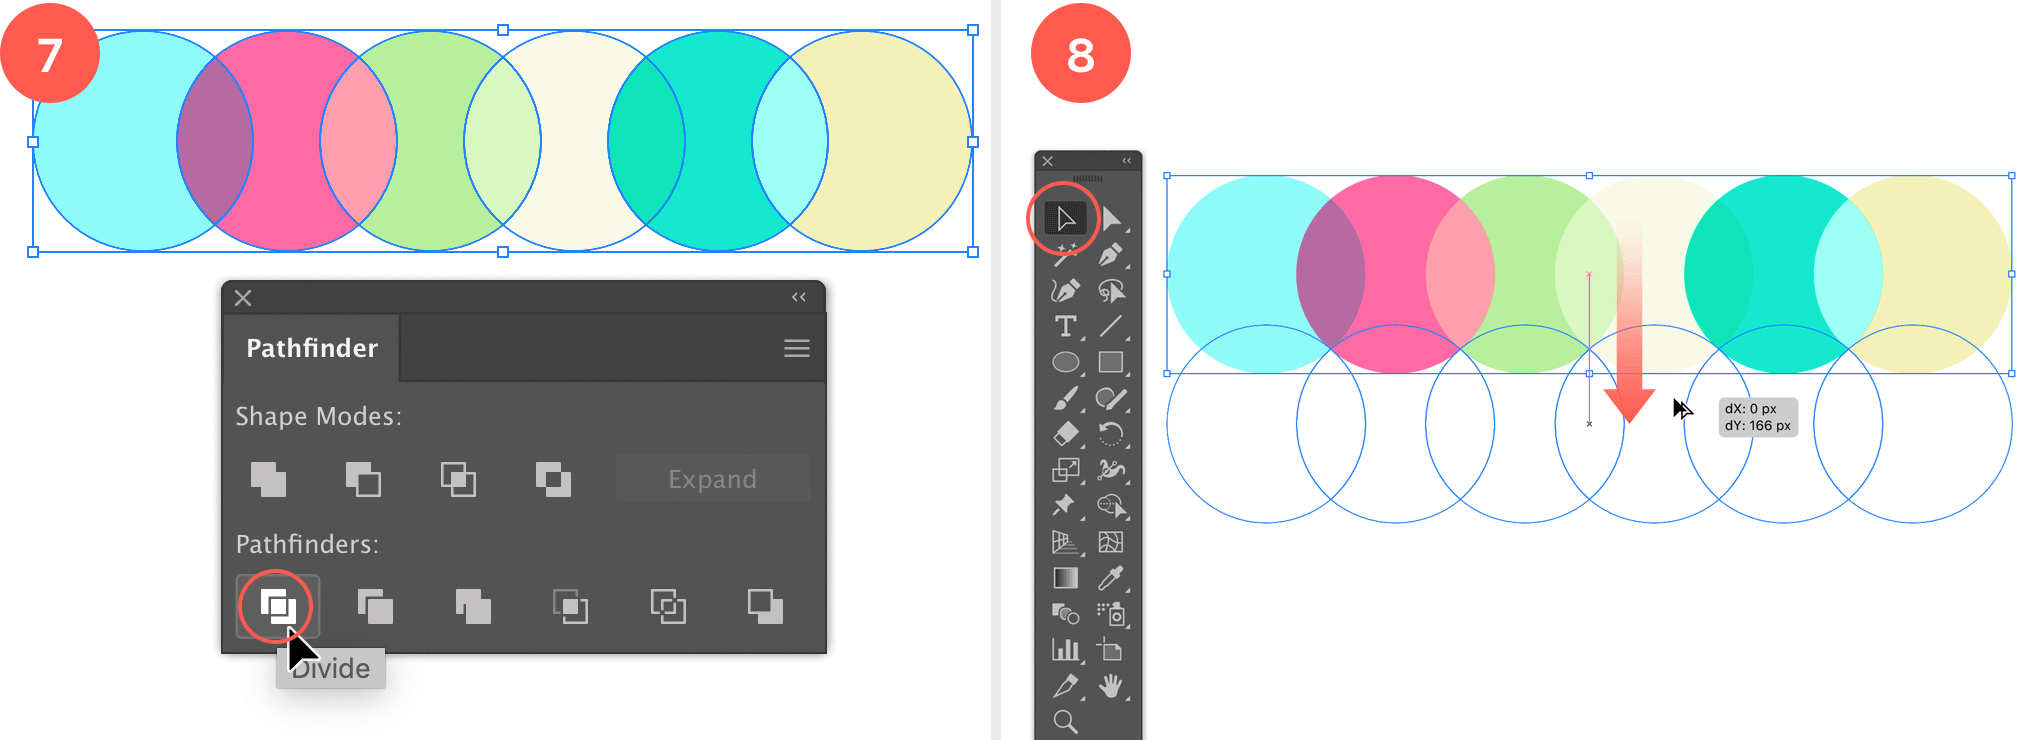
Divide the circles into separate objects and duplicate all the circles while moving them vertically down.
8. Duplicate all Circles
It might take a while till you get the colors you like, but if you think you're there, select all circles (using the Selection tool), and duplicate them by moving them perfectly vertical, holding down the Shift + Alt/Option key. Move them to the exact location as shown in the image above. It could help if you turn on Smart Guides, by hitting Cmd/Ctrl + U.
9. Experiment with Colors
Again, experiment with colors and layer modes. In my example I've tried to combine very vibrant colors, and I've also used Multiply as layer mode for the bottom row of circles. You could also divide things further to have more control over the new overlapping area between both rows of circles, but I chose not to, as it's giving me the effect I like. Make sure to take your time for this step and try out a lot of other combinations.
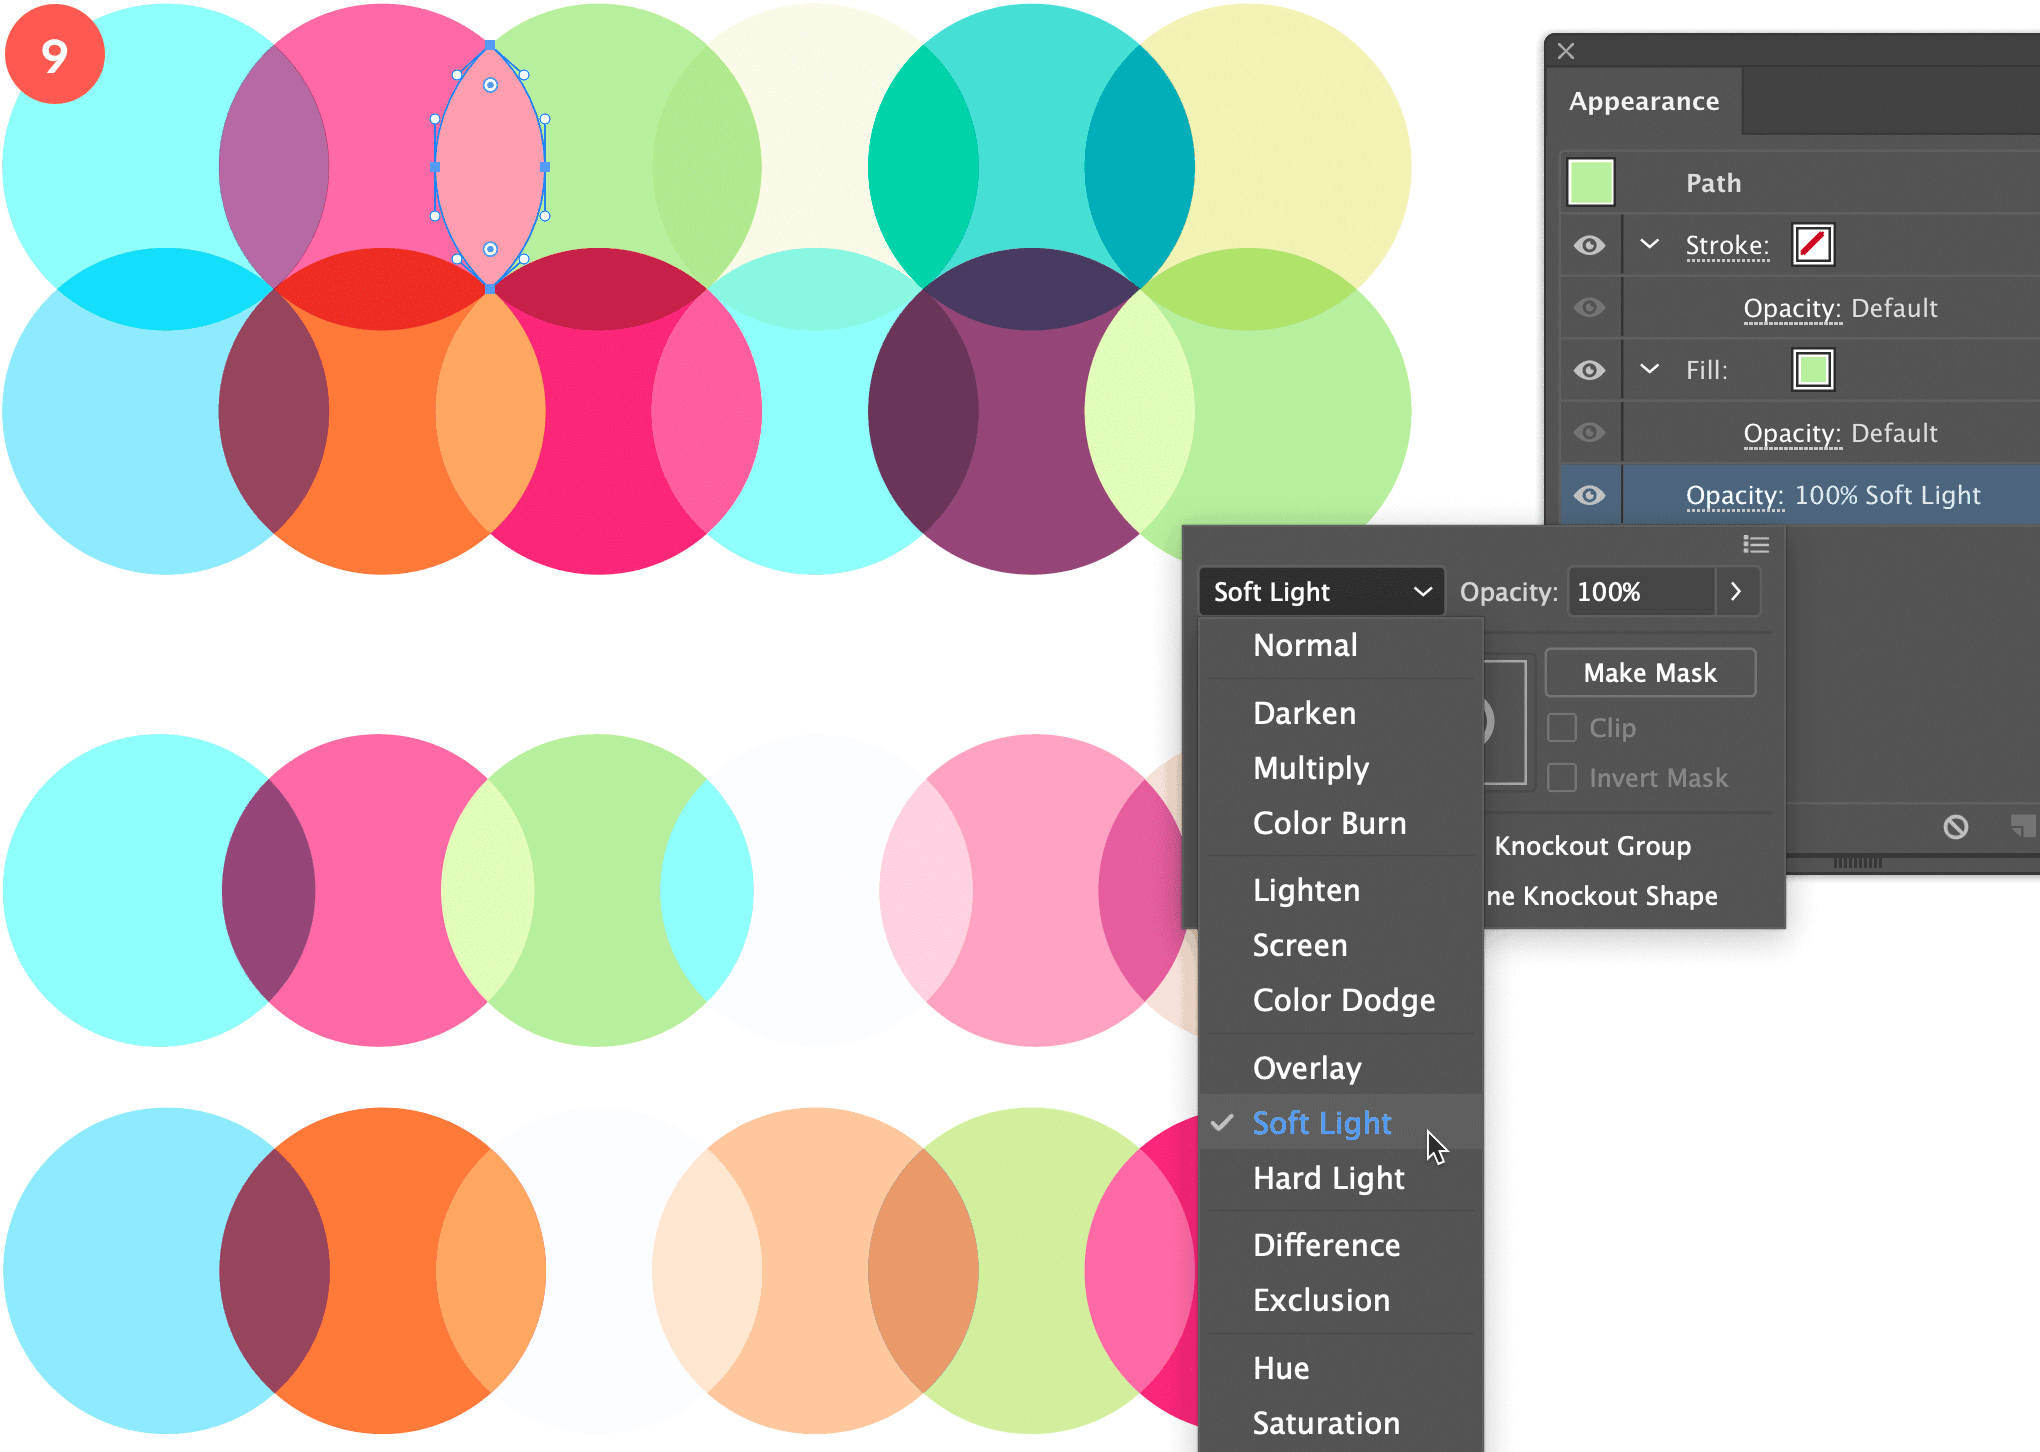
Experiment with colors. This is the most crucial part of the tutorial to end up with a beautiful result.
10. Add the Text Clipping Mask
We're almost there now! Choosing the colors for the pattern is the hardest part, what comes next is plain easy. First, select all circles (using the Selection tool) and group them, by going to Object > Group (Cmd/Ctrl + G). Now select the Type tool, and type the text you want to use as a mask. In my example I've just typed the first word that came to my mind, MASK. Now select the Selection tool and select both your text and the circles pattern object. Go to Object > Clipping Mask > Make (Cmd/Ctrl + 7). Your text should now be filled with your pattern background. The great thing about this is that you can still edit your text by typing something different or by choosing another typeface.
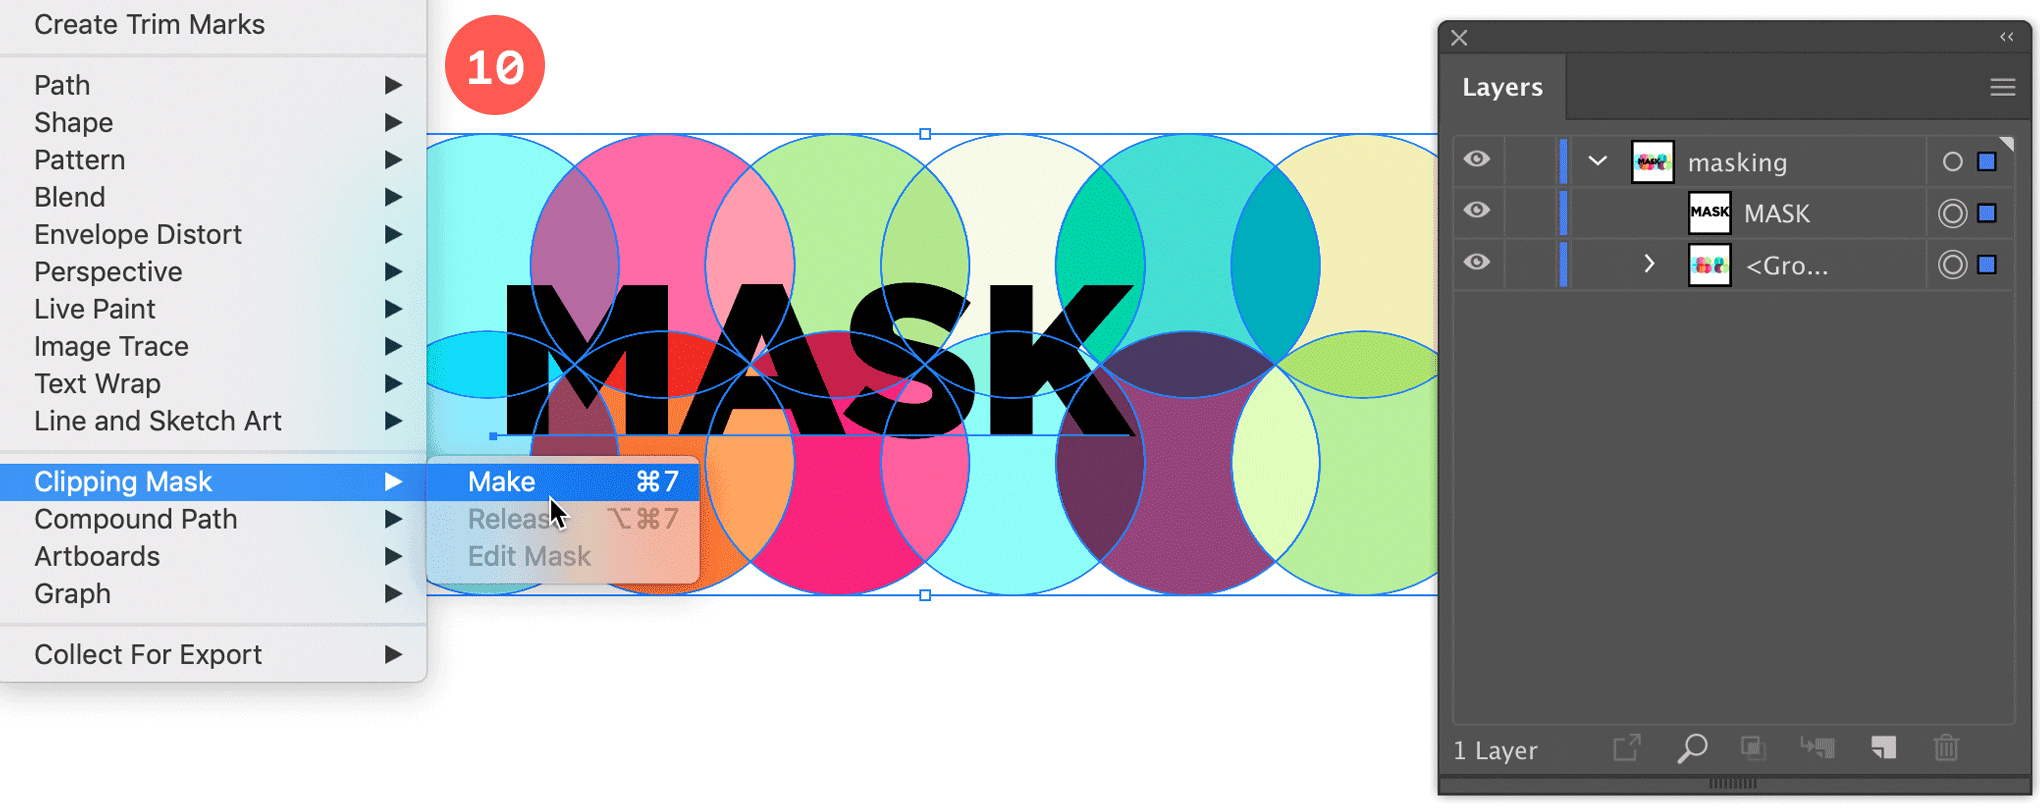
Type your text on top of the circles pattern.
11. Tweak the Size or Position of the Pattern
The other flexibility you have is that you can also move and tweak your pattern if needed. Maybe you want to move the pattern up or down, or you want to scale the circles a bit. That's also no problem. First you need to go into Isolation mode. To do this, just double click the text using the Selection tool. You should see a bar appearing at the top of your document, showing some sort of path (Layer 1 | Group). In your Layer panel you'll see that you are in isolation mode. Click the arrow next to the word group to open this collapsed item. From there you can select the pattern by clicking the circle icon to the right. Now you might also consider hiding the selection while working on this as it might be a little disturbing. To do this go to View > Hide Edges, or simply hit Cmd/Ctrl + H to switch between hiding and showing.
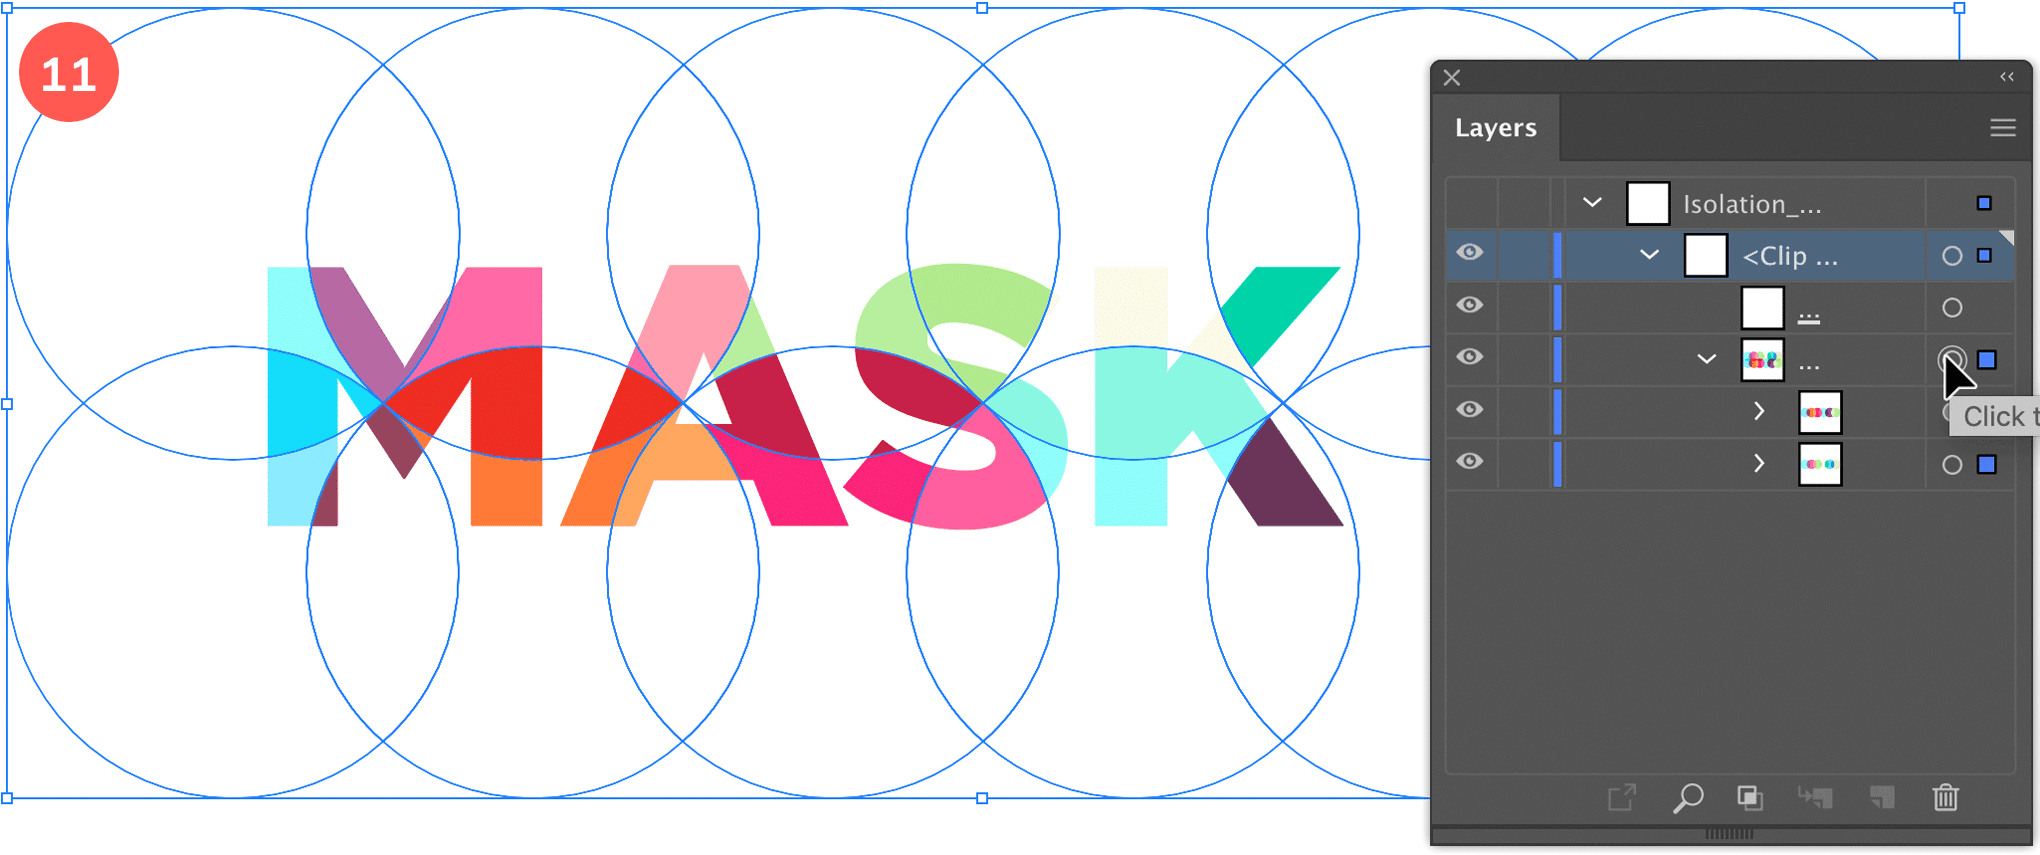
Tweak the position or size of the pattern.
12. Turn on Isolate Blending
When you want to use this colorful text on a colored background like I showed here in my header of the tutorial, you need to select your object and make sure to check Isolate Blending in the Transparency panel. That's it! Hope you've enjoyed this one, and I also hope it'll give you inspiration to some new ideas, such as different variations of patterns, or color effects. The possibilities are really endless.

The end result on a dark background using the Isolate Blending featue.


