Create a Hexagon Pattern in Adobe Illustrator
ALA The Shining
Article written on Wednesday, 20 Mar 2019
- Requirements
- Adobe Illustrator CS6
- Level
- intermediate
- Download
- Download Ai template file
Back in 2010, I wrote this same tutorial, but back then Adobe Illustrator didn't have a Pattern 'tool'. The possibilities to create patterns was way more limited. The option I suggested back then was to create a Symbol from the pattern fragment and then use instances of this symbol to cover the entire space. Today we have Pattern Mode to play and experiment with. It's one of the Illustrator's features of I'm rather fond of.
Illustrator's Pattern Tool
Since version CS6 we have the power of the Pattern Tool to achieve the same result. Let's start by creating the object we need to create this pattern.
Create the Pattern Fragment
Before getting started, download the Adobe Illustrator template that I've prepared for you. This document (in RGB mode) contains an 'empty' canvas with the 3 color swatches in the Swatch panel.
1. Select the Polygon Tool
Open the template document in Illustrator, and select the Polygon tool. It's also recommend to have Smart Guides turned on. Go to View > Smart Guides.
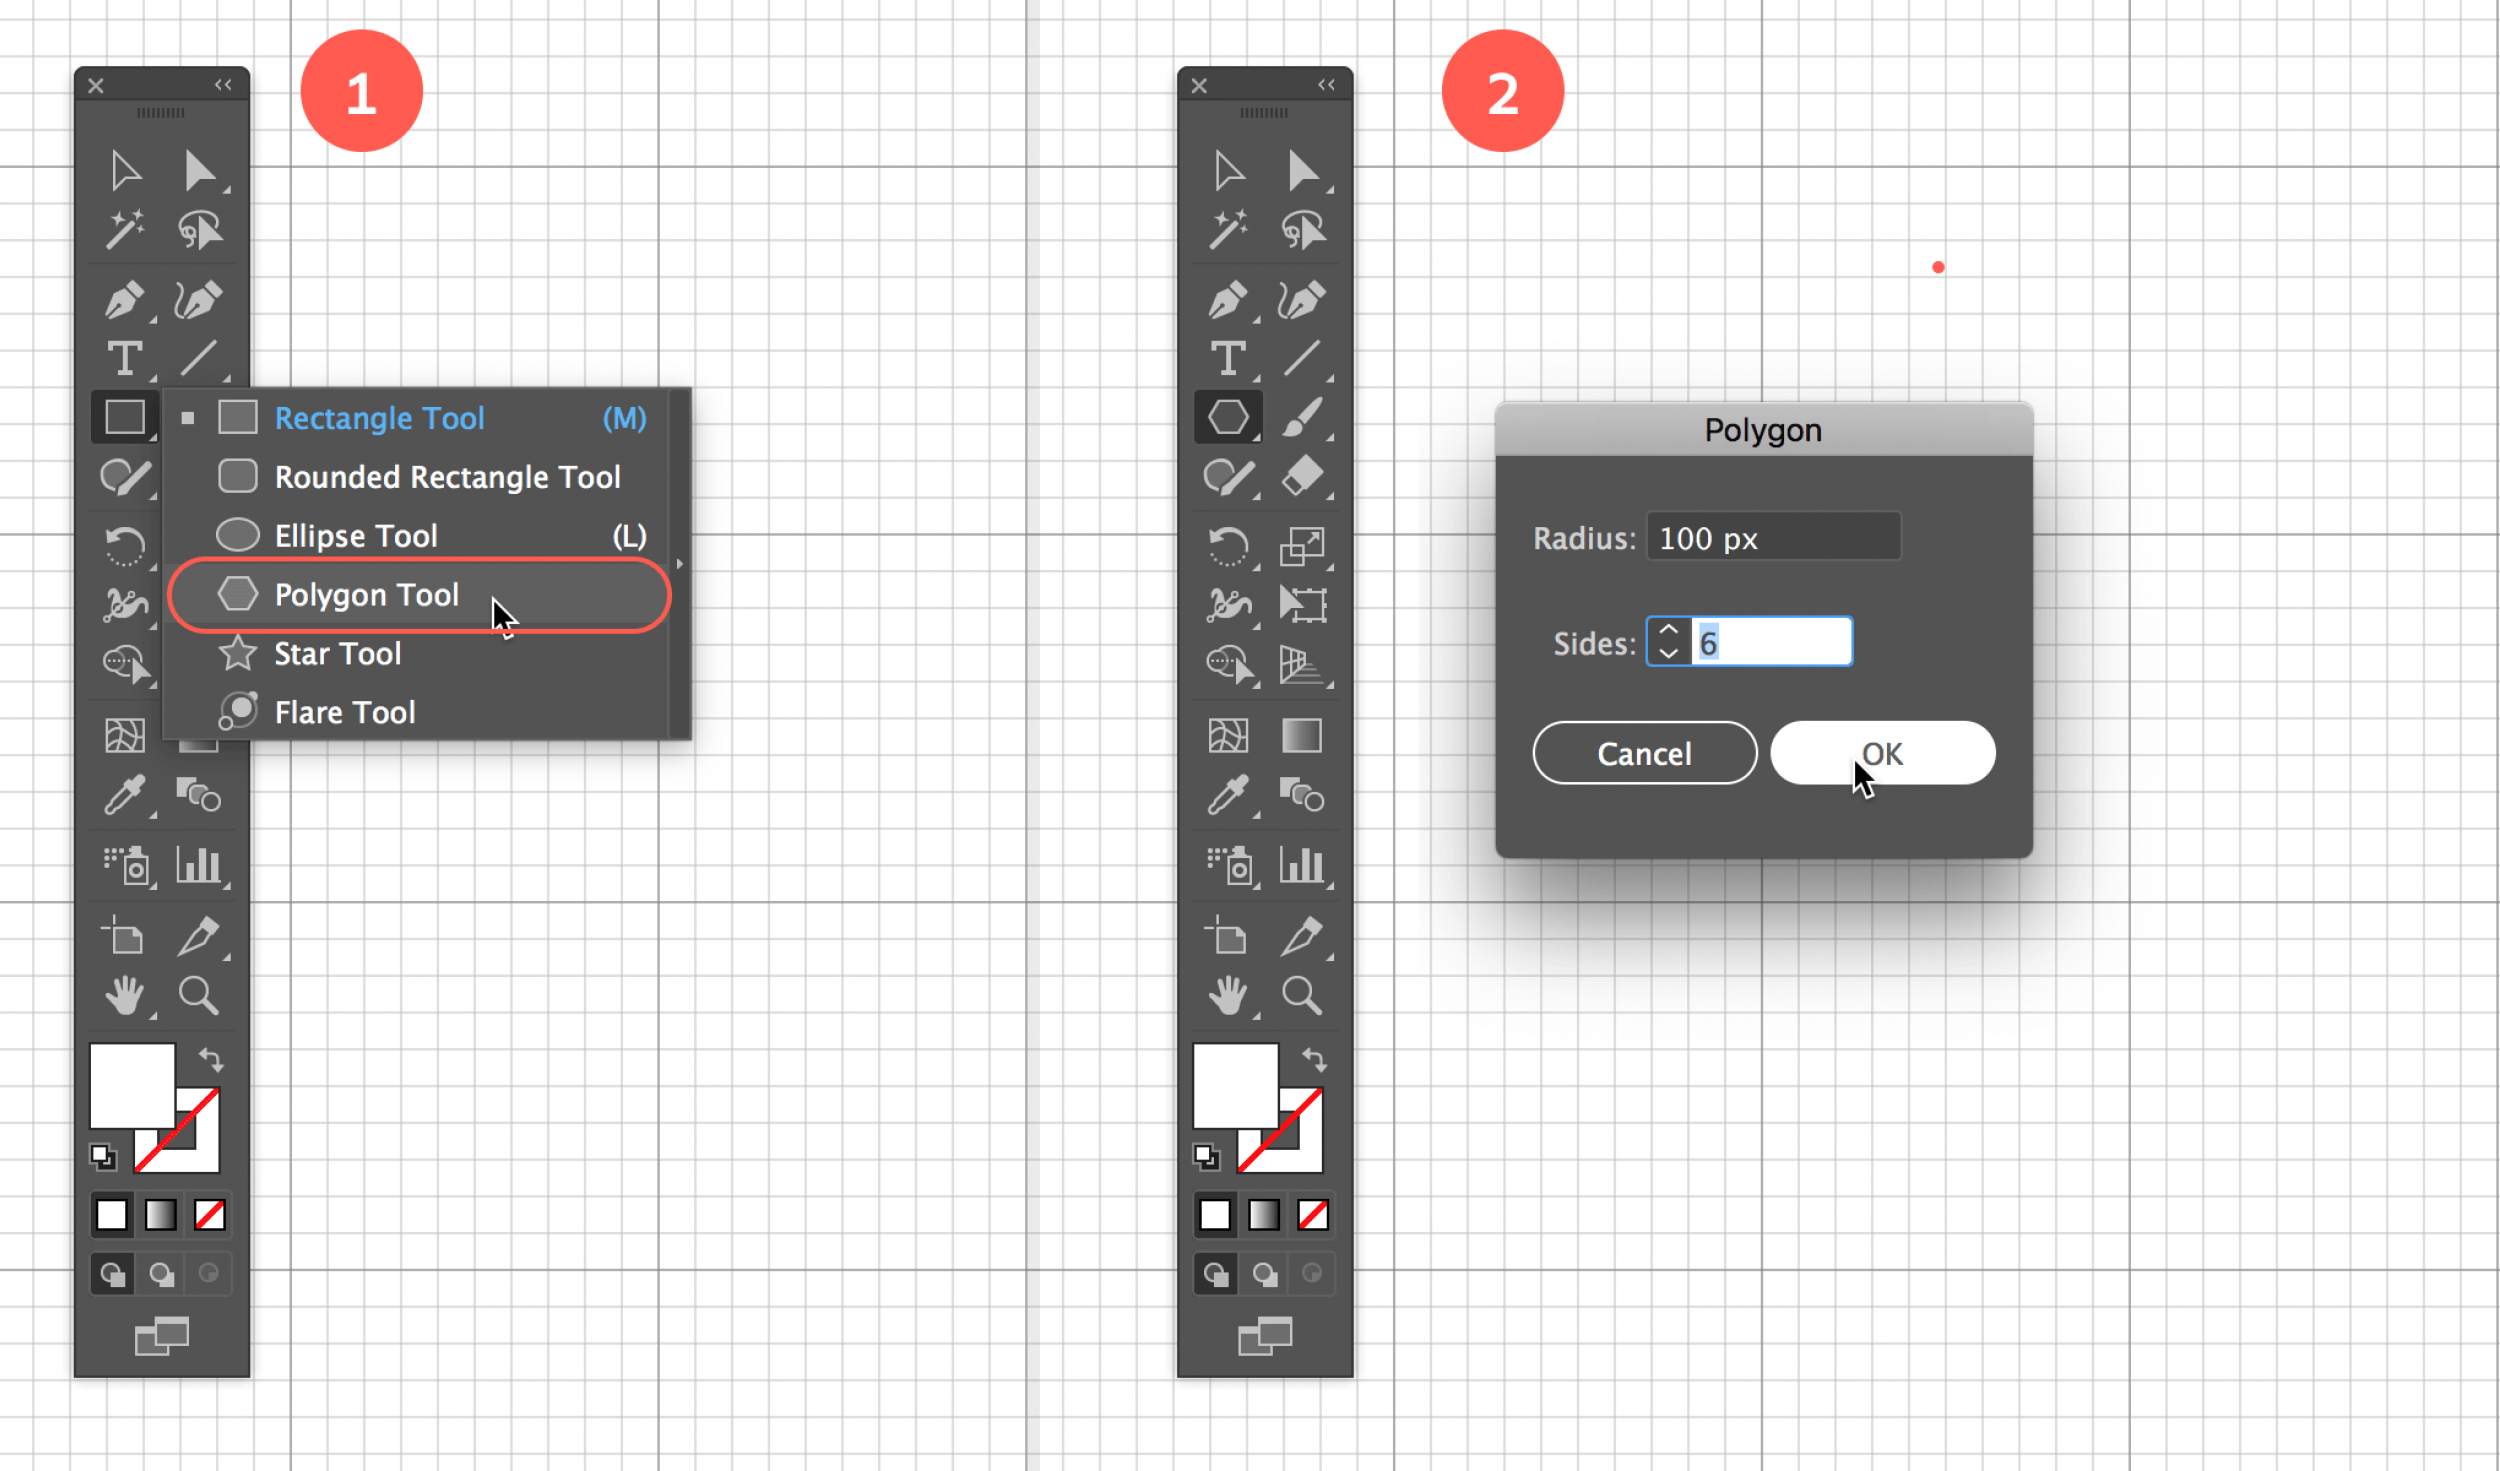
2. Create a Hexagon
Click somewhere on the canvas, and enter in the box that appears 100 px as radius value, and 6 for the amount of sides.
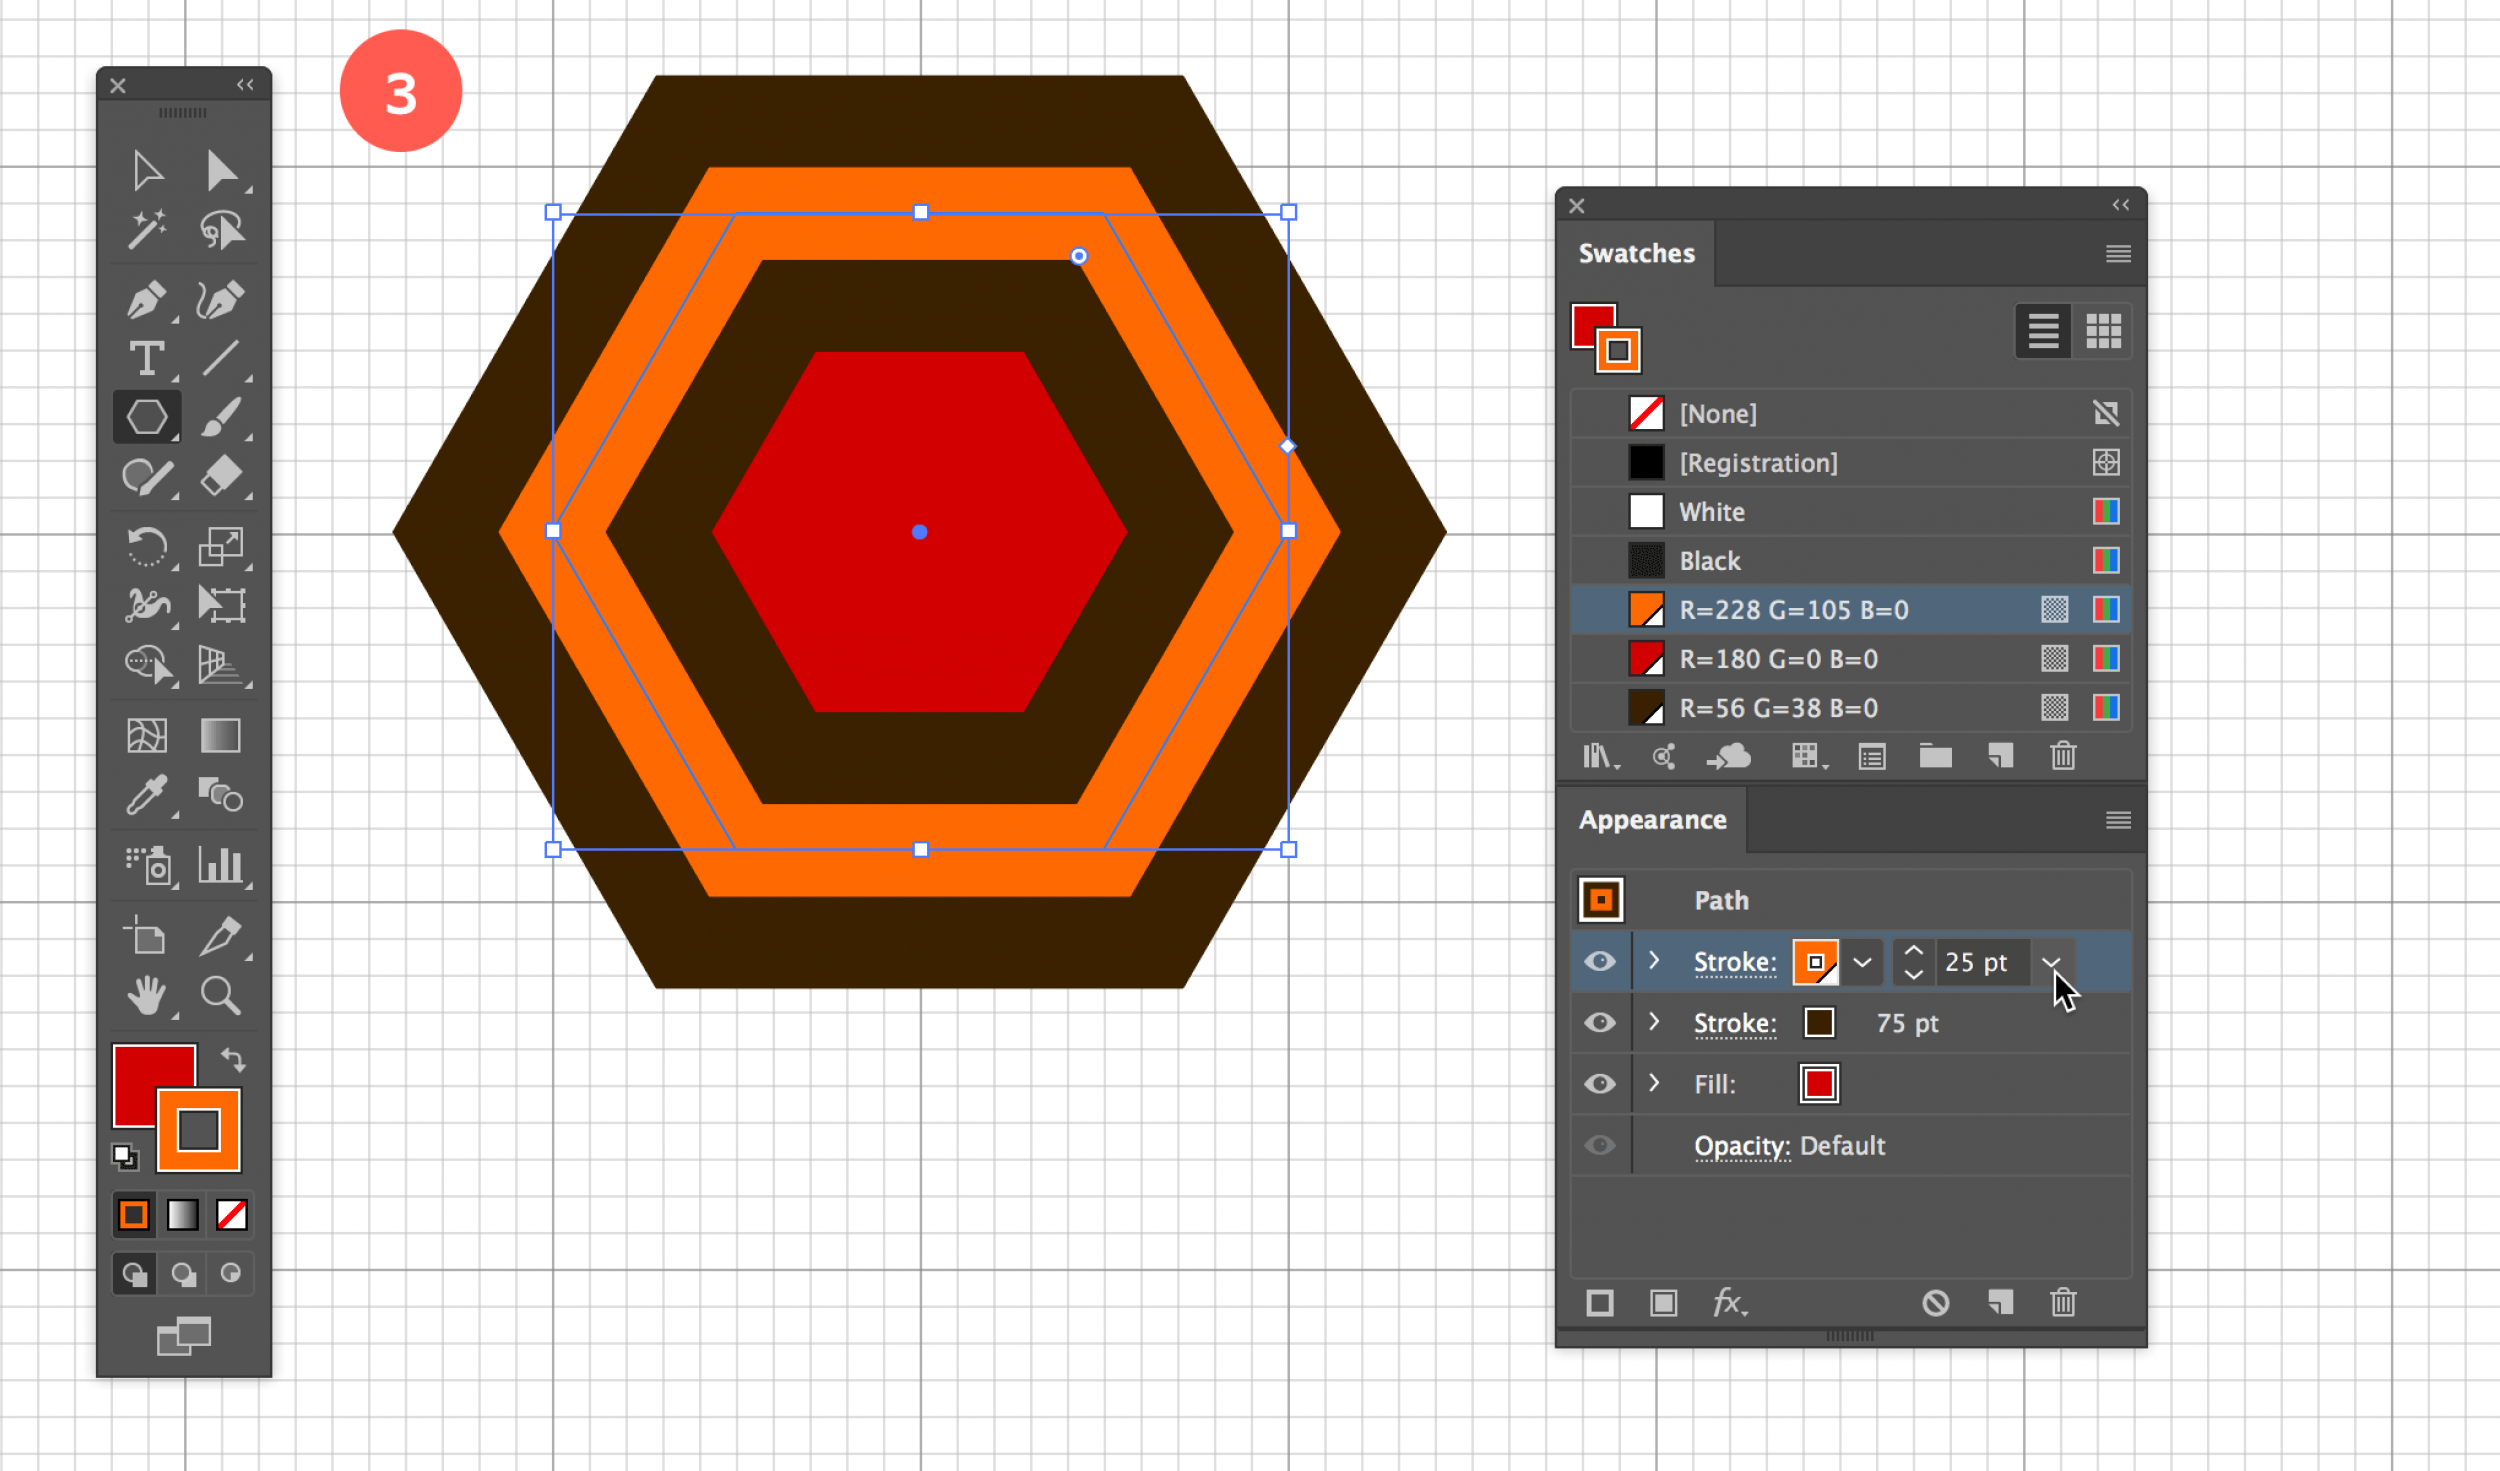
3. Add Fill & Stroke
Give the hexagon the red fill and a brown stroke. Go to the Appearance panel (Window > Appearance), and change the stroke width to 75 px. Then select this stroke layer in the Appearance panel and click the little document icon button at the bottom of the panel to duplicate this stroke layer on top of the current one. Change the color to orange and give it a 25 px width.
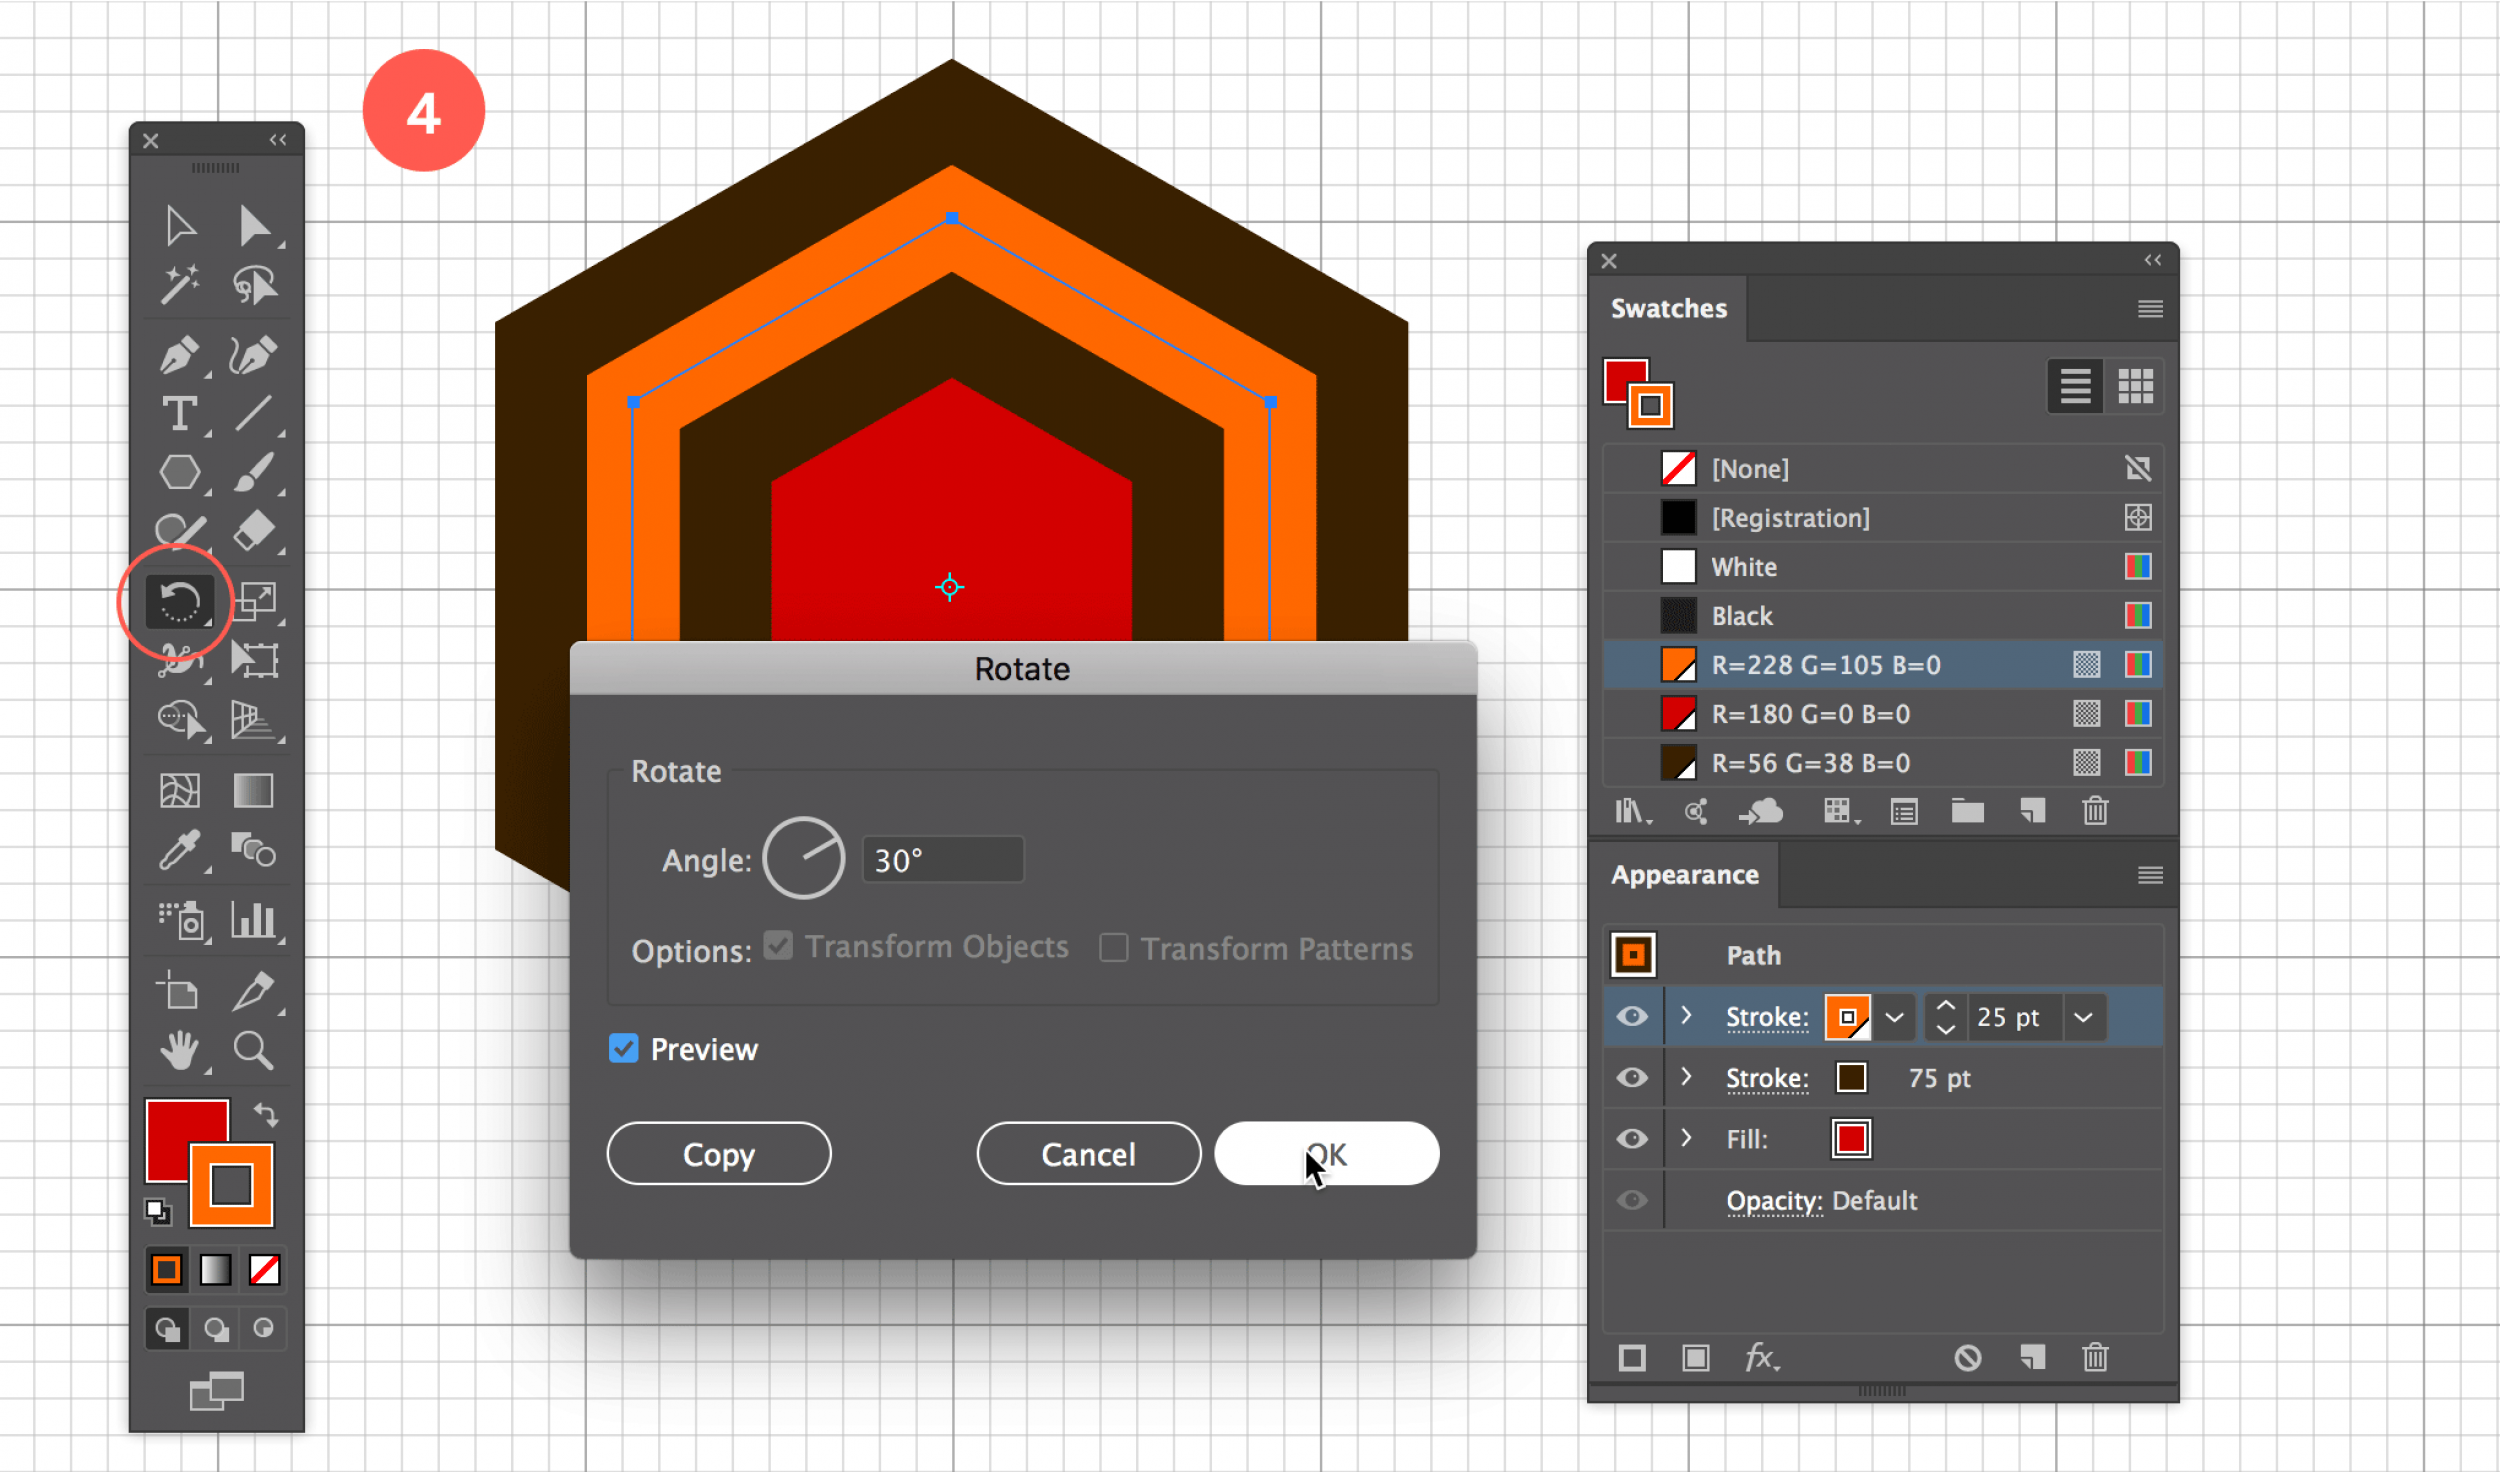
4. Rotate by 30°
With the hexagon still selected, go to the Tools panel and select the Rotate tool. In case this tool isn't visible, click and hold down on the reflect tool. Hold down the Option/Alt key and click in the center of the hexagon. Enter 30° and click OK.
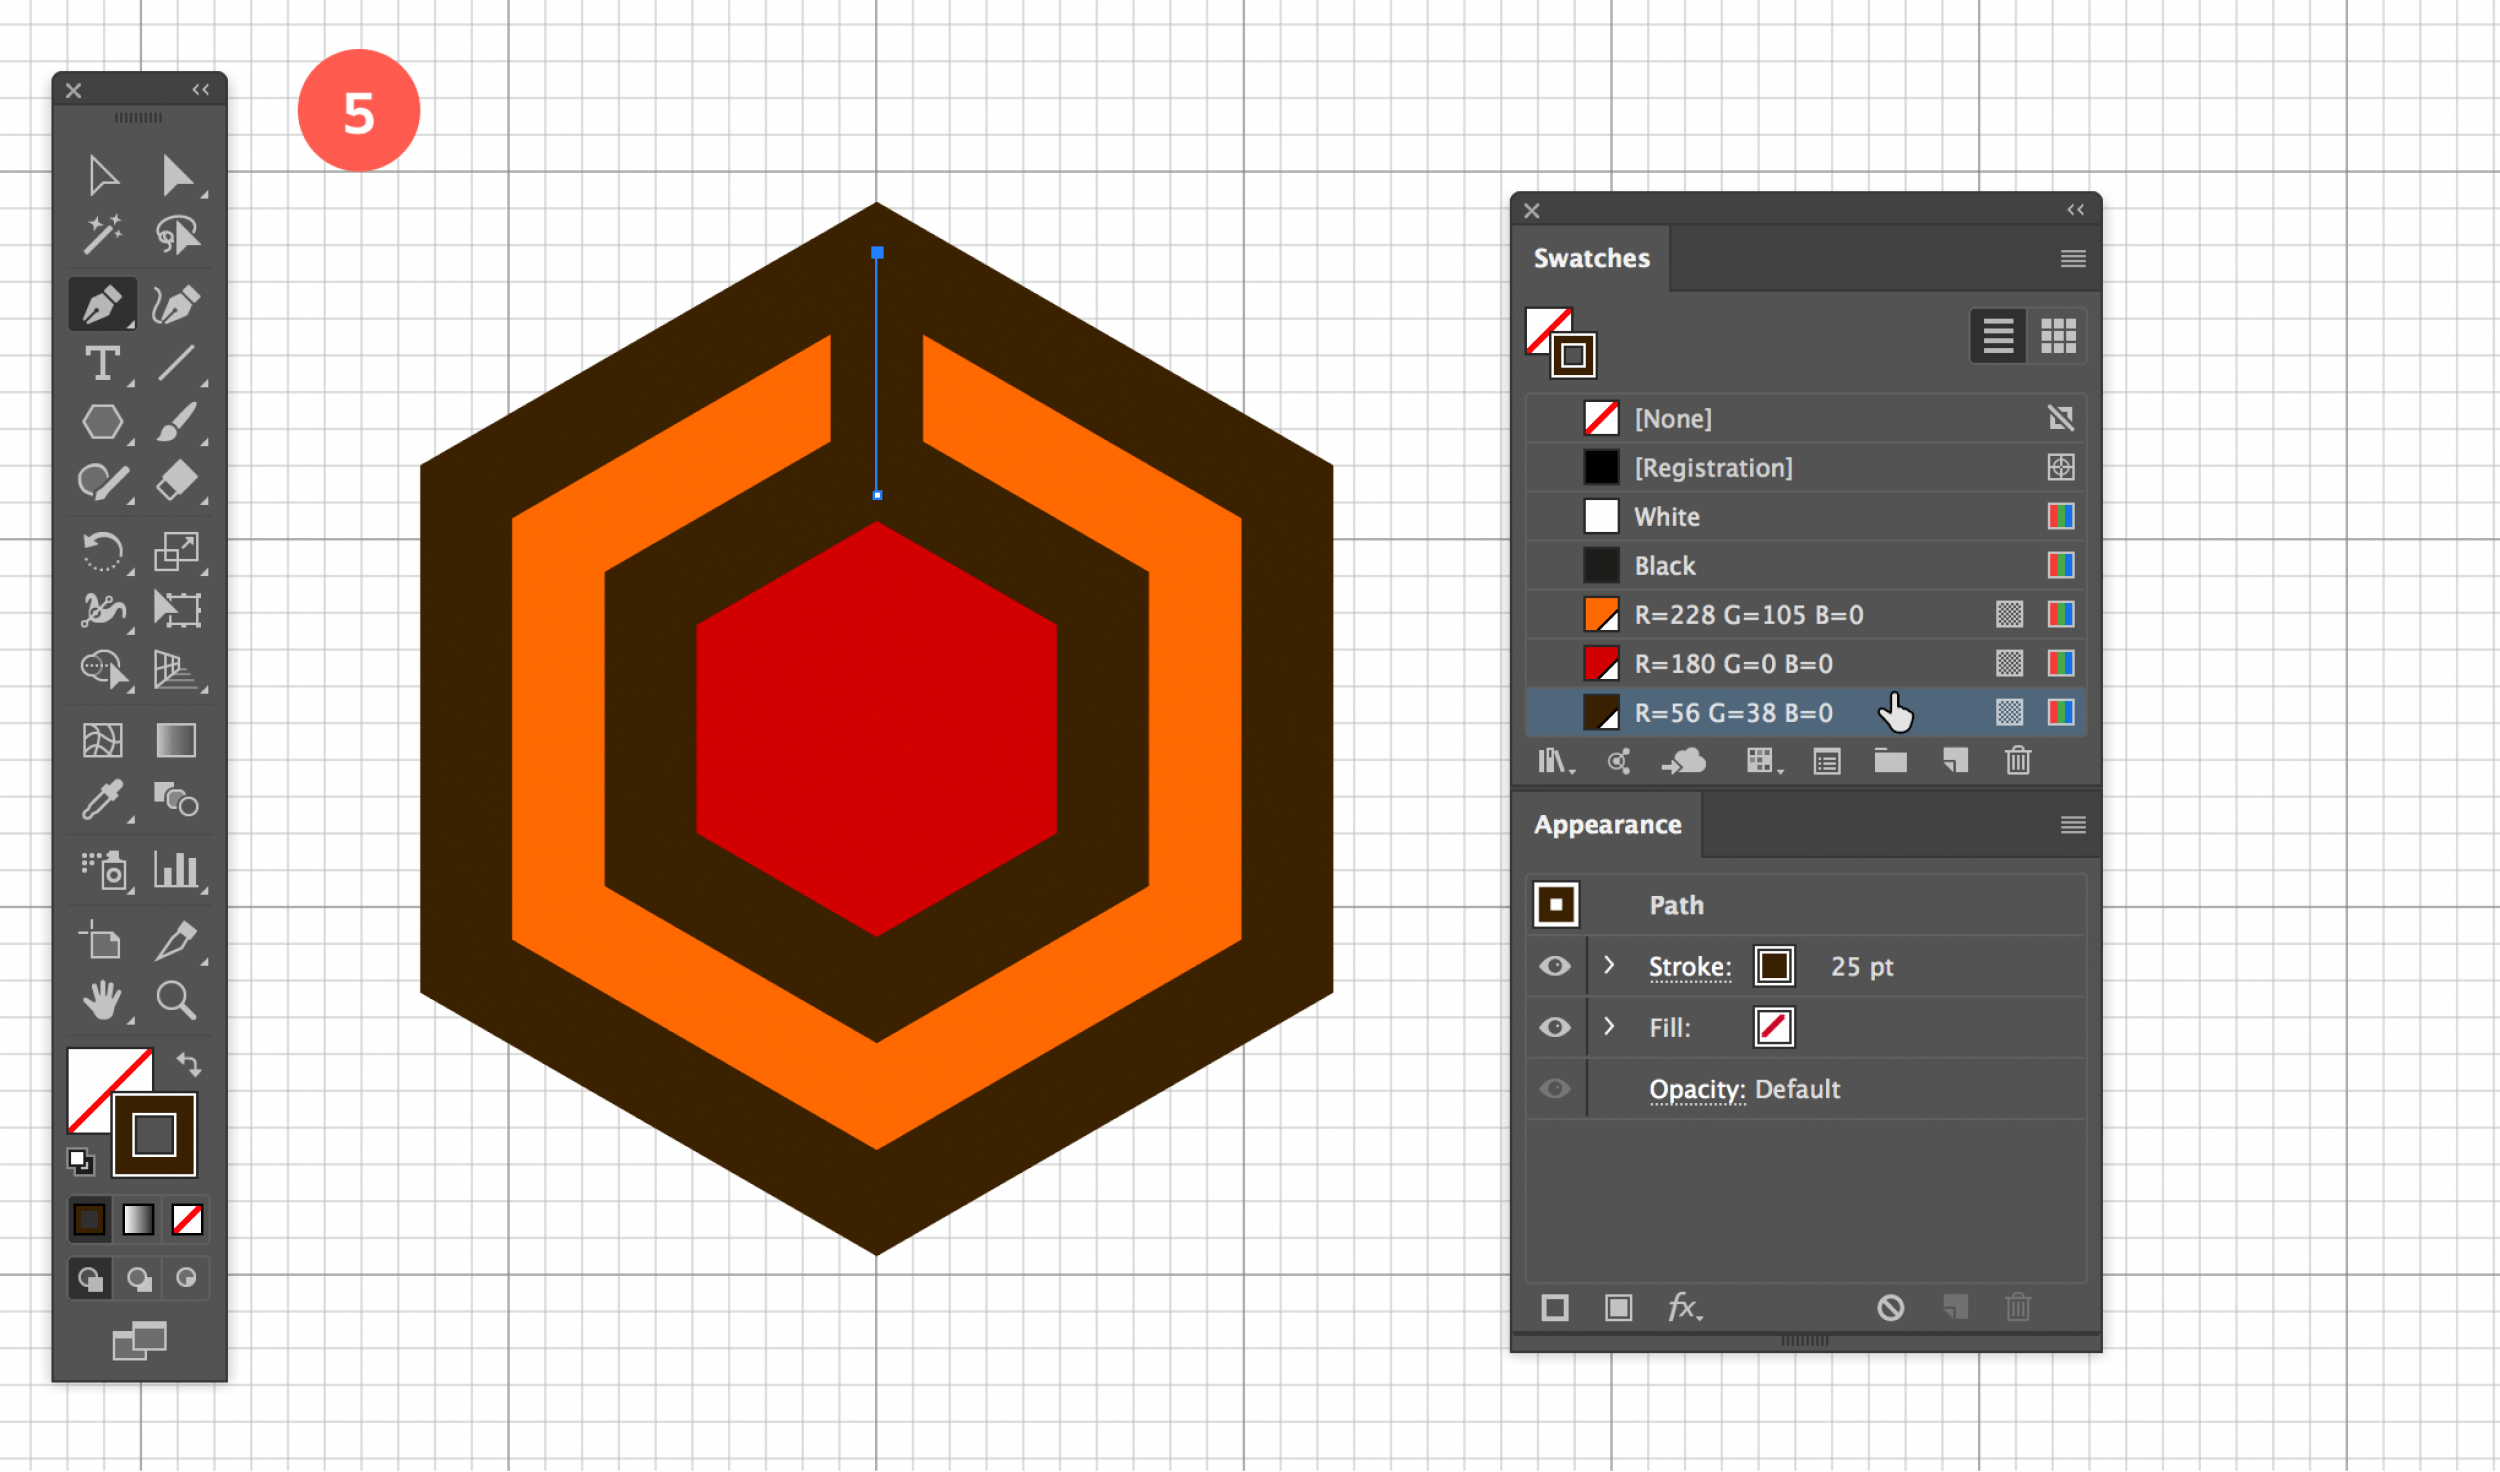
5. Add Vertical Line
Select the Pen tool from the tools panel and draw a short vertical line to connect the 2 brown top corners of the hexagon, as shown in the image below. With Smart Guides turned on you should get indications of the begin and end point of the line. Give the line a brown stroke width of 25 px. Make sure to remove the red fill and orange stroke style from the appearance panel if needed (select the layer and click the trash icon at the bottom).
6. Expand Appearance
Select the polygon and the vertical line and to go to Object > Expand Appearance.
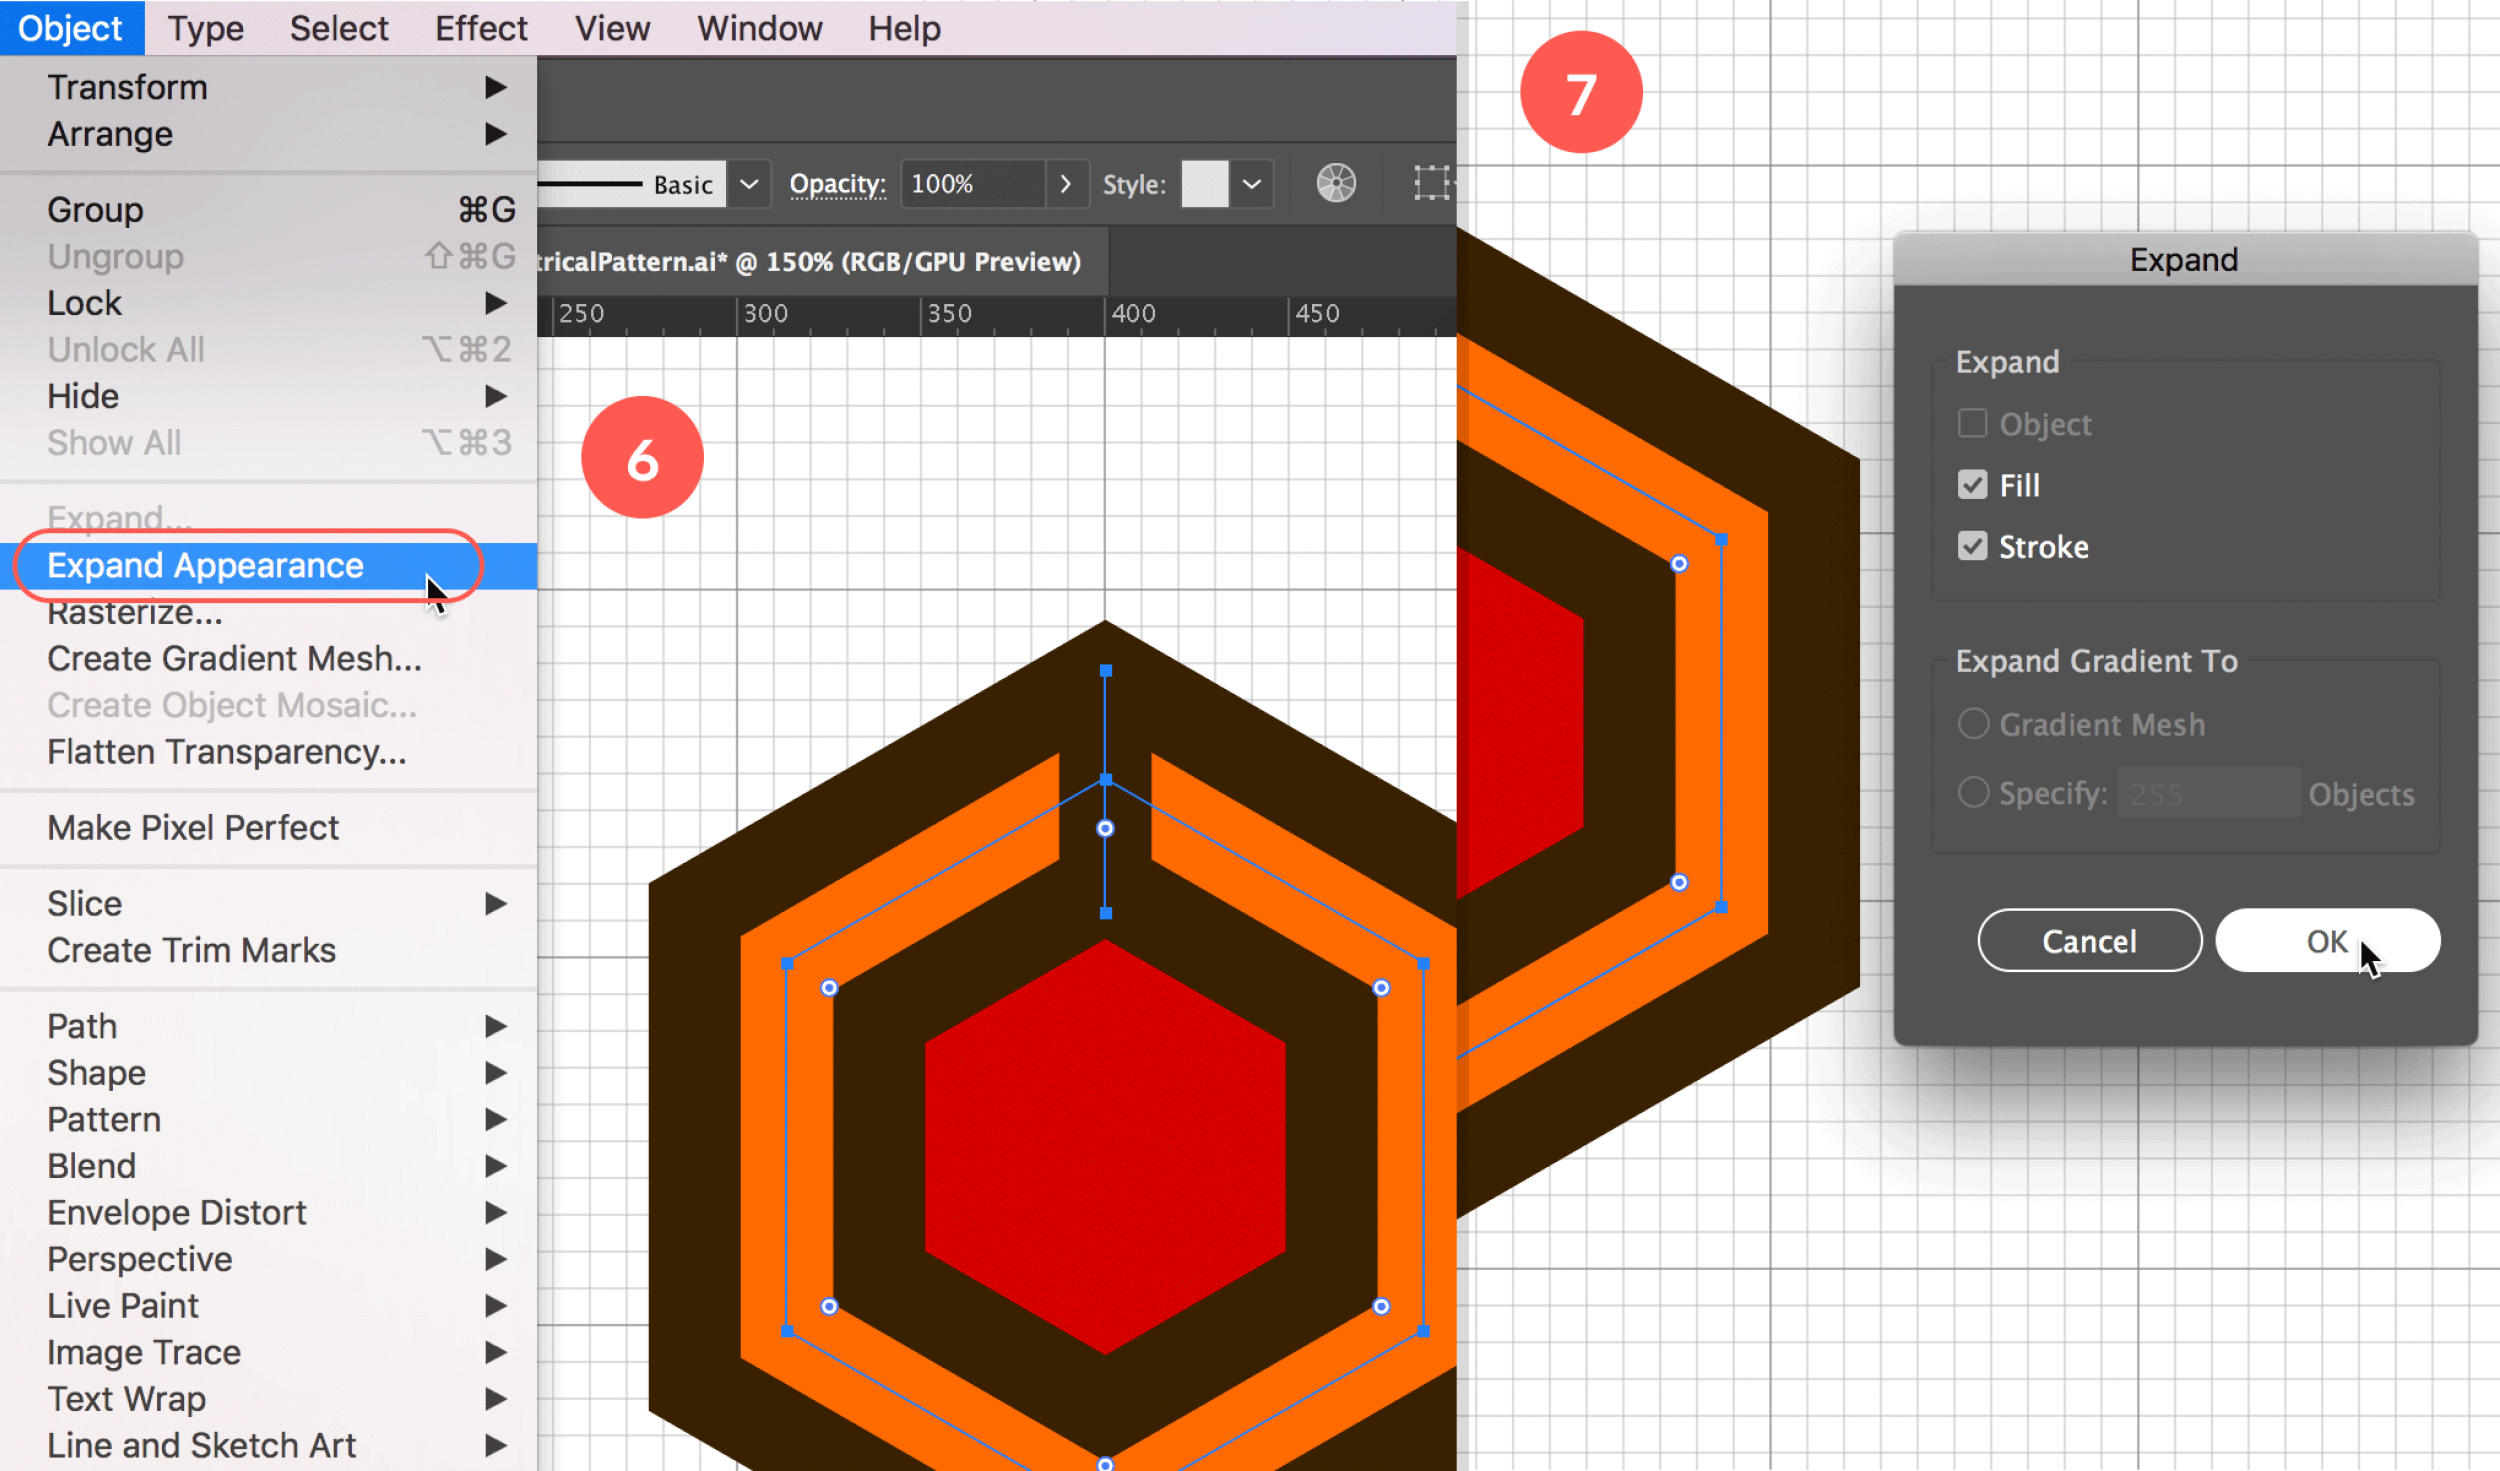
7. Expand
Now go to Object > Expand… Leave Fill and Stroke checked and click OK.
8. Add Anchor Point
Select the Pen tool from the Tools panel and click on the path segment of the outer brown hexagon as shown below to add an anchor point on the path. Make sure you see the plus sign on the Pen cursor first once you hover the path segment before you click the path segment.
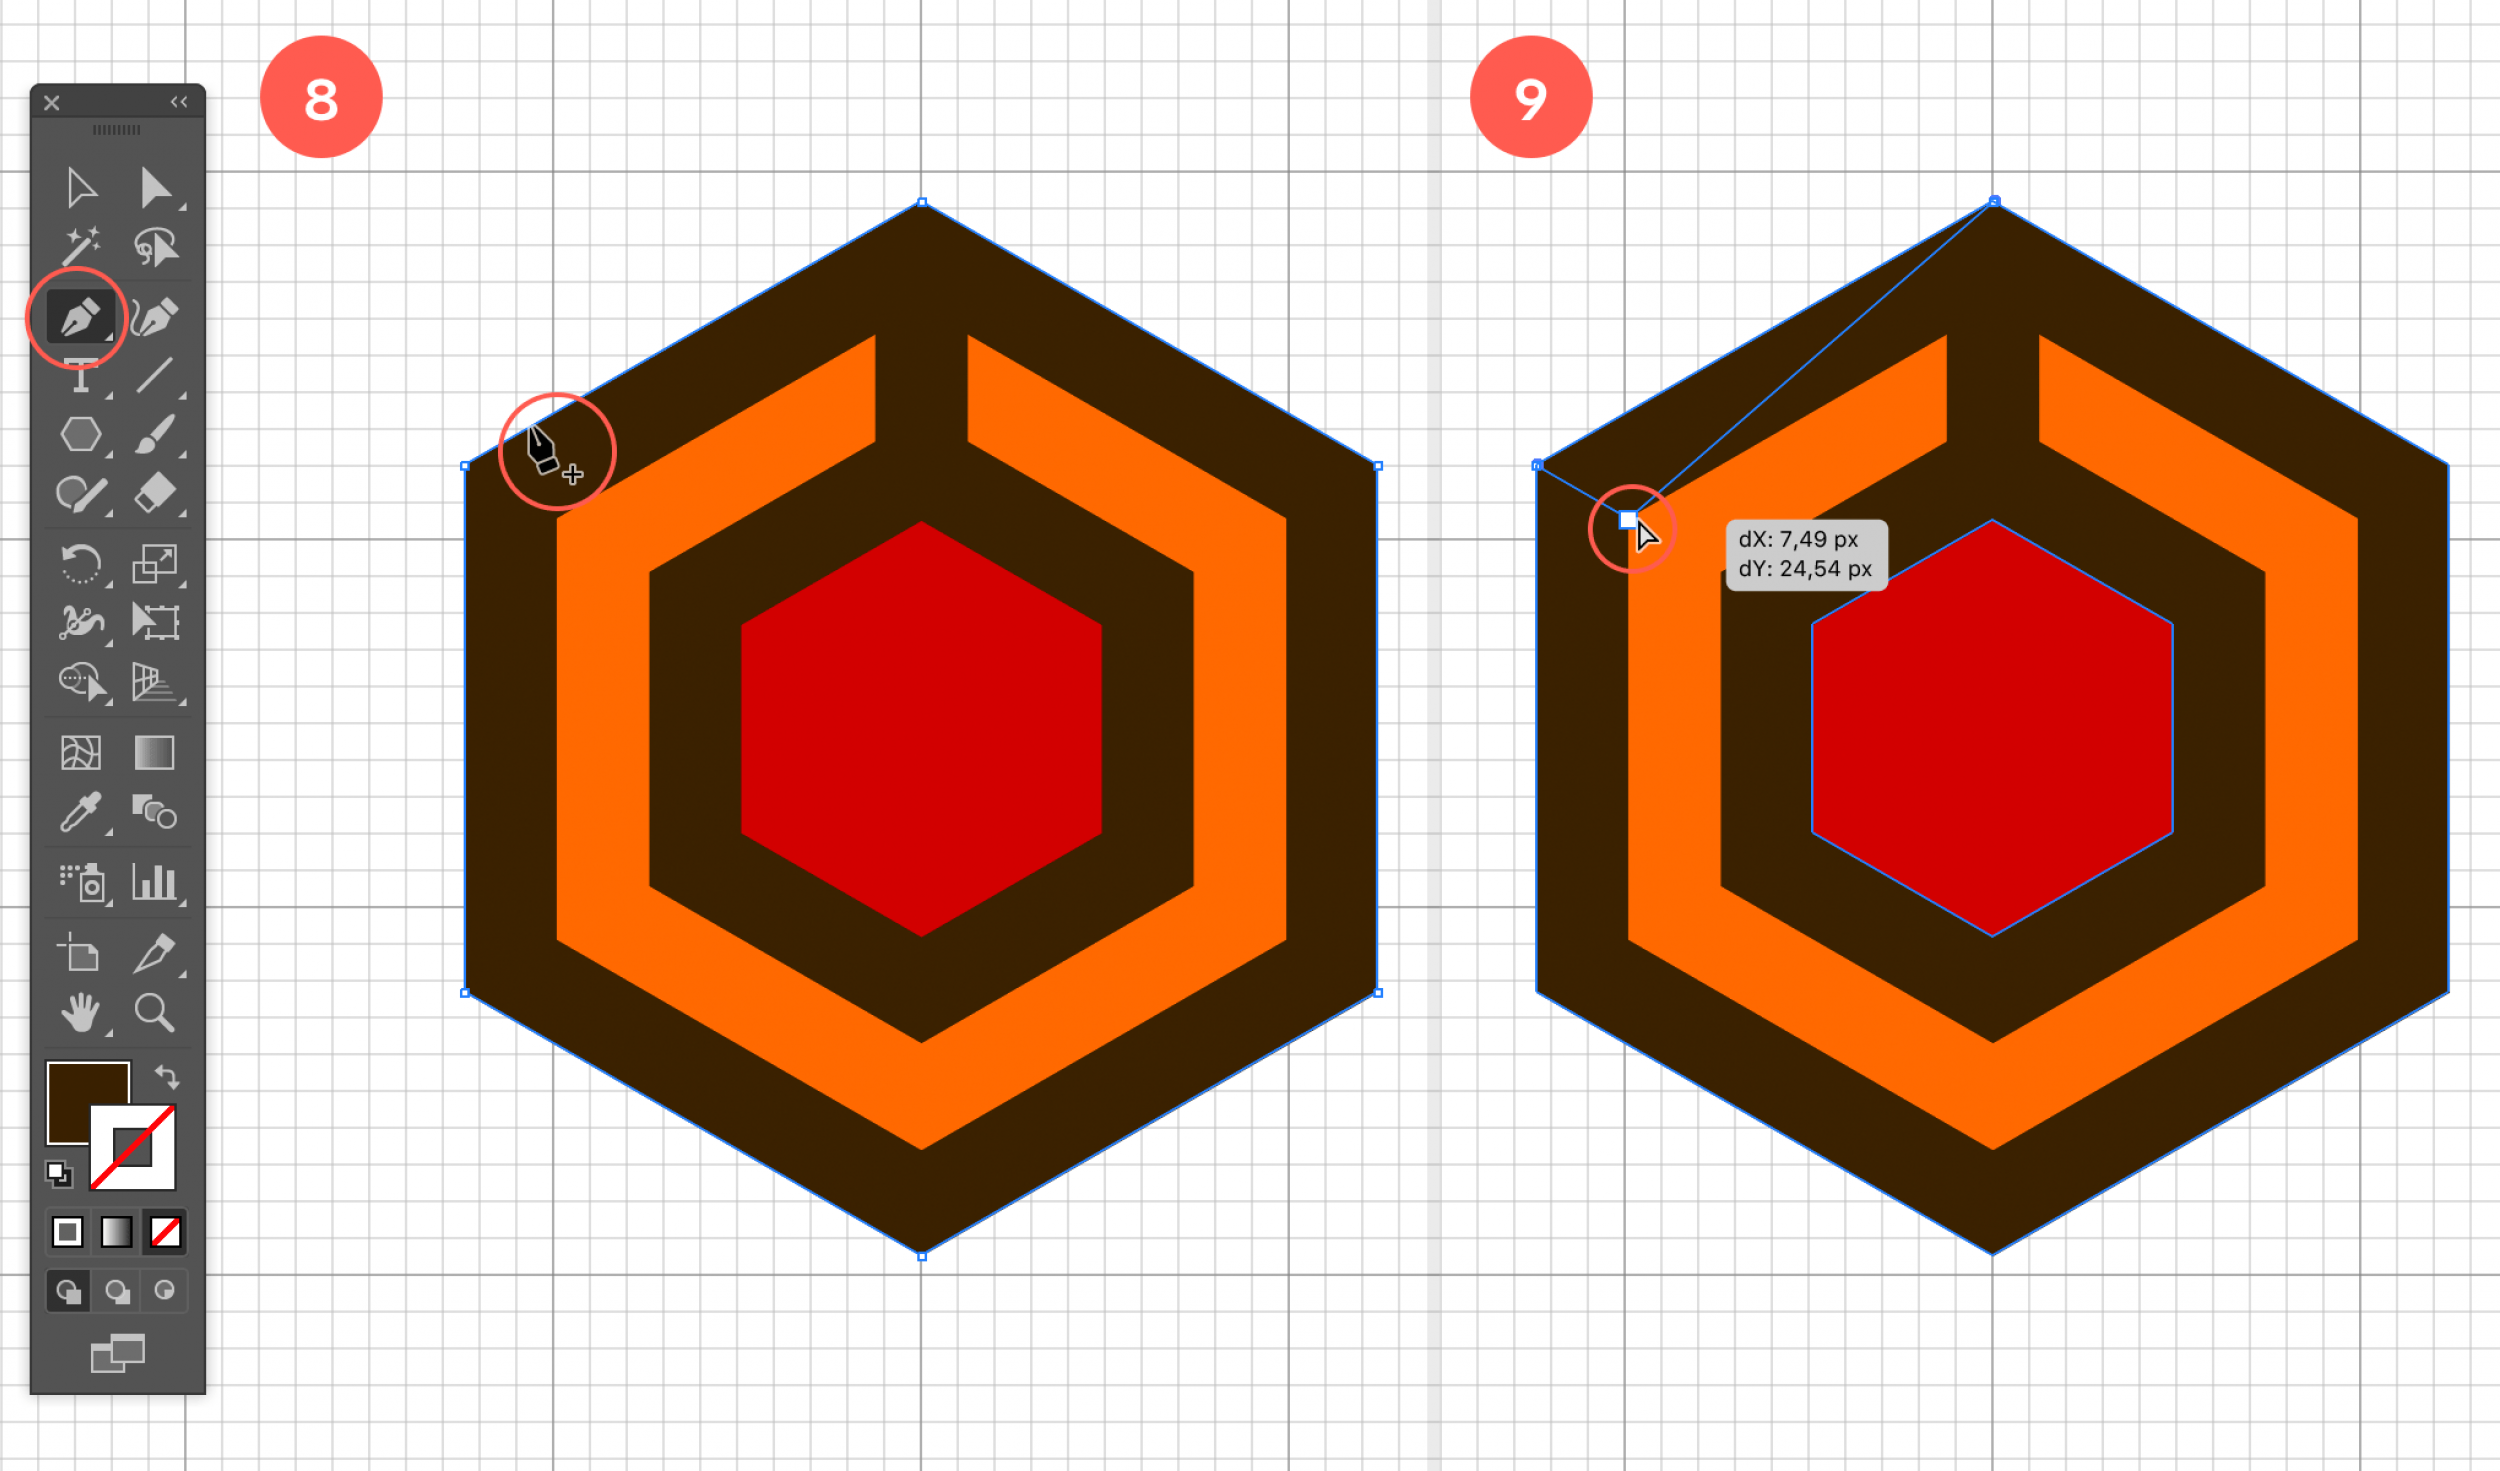
9. Move Anchor Point
Select the Direct Selection tool, or white arrow, to select only this new anchor point, and move (drag) it to the position as shown in the image above.
10. Move Another Anchor Point
Now select the top anchor point of the outer brown hexagon and move it downwards as shown in the image below.
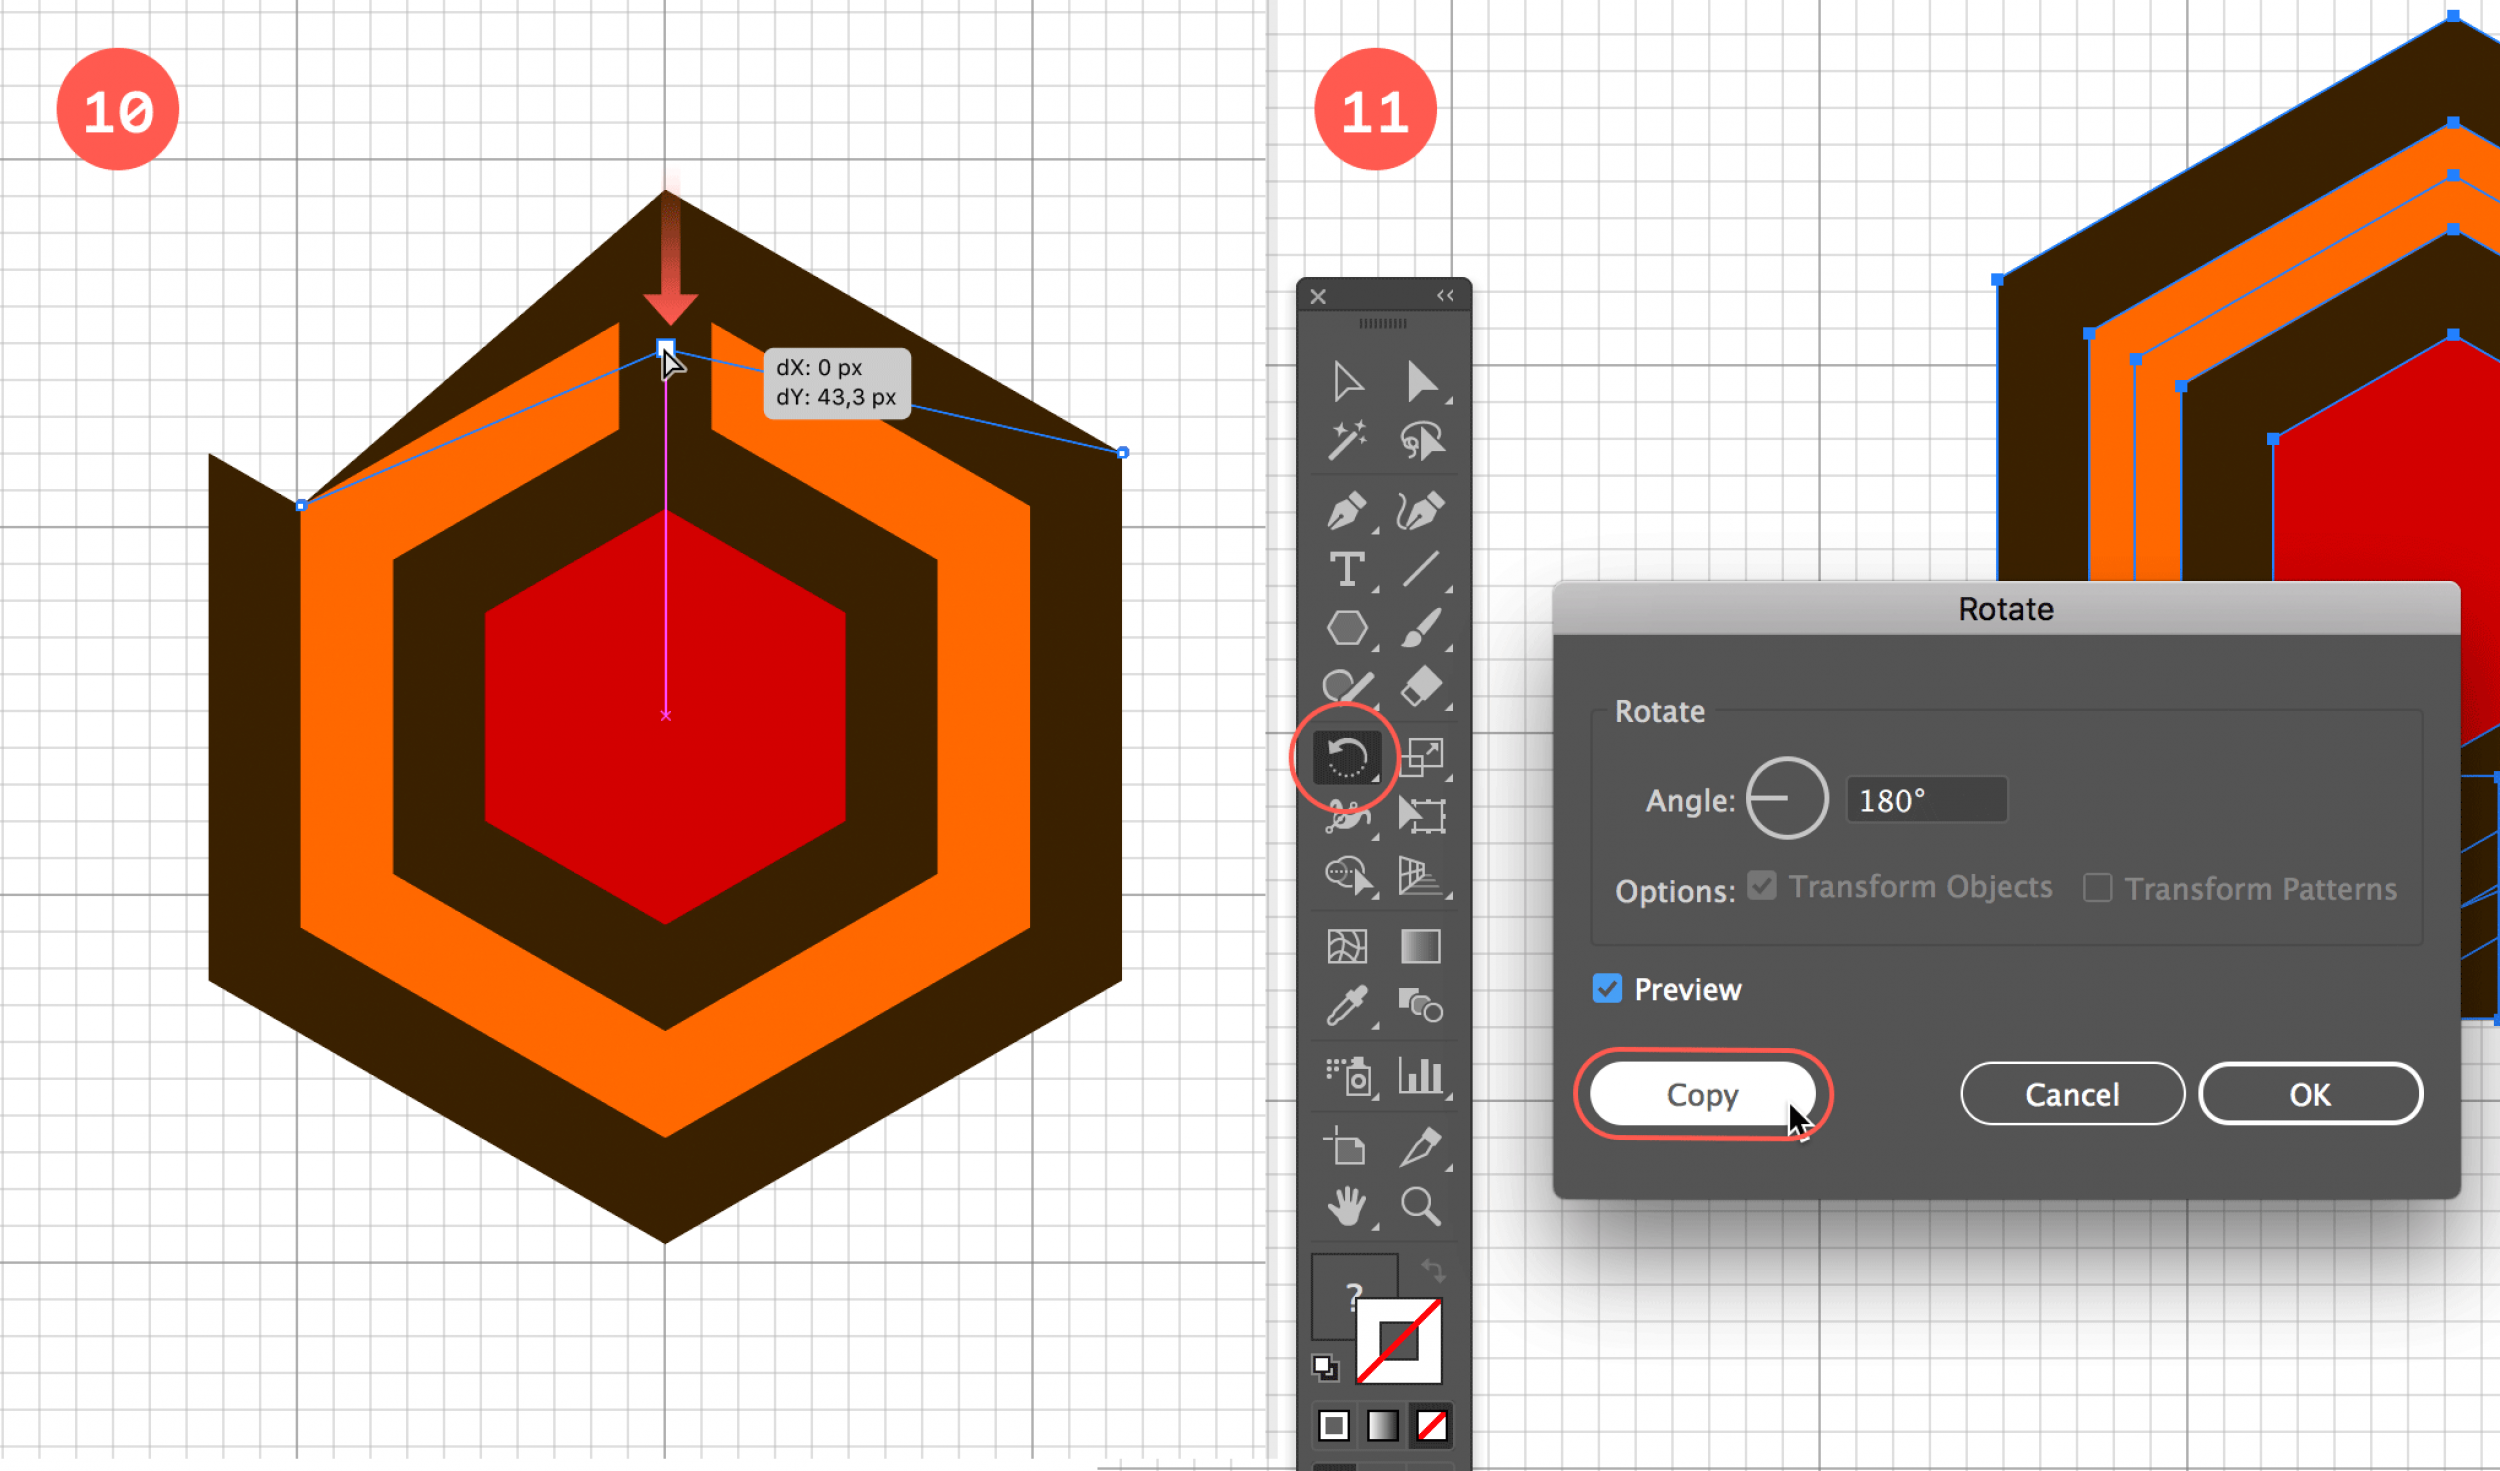
11. Copy Rotate 180°
Select the Rotate tool again from the Tools panel, hold down the Option/Alt key and click somewhere to the top right of the hexagon. In the window that appears enter 180° and click the Copy button to duplicate the object.
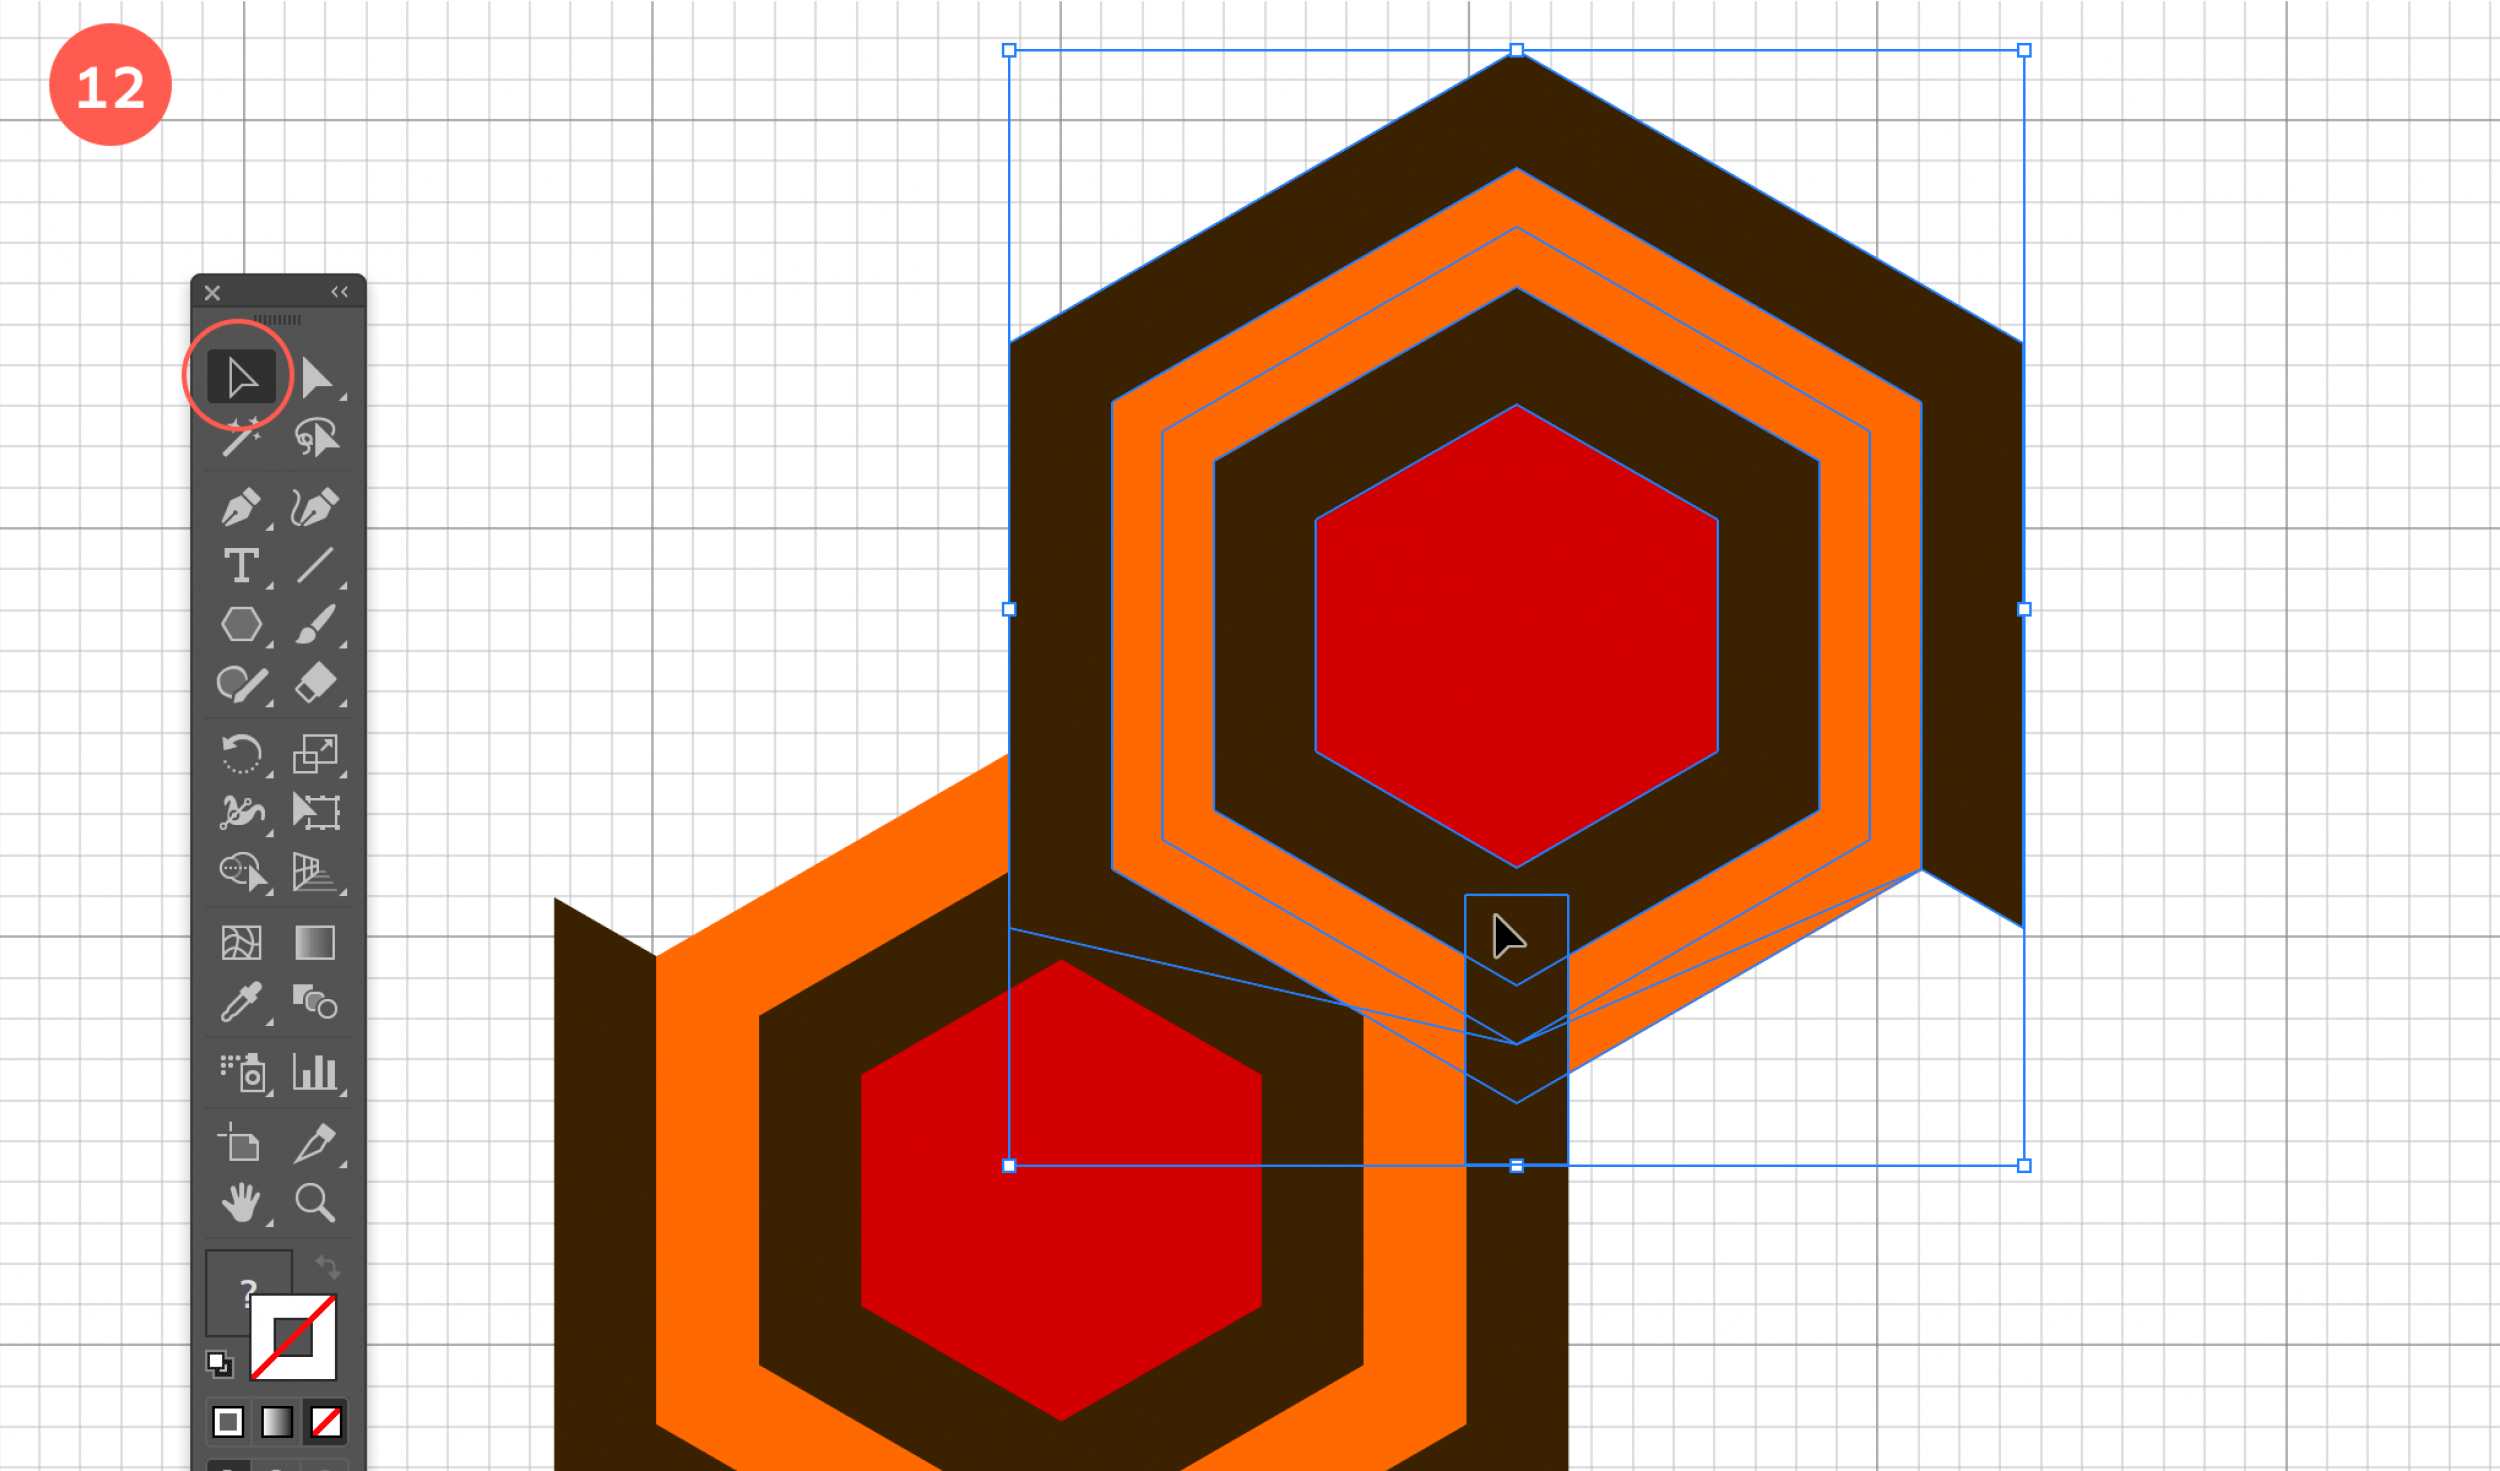
12. Move the Copied Object into Place
Select the copied object and move it into the right position as shown in the image below. The orange and brown lines should be seamlessly connected. If you have Smart Guides on (View > Smart Guides), you should get some snapping indication. Hit Cmd/Ctrl + Y to switch to Outline mode and zoom in if needed for accuracy. Then hit Cmd/Ctrl + Y Again to go back to Preview mode
Create the Pattern Swatch
13. Make the Pattern
With the last step done, we now have our pattern fragment finished to create a pattern tile with Illustrator's Pattern tool. Select the entire object and go to Object > Pattern > Make.
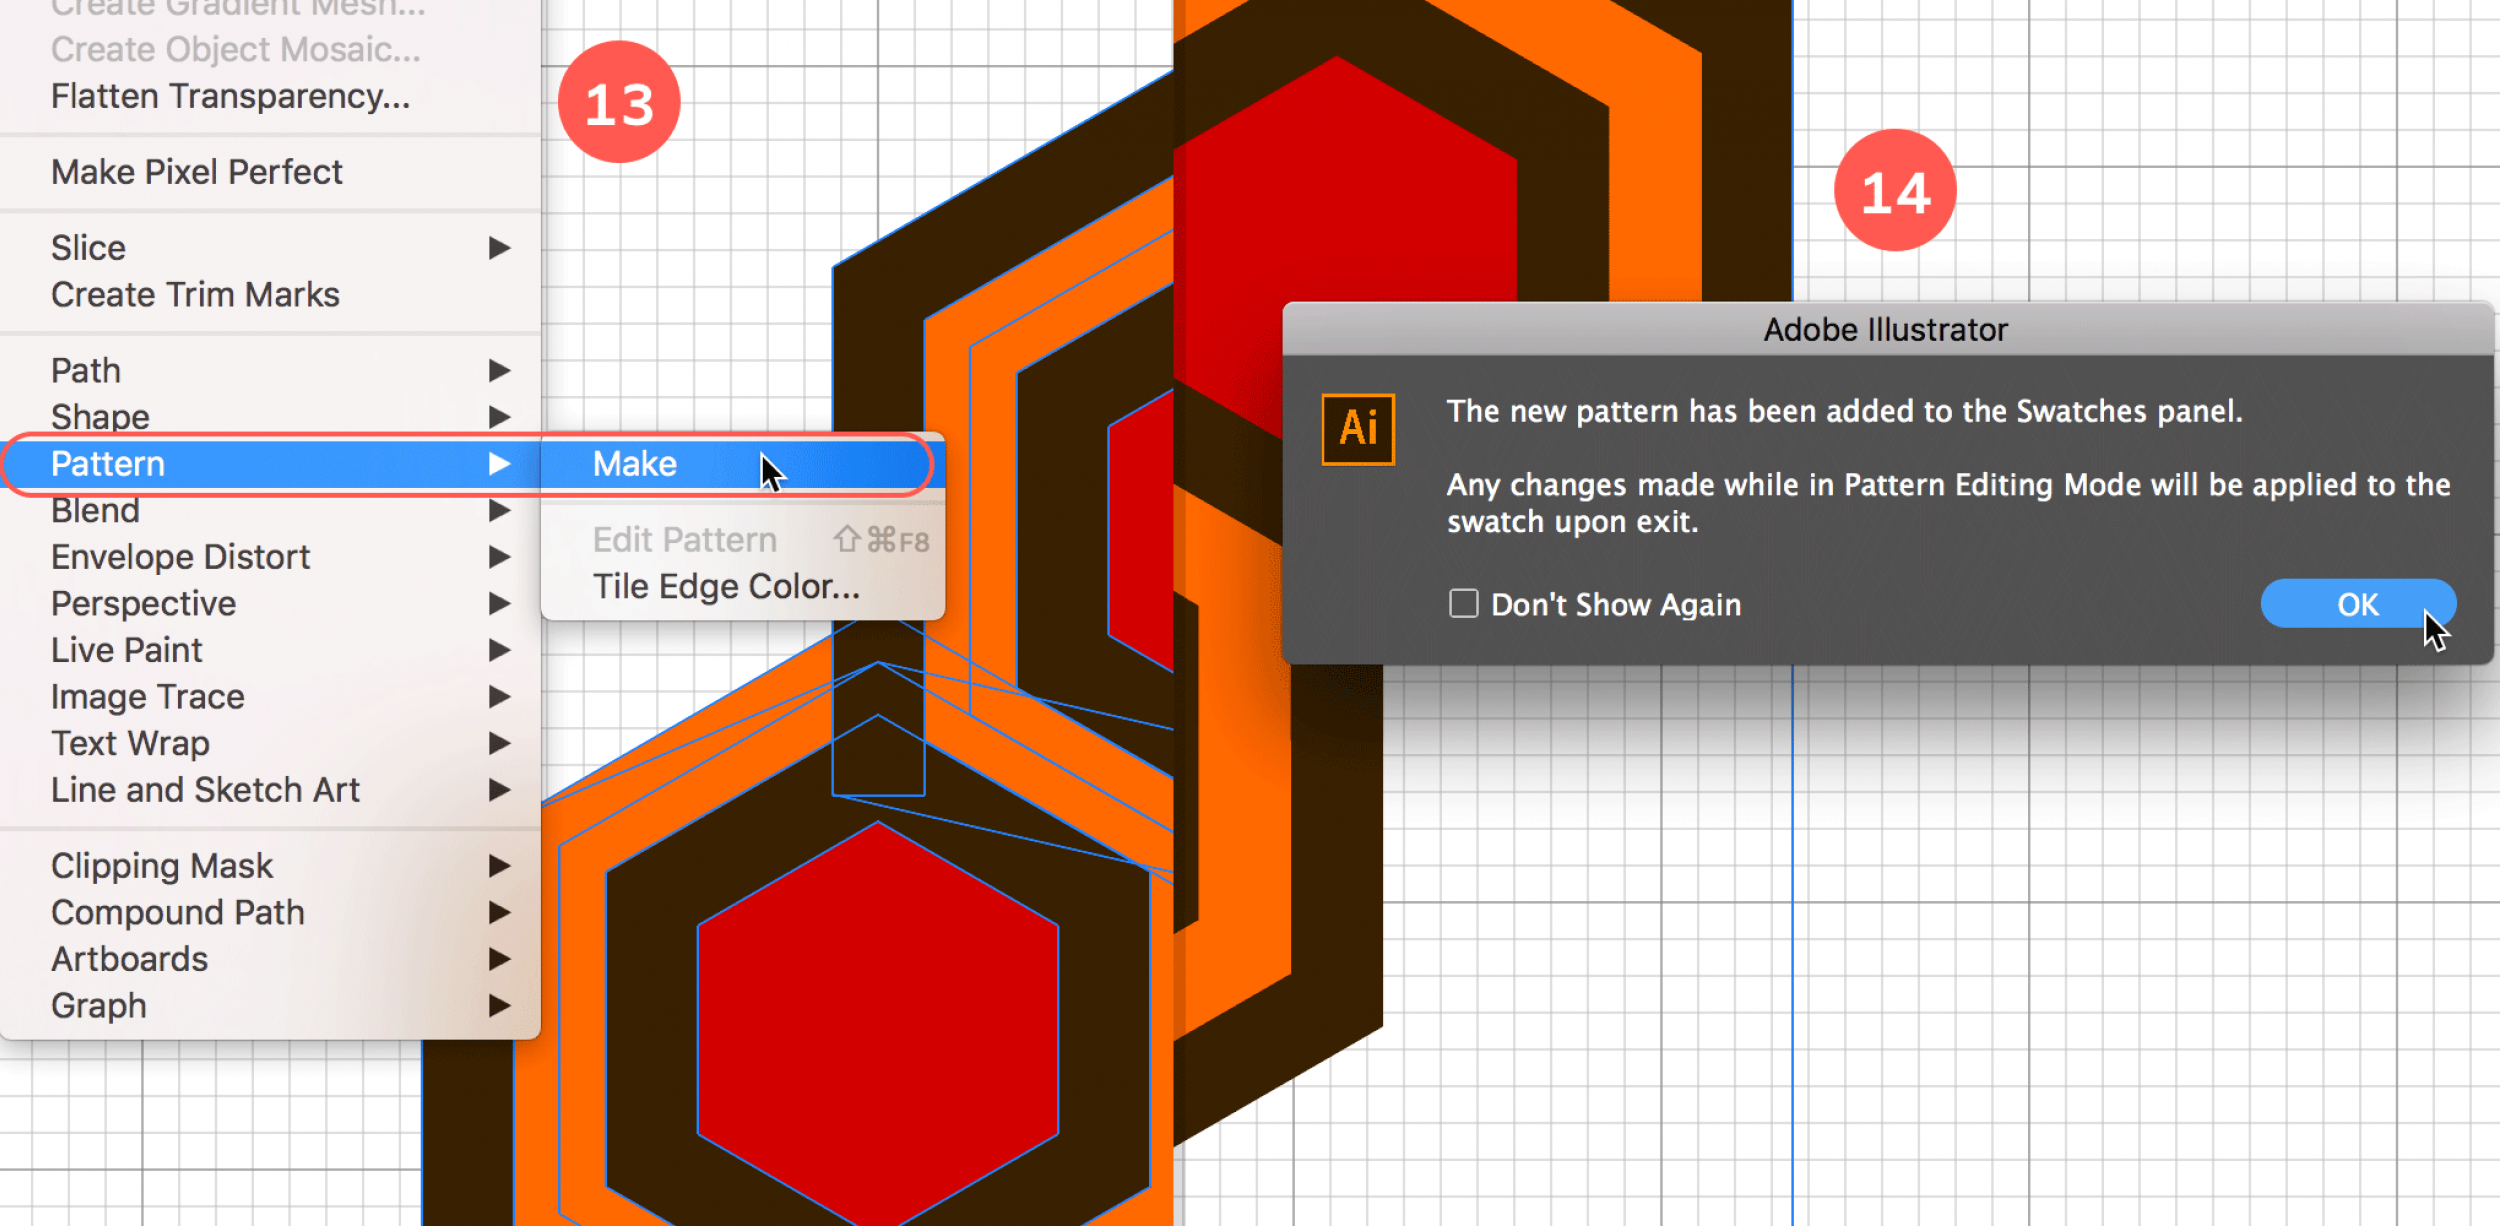
14. New Pattern Swatch has Been Added
The warning message appears telling you there has been a new Pattern Swatch added in the Swatches panel and that any changes you make in Pattern mode will be applied to this swatch. If you want to create more variations from this pattern swatch in a later phase it's best to first duplicate the swatch in the Swatches panel and double click the duplicated version to edit it, so you'll sure your original stays untouched. Click OK.
15. Give the New Pattern a Name
First you can give your pattern swatch a name. As you can see, the result by default is not what we want, but in this Pattern mode, we'll fix this in no time.
Give the New Pattern a Name
16. Remove Horizontal Gap
First we'll remove the horizontal gap. We can leave the 'Tile Type' to Grid. Next we make sure both 'Size Tile to Art' and 'Move Tile with Art' are checked. Below we enter a H Spacing of -137 px. How do I know this exact value, you say? Well, I just entered some value first to see what happened. I immediately figured I needed a big negative value. Then I used the up/down arrow keys to move the muted tile pixel by pixel by changing the value by 1 increment. I ended up with -137 px.

Remove the Horizontal Gap
17. Remove Vertical Gap
Then I did the same for the vertical gap, and when I was almost close I used the up/down arrow keys to have it perfectly fit. I ended up with -93 px.
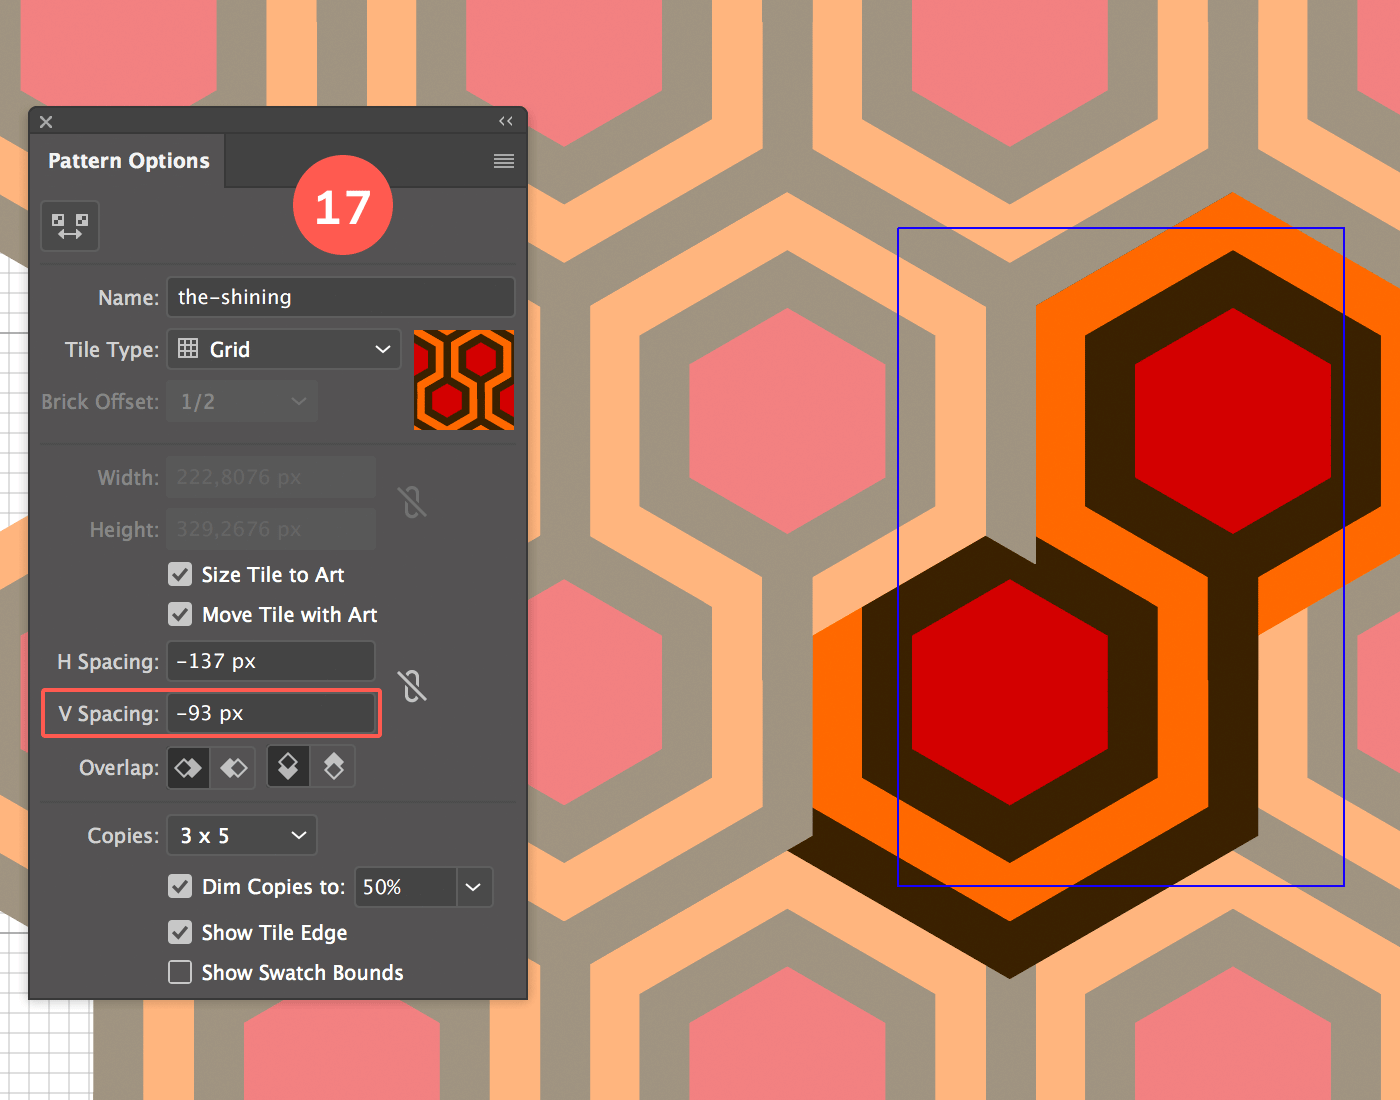
Remove Vertical Gap
18. Apply the Pattern
Once you have the perfect result, you can click the 'Done' link button at the top left of the canvas to leave Pattern Mode. You can move the pattern fragment somewhere outside your document to save it as an extra back-up if you like, or you can simply delete it. Now you can apply the pattern on a rectangle (or any other) shape. Draw a rectangle that covers your entire document and apply the pattern swatch as a fill. If the pattern is too big, you can scale it down by using the Resize tool. Select the Resize tool from the Tools, Alt/Option click on the rectangle and make sure to only check the 'Transform Patterns' option. Also check Preview to see the direct result, and enter a value you see fit. Click OK.
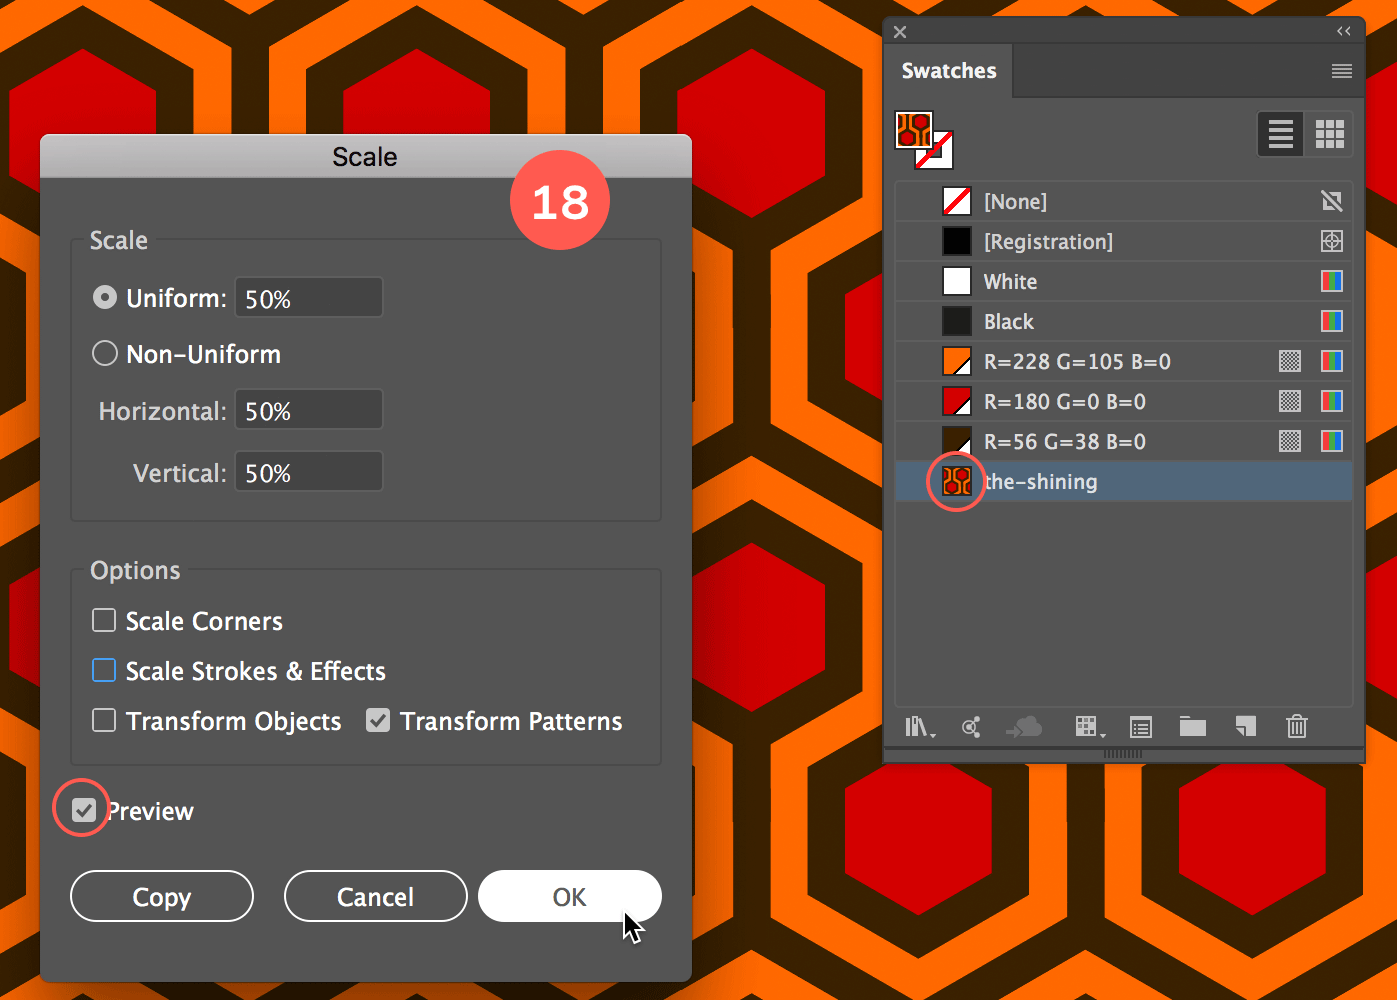
Apply the Pattern Fill
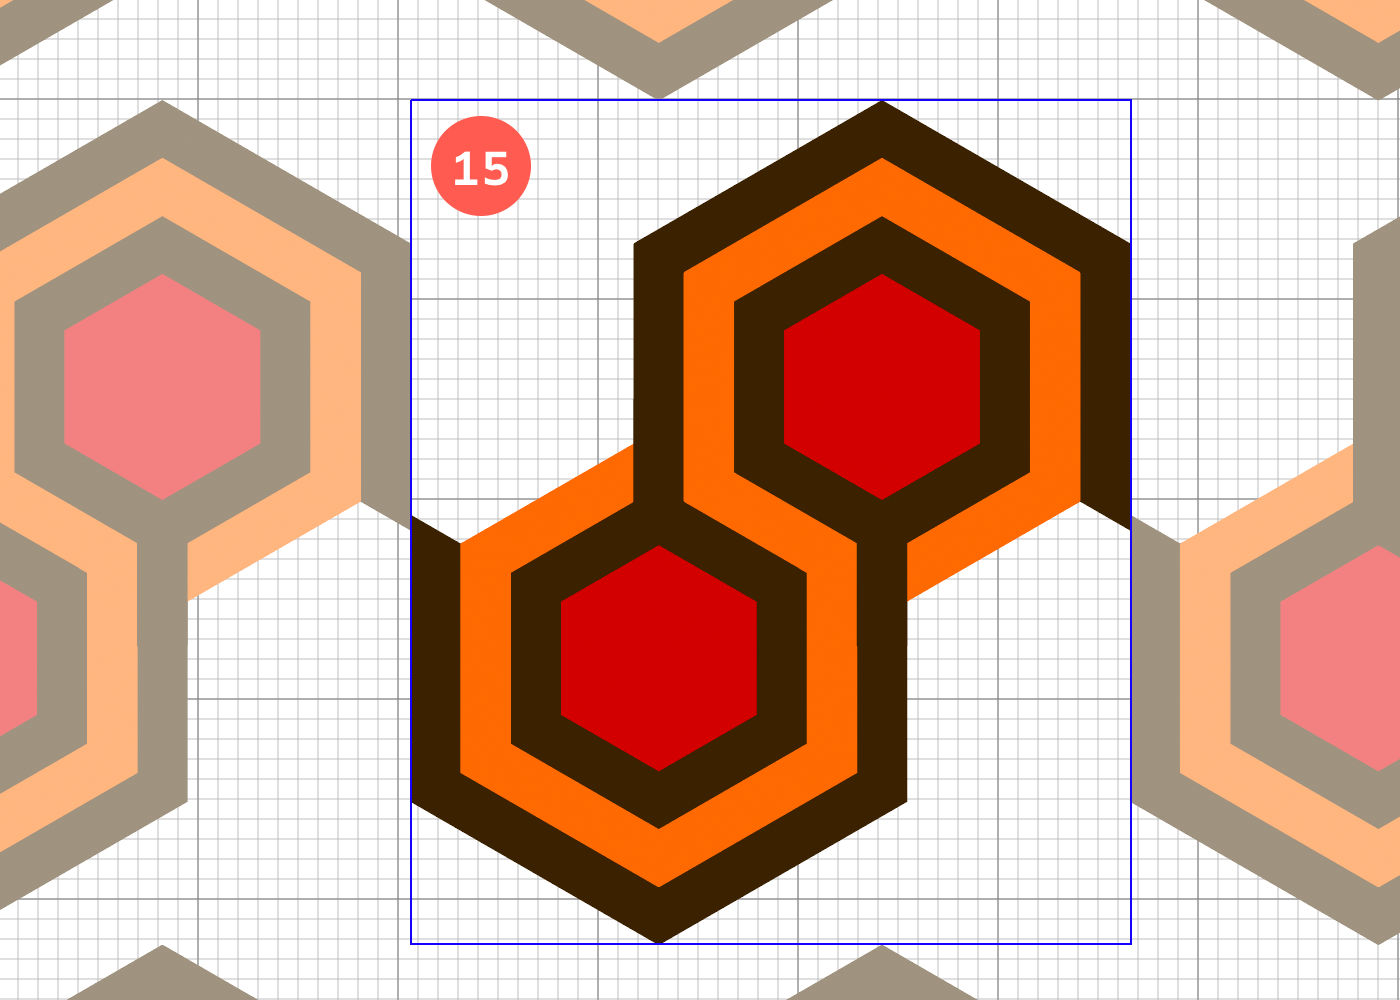
Experiment
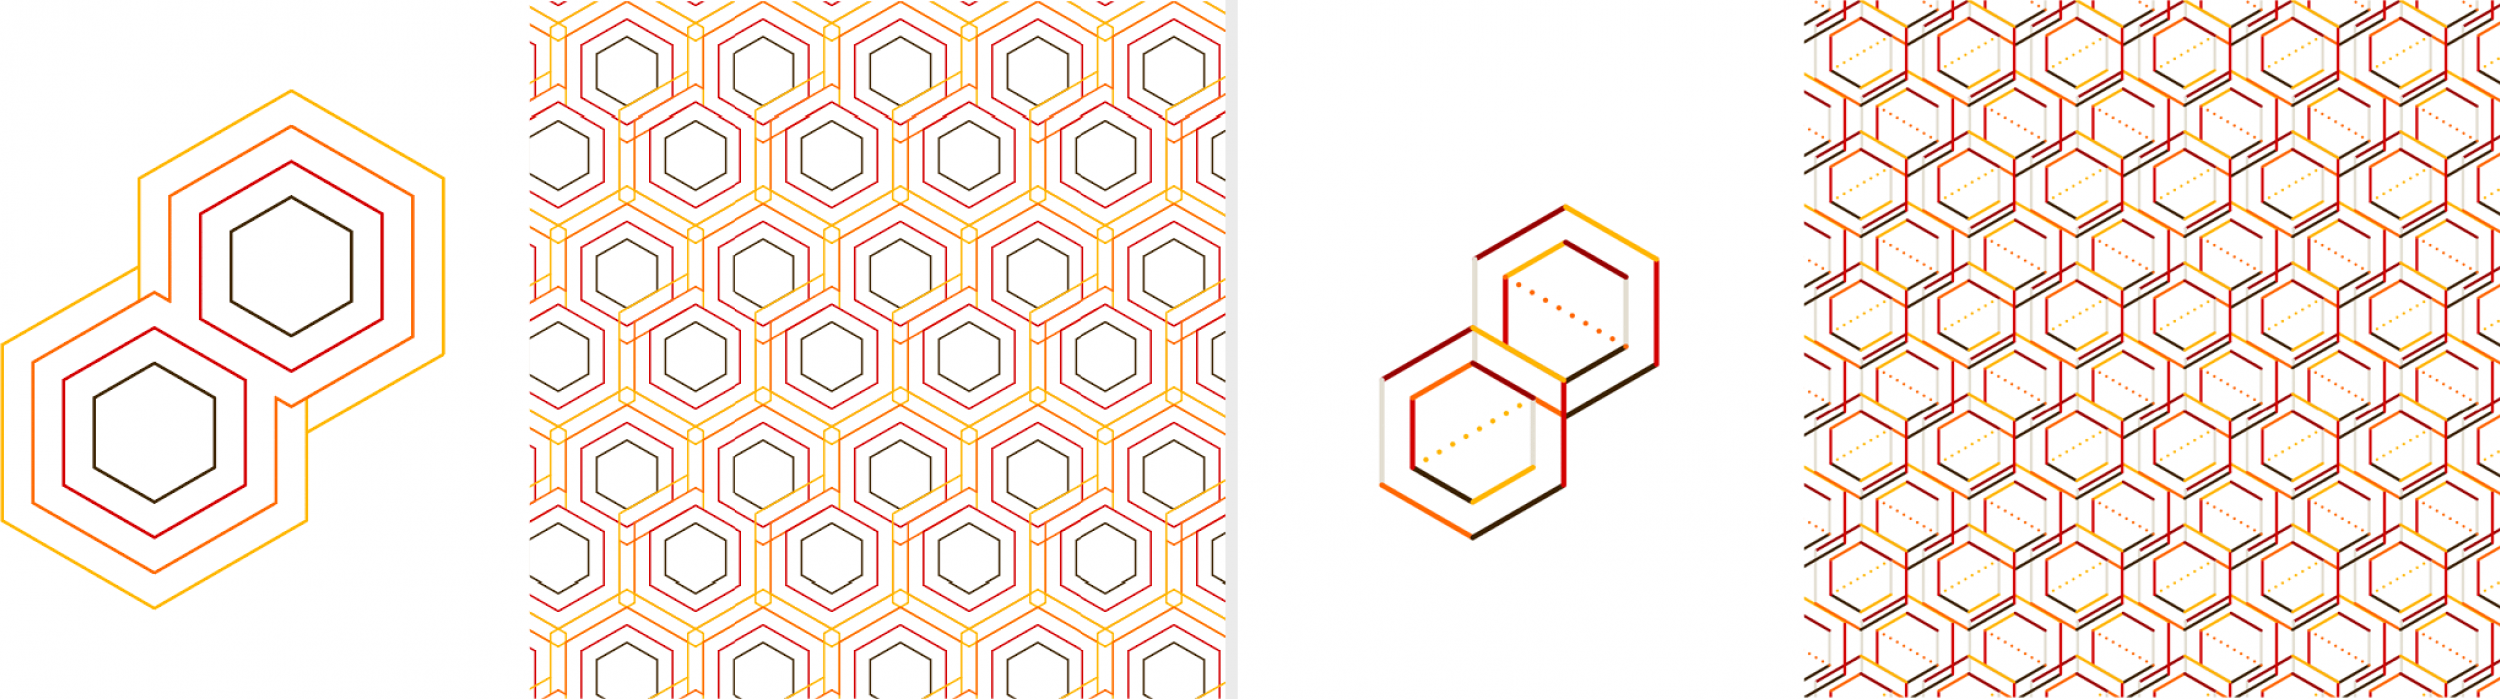
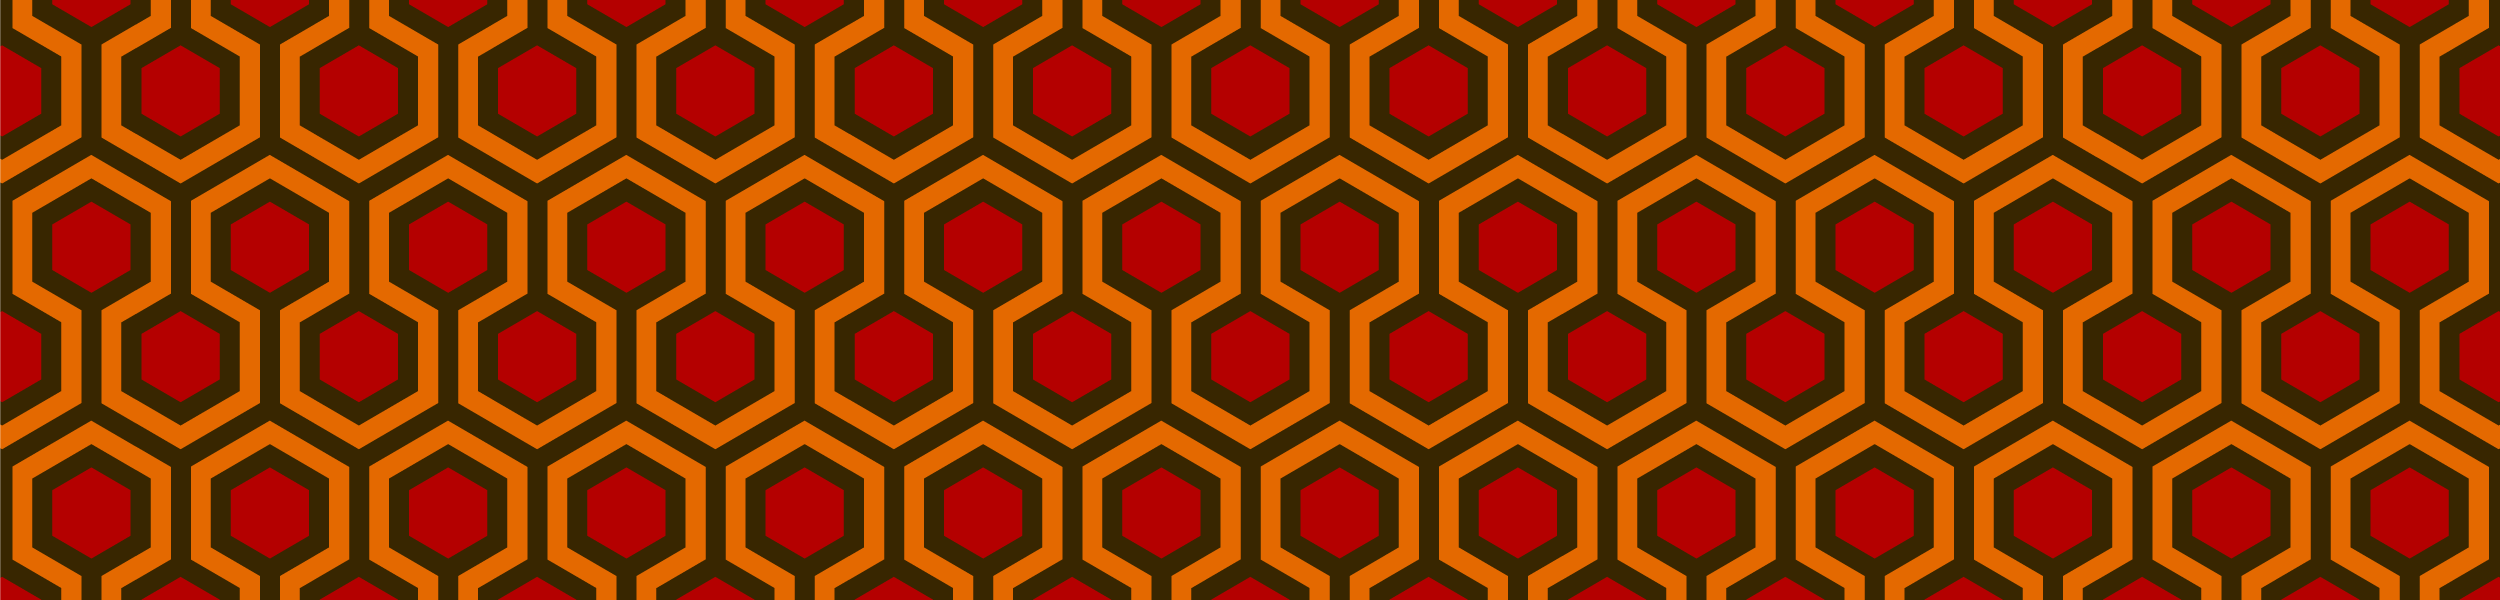
This shows just a small bit of what you can do in Pattern Mode. We haven't even looked at the other Tile Types like Brick by Column, Brick by Row, Hex by Column, and Hex by Row. Duplicate the swatch (in the Swatches panel by selecting the pattern swatch and dragging it over the document icon at the bottom of the panel, or choose Duplicate Swatch from the panel's menu), double click it and start editing: colors, shape etc. Start with another shape and create new ones. It might need some head scratching to achieve the result you want, but sometimes you end up with surprising results. The possibilities are just endless. Have fun!
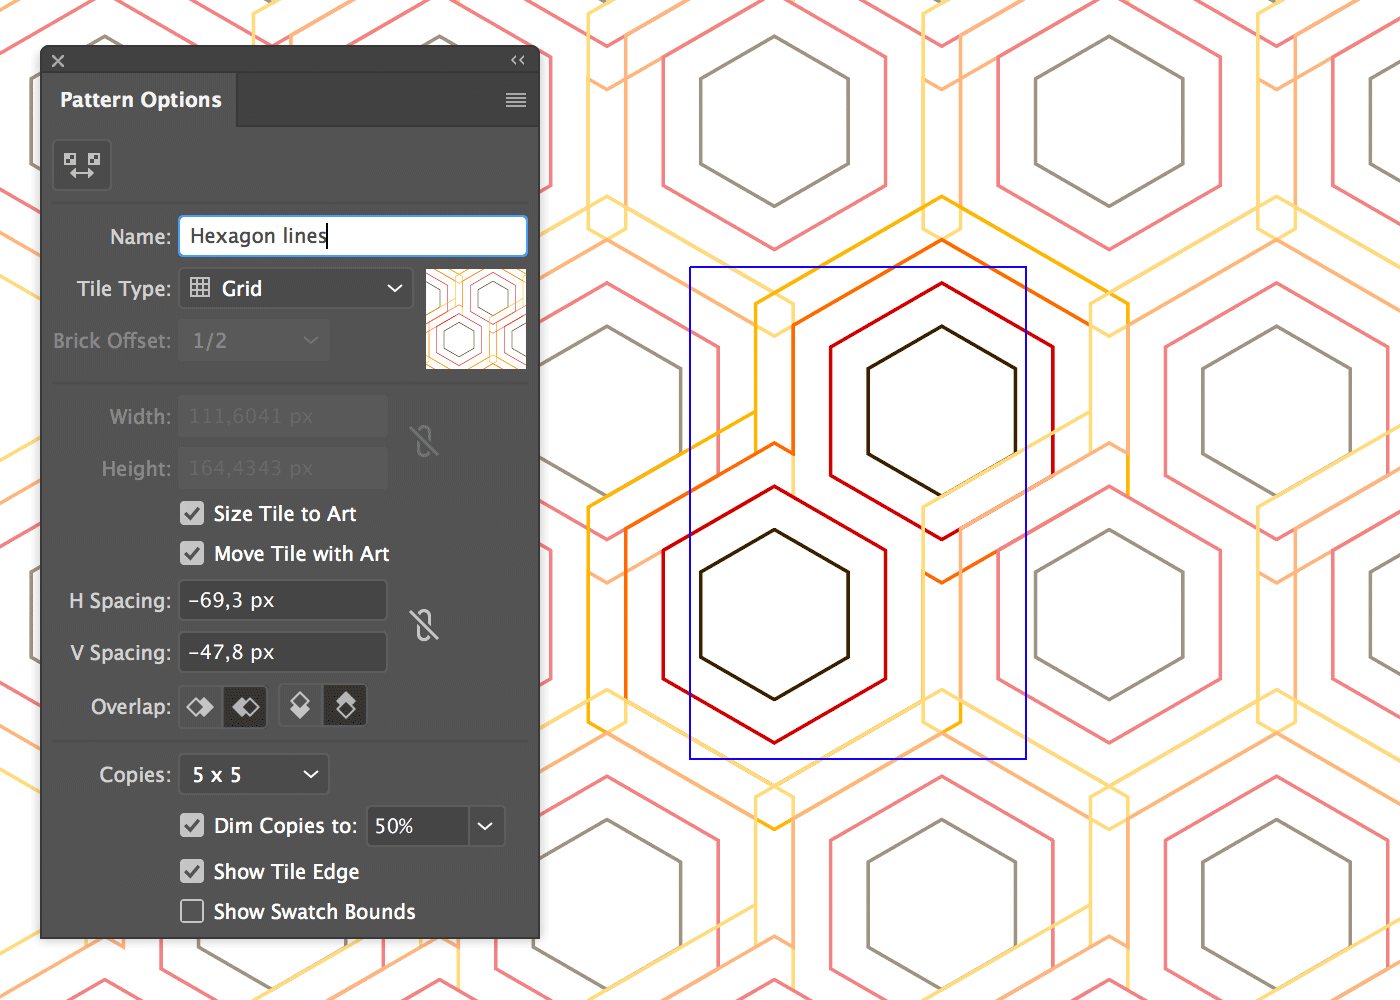
Experimenting in Pattern Mode
Here are just a couple of iterations I made starting from this Hexagon Shape: